

Take Full Control of Your Route with Trucker Guide | Navigation


Tired of last-minute detours and surprise roadblocks? If you’re spending more time rerouting than driving, it’s time for a better plan. That’s exactly what Trucker Guide | Navigation is built for. Designed with truckers in mind, it helps you plan smarter, drive safer, and keep your journey running smooth from start to finish.
Ready to take control of your route like a pro? Let’s get started.
Quick Summary:
- Trucker Guide | Navigation provides truck-specific routing based on vehicle dimensions and restrictions.
- Users can input truck height, weight, length, and axle count before starting navigation.
- The system includes live traffic data, road conditions, and truck-restricted zone filtering.
- Points of interest (POIs) such as fuel stops, parking, and weigh stations can be added directly to routes.
- Parking availability is displayed using a color-coded system (red, yellow, green).
- Live road camera integration is available on select highways for real-time traffic visibility.
Step 1. Build Your Best Route
Start by entering your destination, and Trucker Guide | Navigation will instantly generate the most efficient routes based on live traffic updates and road conditions. Review the available options and choose the one that best suits your journey, based on your destination and estimated arrival time.
You May Also Like: Part 1. How to Build a Route with Trucker Guide | Navigation?

Add points of interest (POIs) to your route based on what you’ll need along the way. Whether it’s finding a place to eat, refueling, resting, or parking, having these locations readily available ensures a smoother drive. Additionally, weigh stations and low clearance areas are key to consider, as keeping them visible in your navigation helps you stay prepared and avoid restrictions.

Tap on the icon of the location you’re interested in to preview its business card details.
This will give you access to key information, including contact information, available services, supported languages (if available), accepted payment methods, ratings, and more. To view the full details, simply scroll down the card.

If the stop meets your needs, simply tap the “Add to trip” button to include it in your route. The system will integrate it automatically, ensuring your journey stays on track.

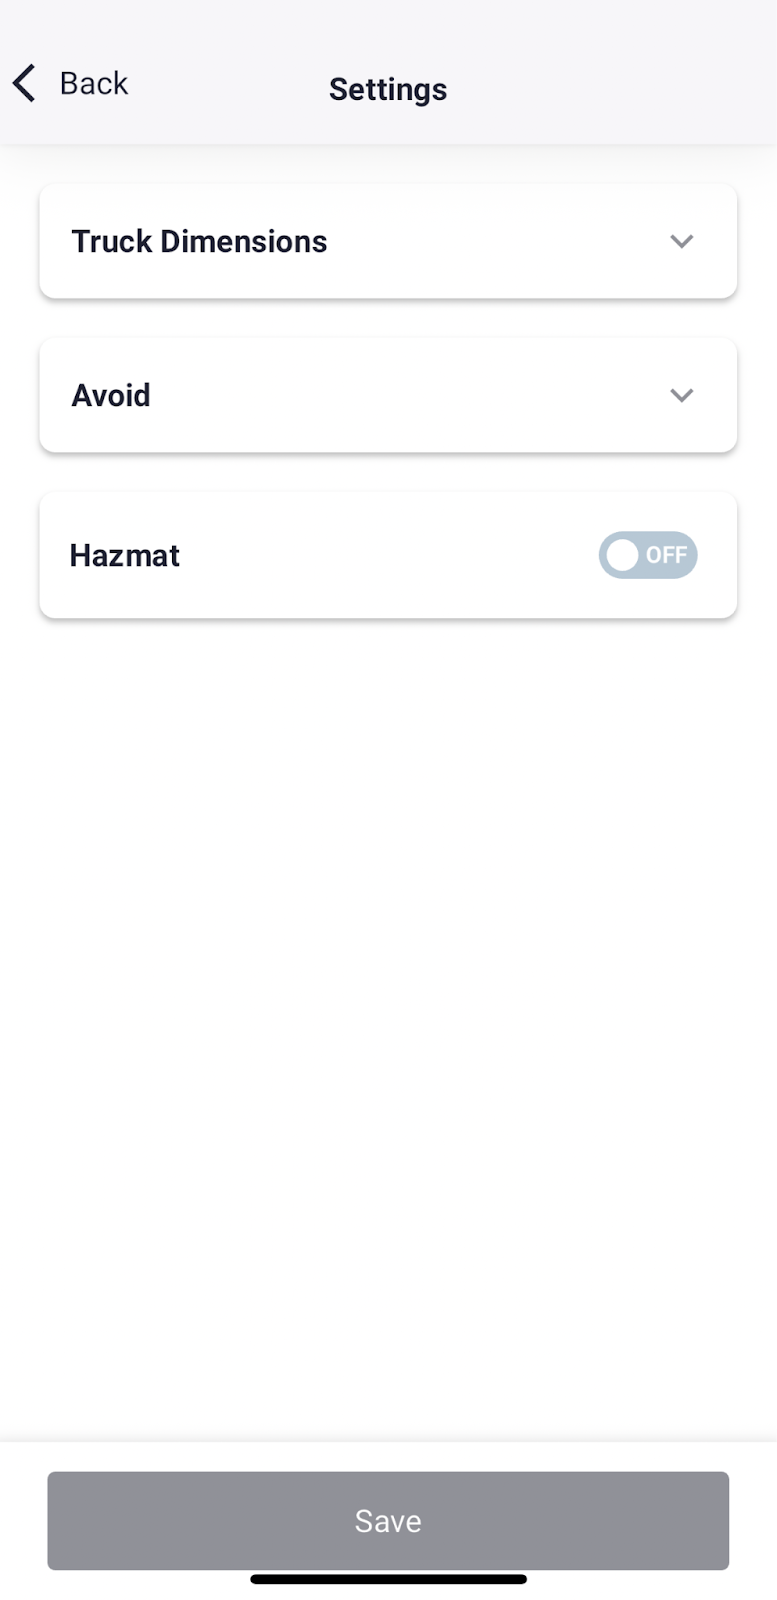
Step 2. Customize Truck-Specific Settings
After, enter your truck’s dimensions—height, weight, length, and axle count. Next, customize your route preferences by selecting roads to avoid. Whether it’s toll roads, tunnels, or difficult turns, you have full control over your path.
If you're carrying hazardous materials, enable hazmat routing preferences. The system automatically filters out restricted zones and highlights approved routes for safe and legal transport.
You May Also Like: Part 2. How to Get Truck-Specific Routing Customized to Your Truck?
Once your personalized settings are in place, the navigation system ensures a smooth and compliant journey.
With everything set, simply press the “Go” button to begin your trip, and the system will direct you into truck navigation mode.
You May Also Like: Trucker Guide | Navigation: Where Smart Design Meets Trucking Needs

Step 3. Optimize Your View and Alerts
On the right side of the main navigation screen, you’ll find a button that allows you to customize your route settings.

From this menu, you can adjust map display options, selecting features such as no-truck zones, live traffic updates, and upcoming weather alerts (coming soon). Choose one or all to stay informed during your drive.

If needed, use the “Back” button to review any changes on the map.

You can also modify the information displayed on the navigation bar. Diesel prices are automatically shown, but if you want to check the current parking availability, simply tap the corresponding option. If you prefer a standard view, you can switch to it anytime.

Once you select your preferences, the system will automatically apply them. For parking availability, the color-coded system will update accordingly:
- Red means parking is FULL.
- Yellow means SOME spaces are available.
- Green means MANY parking spots are available.

If you’d like a different interface mode, select auto, light, or dark mode for better visibility in the night.

Additionally, you can toggle speaker notifications on or off based on your preferences.

Step 4. Refine Stops with Advanced Tools
If you need additional tools to refine your next stop, tap on the designated icon to access advanced features designed to enhance your route planning.
You May Also Like: Smoother Search, Smarter Design: What’s New on Trucker Guide Web

One of these features is the binocular view, which provides a detailed look at the location. The system will automatically zoom in, allowing you to examine entrances, exits, and surrounding areas before arrival.

Another valuable tool is the ability to add a stop directly to your route. Simply tap “Add to route”, and the system will instantly integrate the stop into your plan while recalculating the estimated travel time.

To exit the binocular view and return to a broader perspective, switch to satellite mode.

Step 5. Track Live Road Conditions
Live road cameras along I-30, I-39, I-4, I-40, I-41, and I-43 provide real-time visibility into traffic conditions and weather forecasts, ensuring you stay informed throughout your journey. To enable this feature, start by tapping the “Edit Route” button.

Once activated, the system will take you to the second screen of the navigation bar, where you can add cameras to your display. Simply tap the camera button and confirm your selection by pressing “Continue.”

Now, you have additional visibility on the road ahead. Tap the camera icon to open its view, where you’ll see either a snapshot or a live stream of current road conditions.
Just below the feed, the weather forecast for the selected location will be displayed, helping you anticipate any changes on your route.

Step 6. Share Parking Updates Live
If your route includes a truck stop or rest area, the system will prompt you upon arrival to update the current parking availability. This helps other truckers plan their stops effectively.
Simply select the option that best describes the situation, and your input will be shared in real time to keep fellow drivers informed.
You May Also Like: Update Weigh Station Status: Help Your Fellow Truckers!

With real-time updates, truck-specific routing, and powerful tools at your fingertips, you’re in control of every mile. Whether it’s picking the best stops, checking live road conditions, or fine-tuning your route, this system helps you make better decisions while keeping the drive smooth.
Start driving smarter. Download Trucker Guide | Navigation now.


