



Trucker Guide: A Vendor Guide to Our New Road Assistance Service

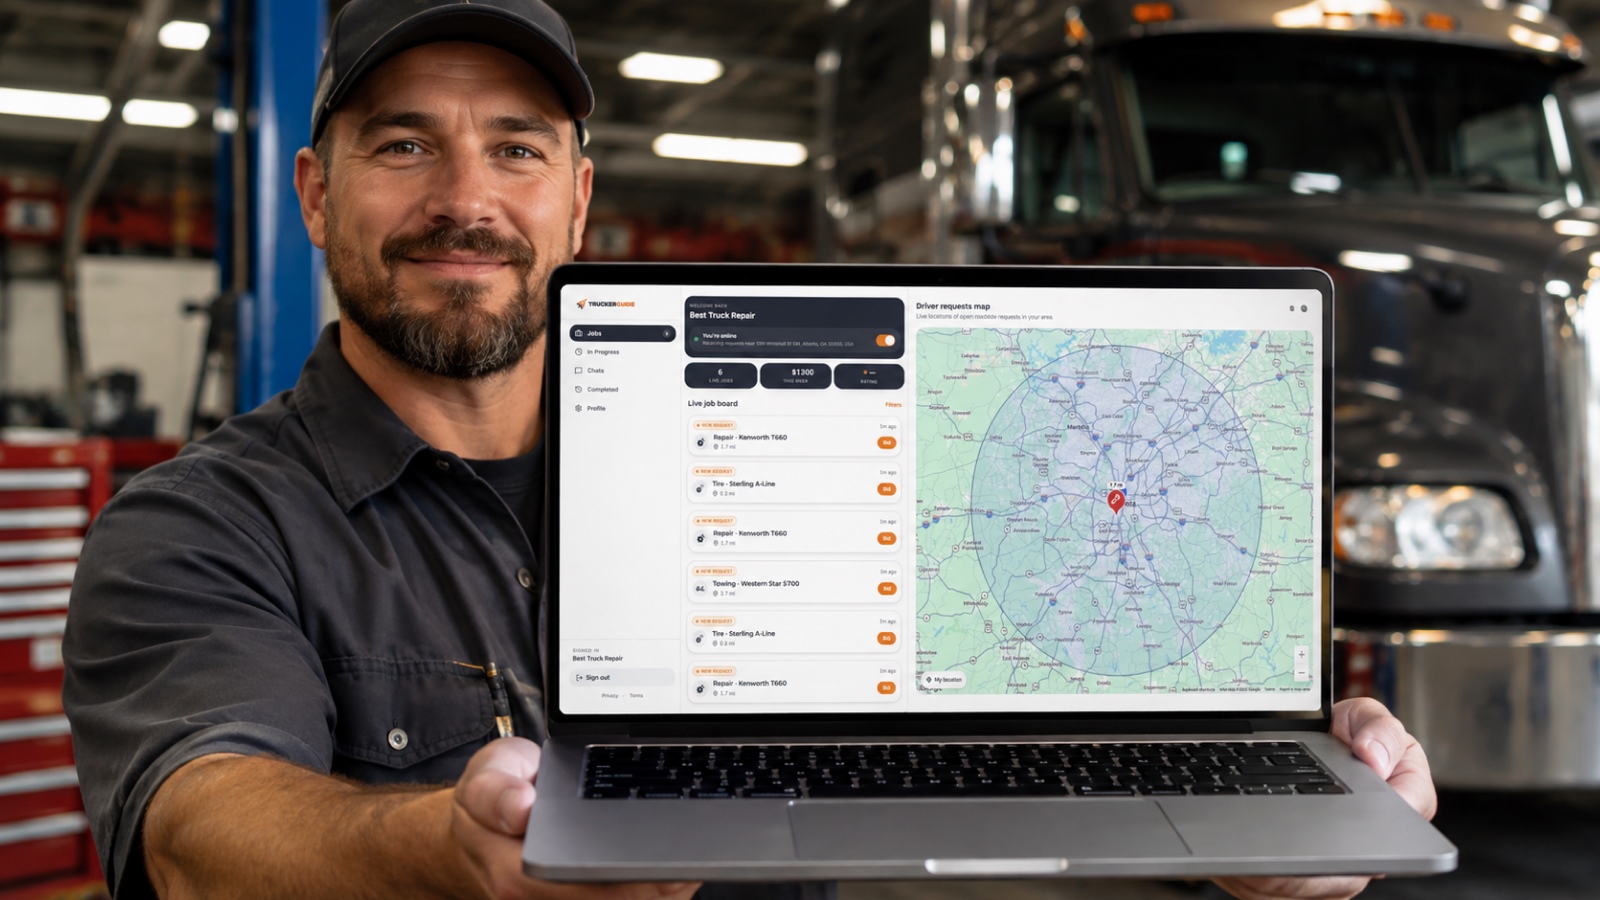
Our new Road Assistance service helps connect truckers with businesses that provide roadside support. As a service provider, you can create a business profile, add your service location, set your coverage radius, and specify the vehicle types and services you support.
In the steps below, we’ll explain how to create your vendor profile and make sure your services are visible to the right truckers.
Key Facts:
- Create your vendor profile to join the new Road Assistance service.
- Set your location and service radius based on the area your business covers.
- Choose the vehicle types and services your business supports.
- Monitor incoming requests and review job details on the Live Job Board.
- Submit your offer with pricing, additional charges, notes, and ETA.
- Pay the $19.99 service fee after your offer is accepted and proceed with the roadside job.
1. Register Your Business
Start by visiting the Vendor Portal and creating your business account. Enter your name, company name, email address, password, and phone number.
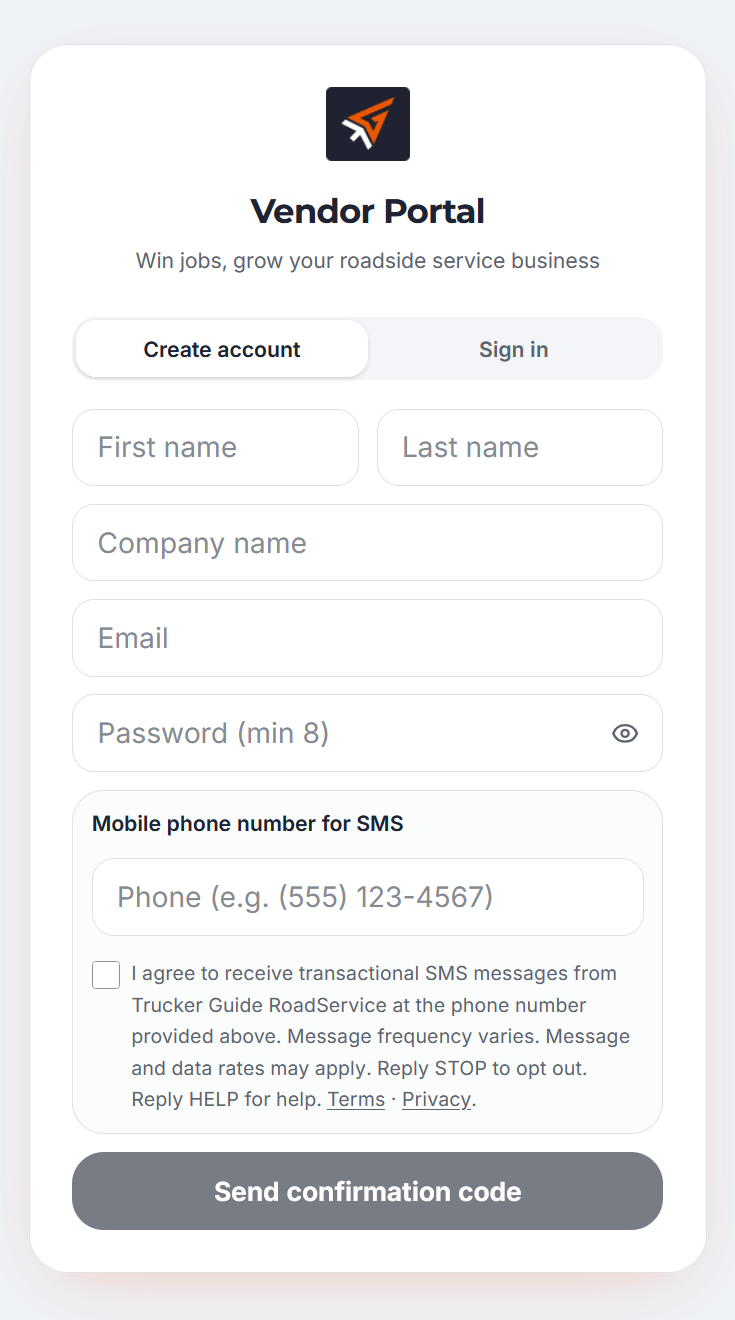
You’ll receive an SMS confirmation to verify your phone number. Once your registration is complete, you’ll be directed to your vendor profile, where you can add the information truckers need to find and request your services.
2. Add Your Business Location and Service Area
Your location is one of the most important parts of your vendor profile because it helps match your business with truckers who need assistance nearby.
To manage it, go to Profile → Business Profile.
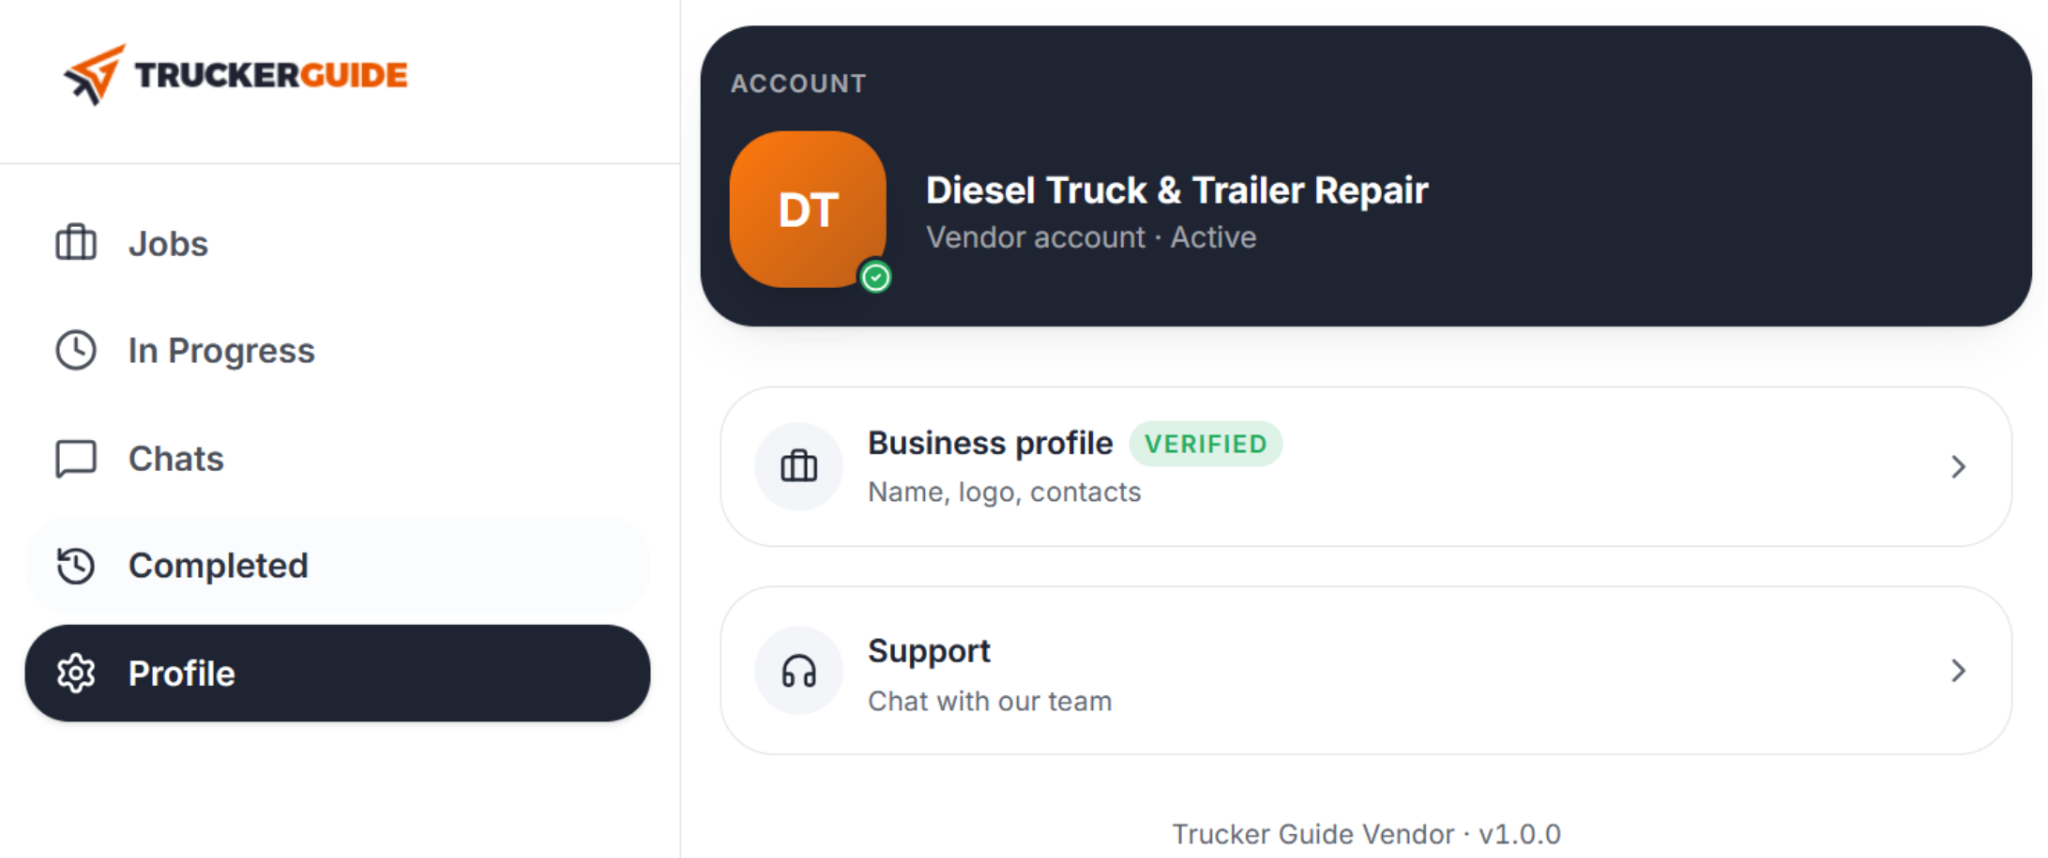
You’ll see the information you provided during registration.
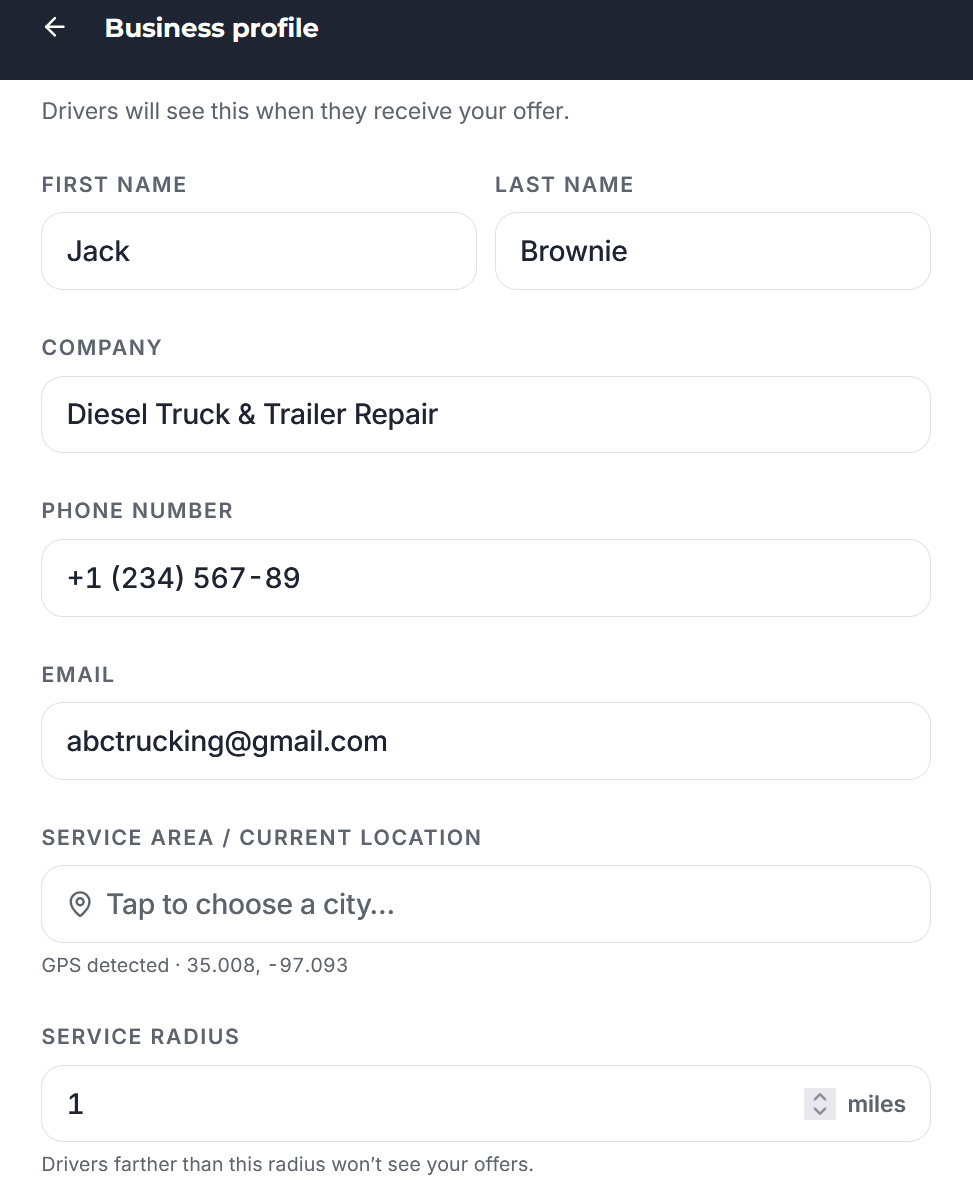
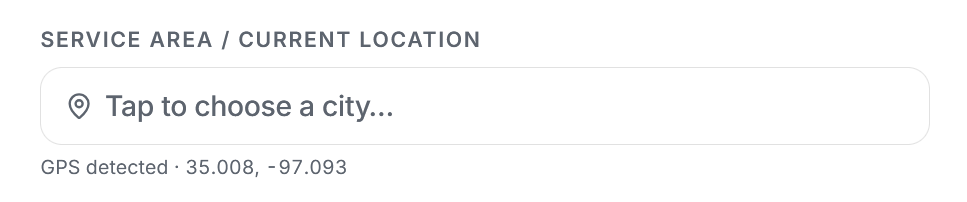
Below your email address, enter the location where your business operates.
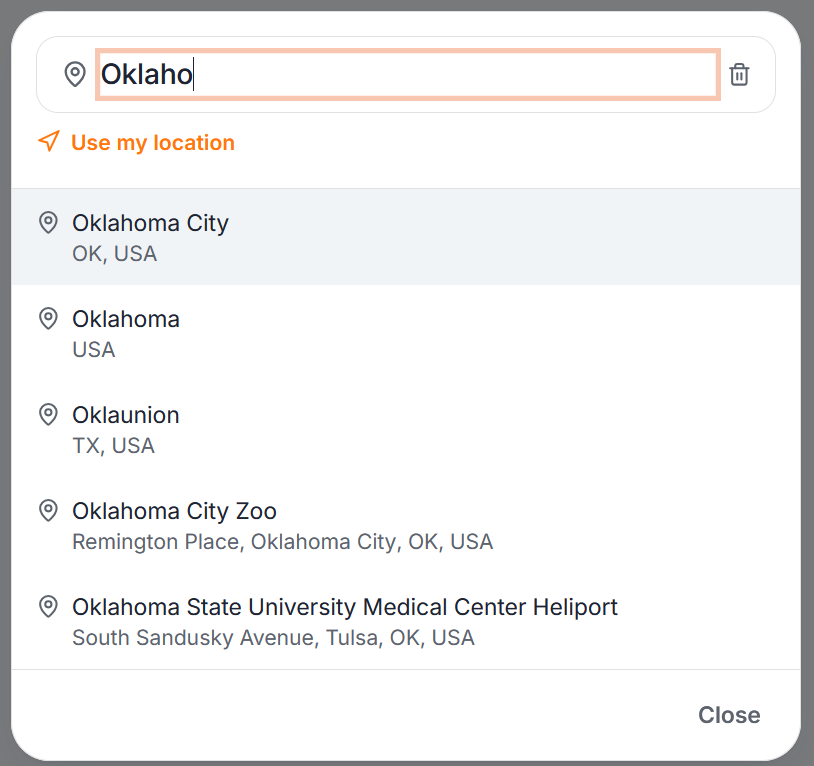
Simply start typing the name of the area and select the appropriate location.
Next, choose your service radius, which is the distance from your location where you’re available to provide roadside assistance.
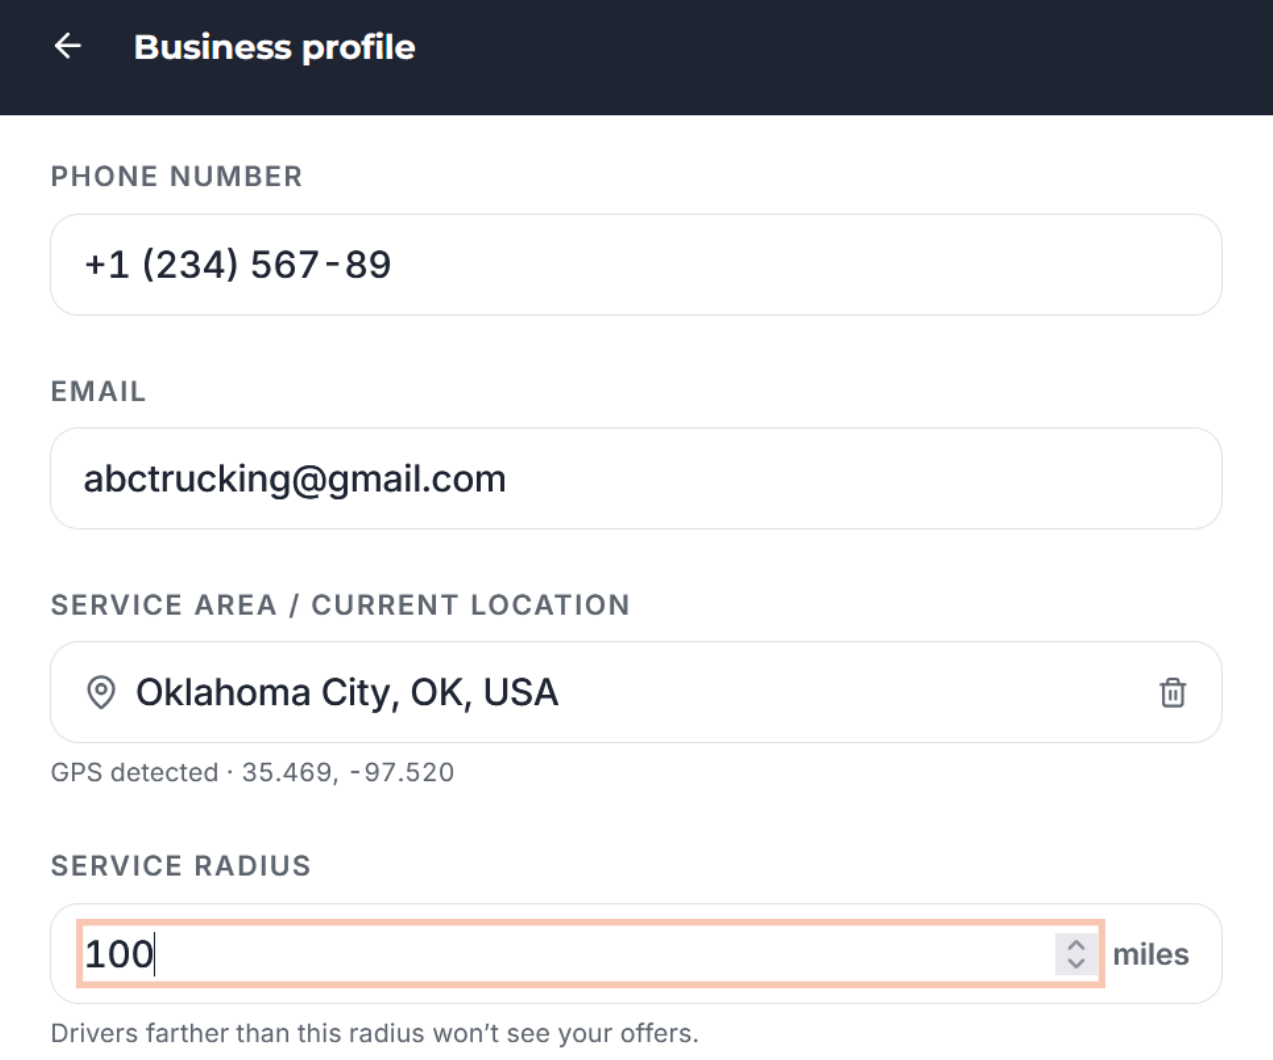
A larger radius can help your business reach more truckers, while a smaller radius keeps requests closer to your primary service area. Choose the radius that best matches where your team can realistically provide service.
3. Select the Vehicle Types and Services You Offer
Once your service area is set, tell truckers what types of vehicles you can assist and which services you provide. First, select the vehicle types your business works with, such as:
- Trucks
- Trailers
- Buses
- RVs
You can select multiple vehicle types if your business serves more than one category.
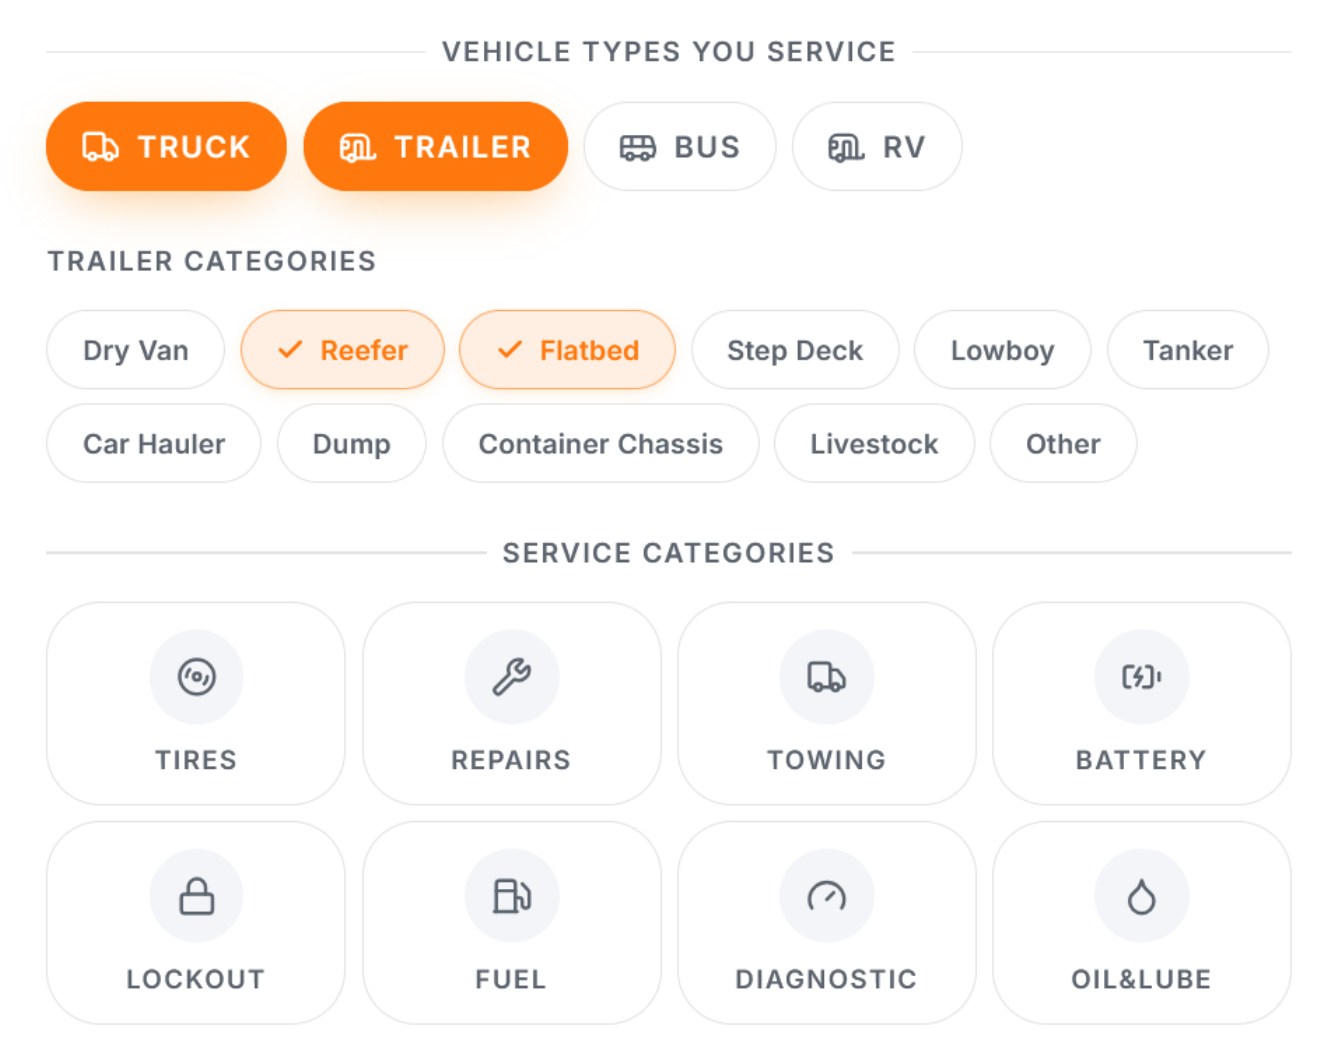
Next, choose the roadside assistance services you provide, such as mobile repairs, towing, battery assistance, fuel delivery, and other available options. Select all services your business can reliably provide.
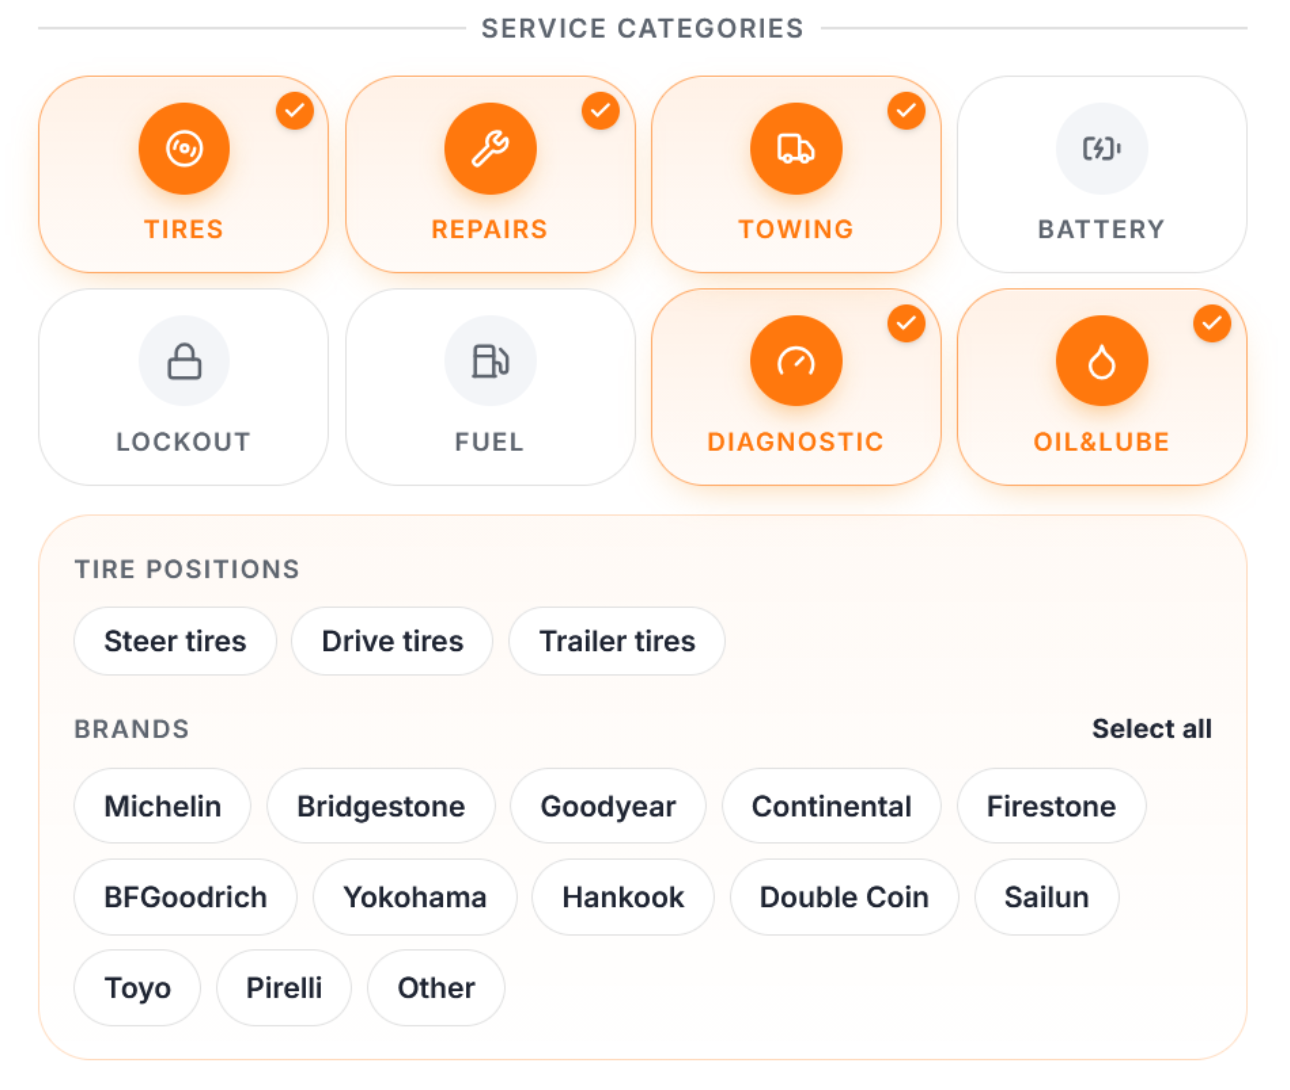
For some services, you may need to provide additional details. For example, if you offer tire services, you can specify which tire positions and brands your team handles. This additional information helps make your profile more precise and helps truckers find a provider that matches their specific needs.
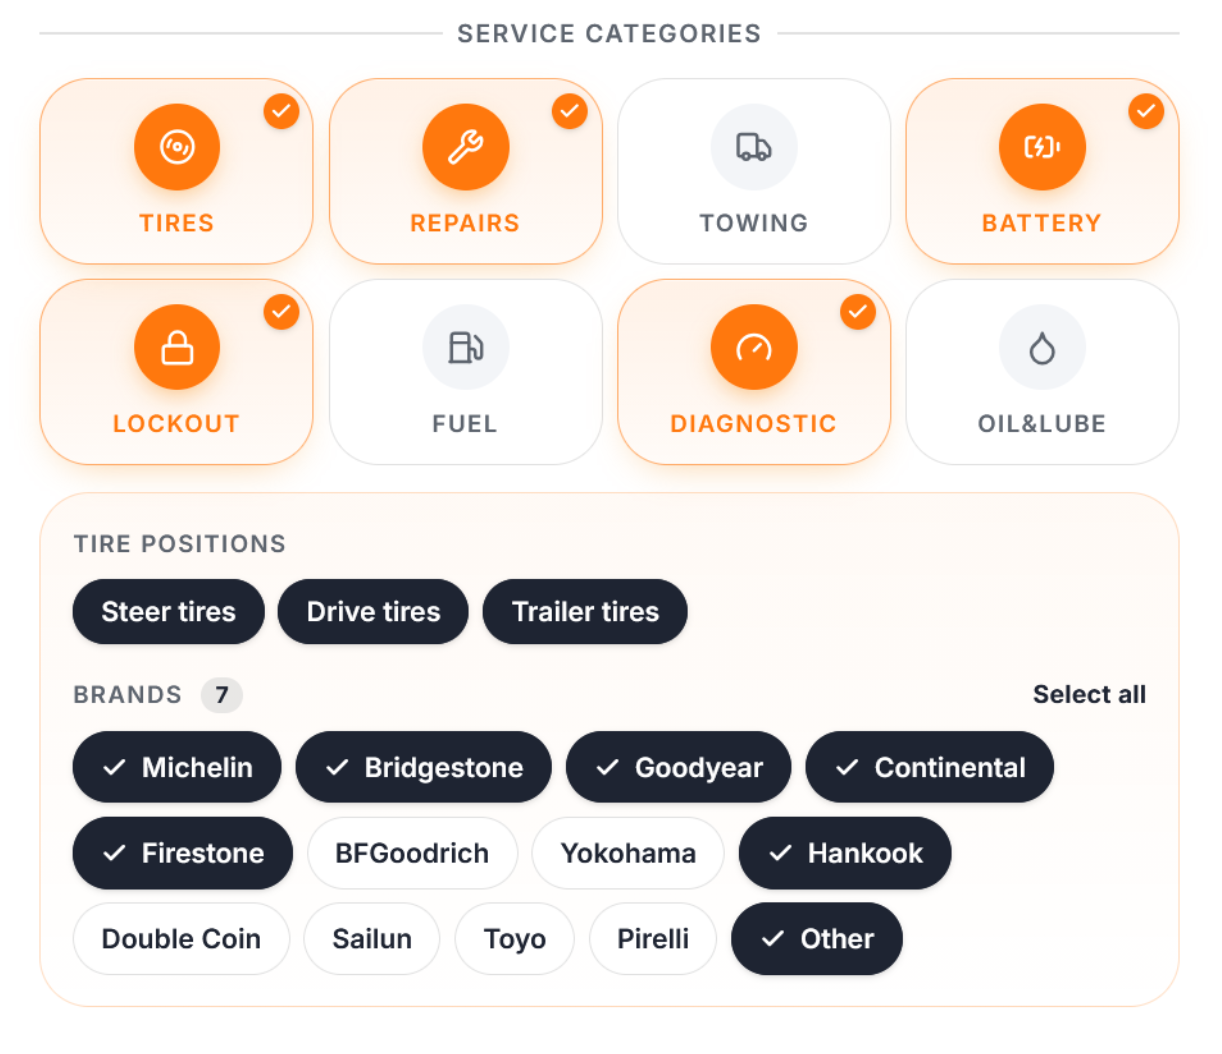
Before finishing, review your business information, service area, vehicle types, and services to make sure everything is accurate. Then, save your changes.

A complete and accurate profile gives truckers a clearer picture of what your business can provide and makes it easier for the right customers to find you when they need assistance.
4. Turn On Requests
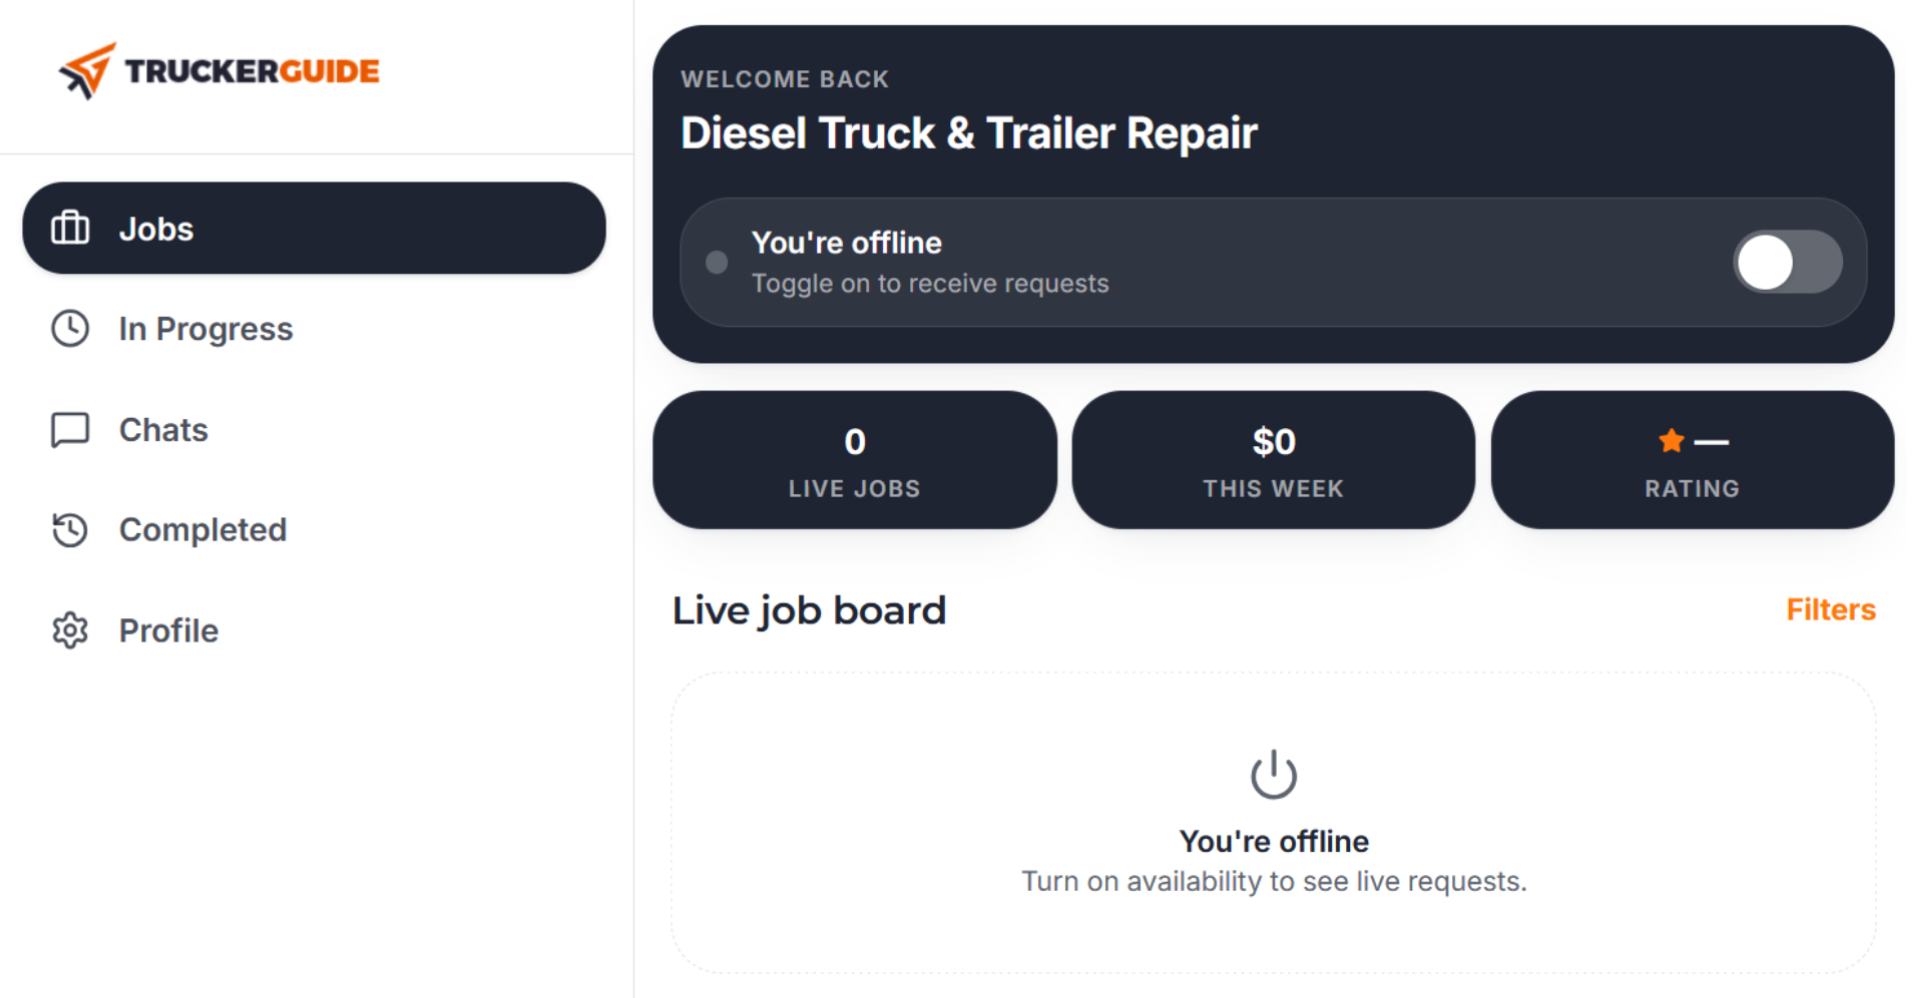
To start receiving requests from truck drivers in your service area, go to the Jobs page and enable request notifications.
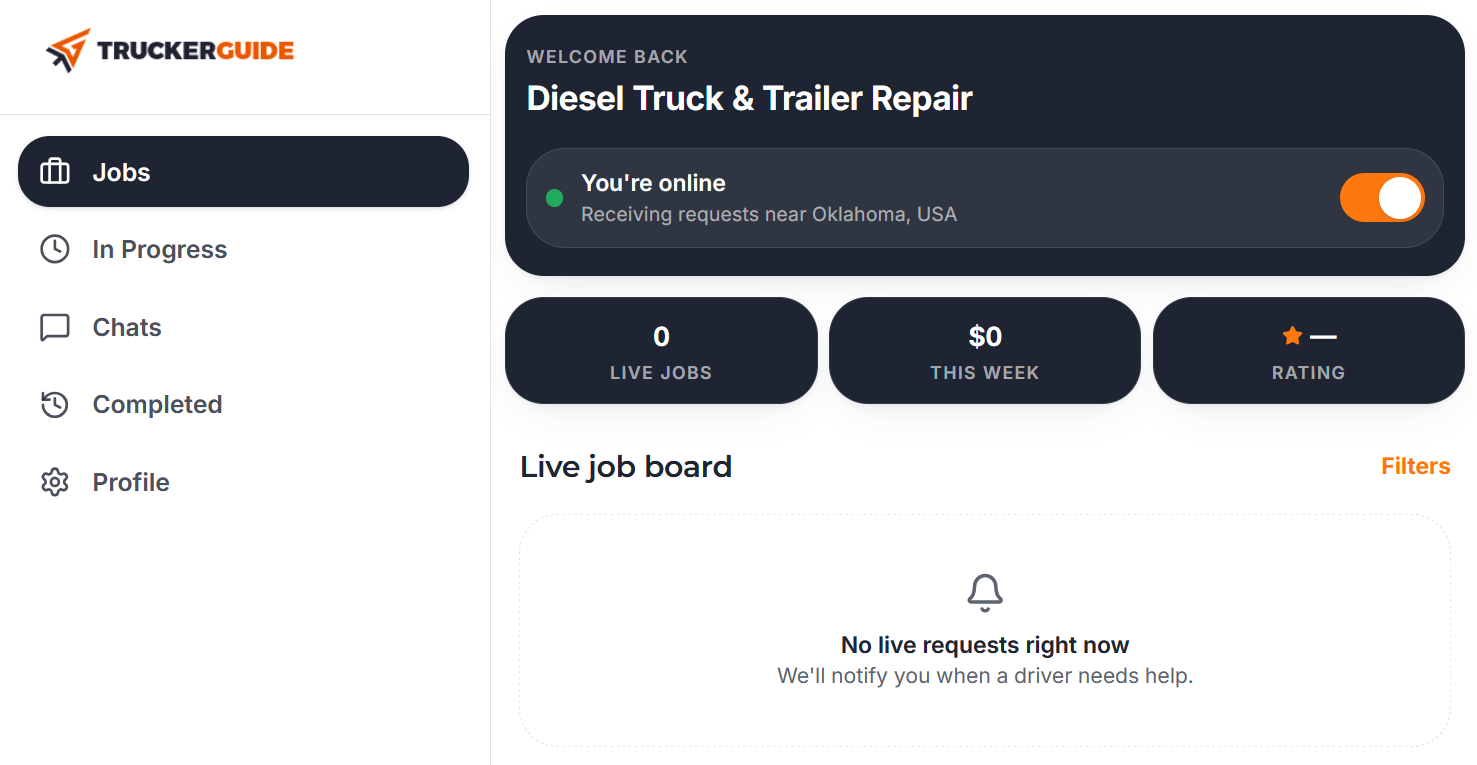
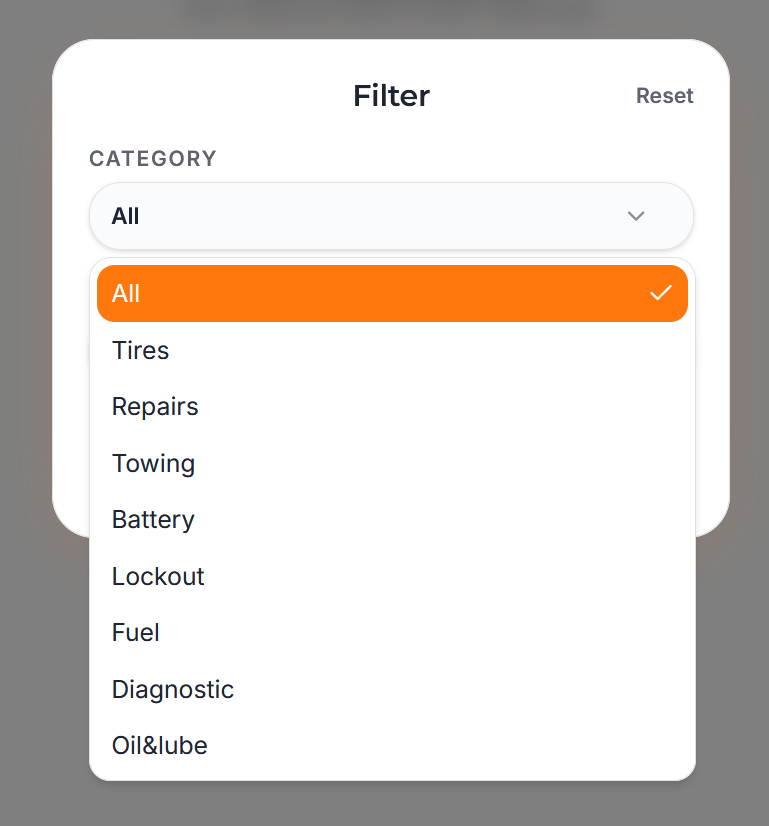
On the same page, you can customize the types of jobs you want to receive. In the Filter section, select the service categories you are available for at that moment, such as tire services, repairs, towing, fuel delivery, or other roadside assistance options.
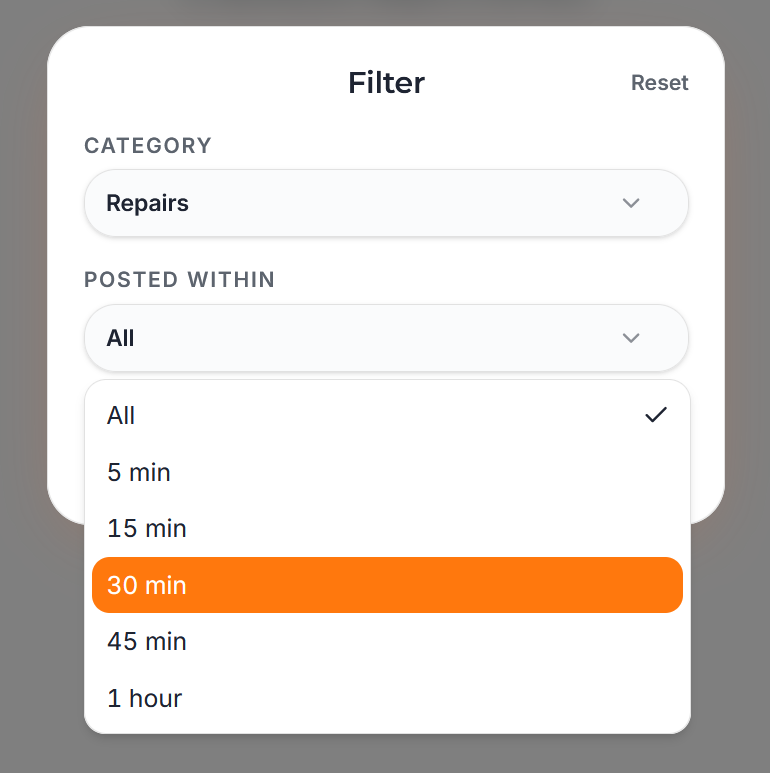
You can also filter requests based on when they were posted, from the last 5 minutes up to 1 hour. This helps you focus on the most relevant and active requests.
5. Review Incoming Requests
Once your filters are set, available jobs will appear in the Live Job Board. You can also use the driver request map on the right side of the screen to see where truckers are requesting assistance.
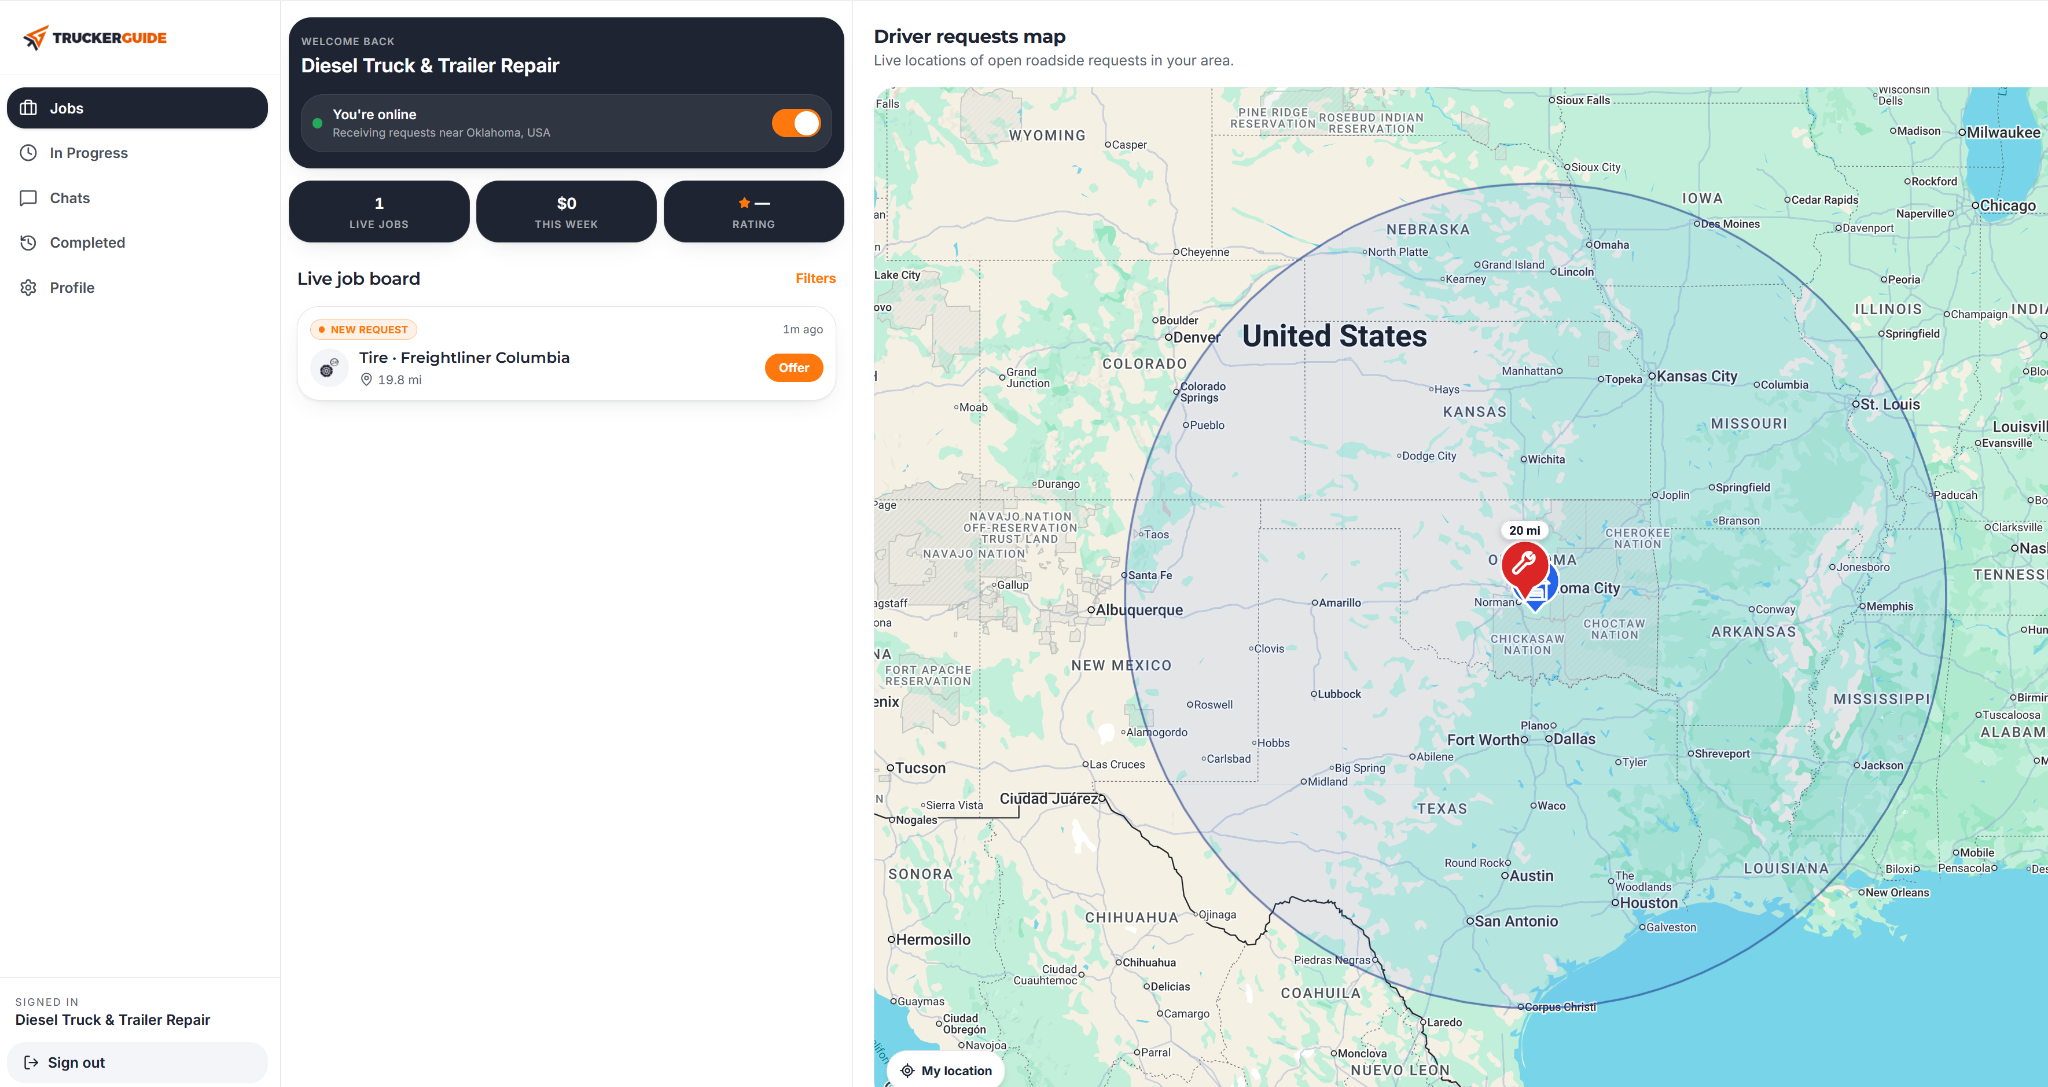
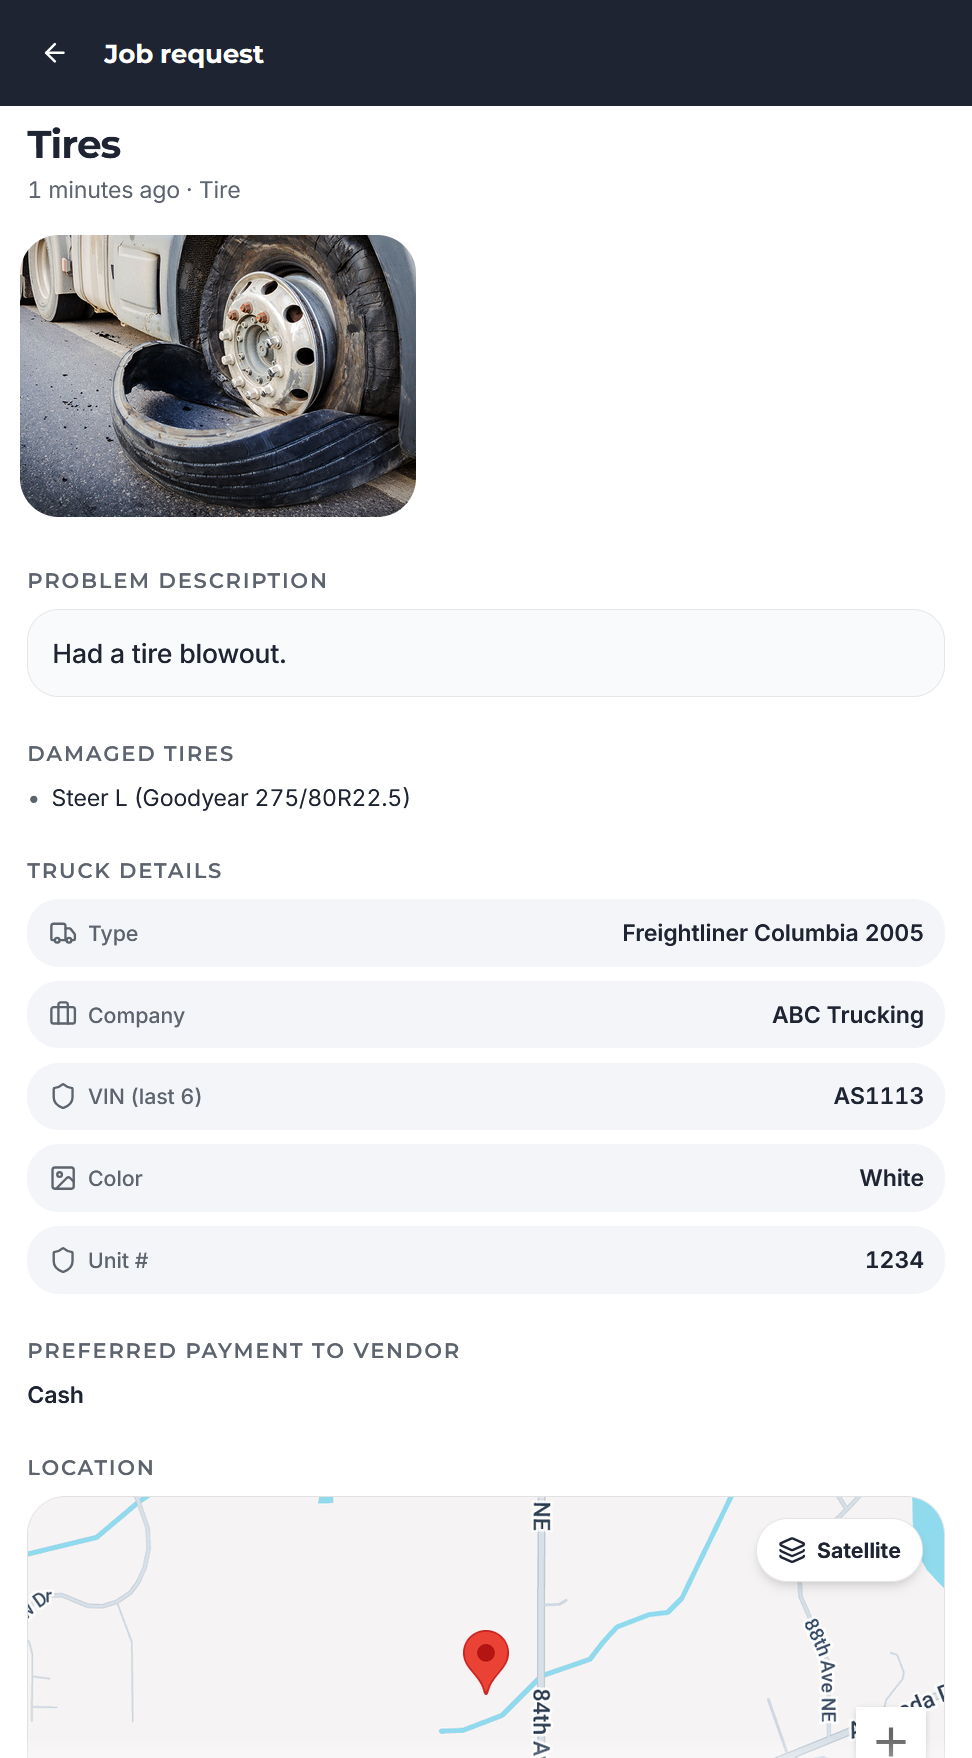
Select a request to view more details. Depending on the information provided by the driver, you may see:
- Photos of the issue
- A description of the problem
- Vehicle details
- Payment options
- The exact location on the map
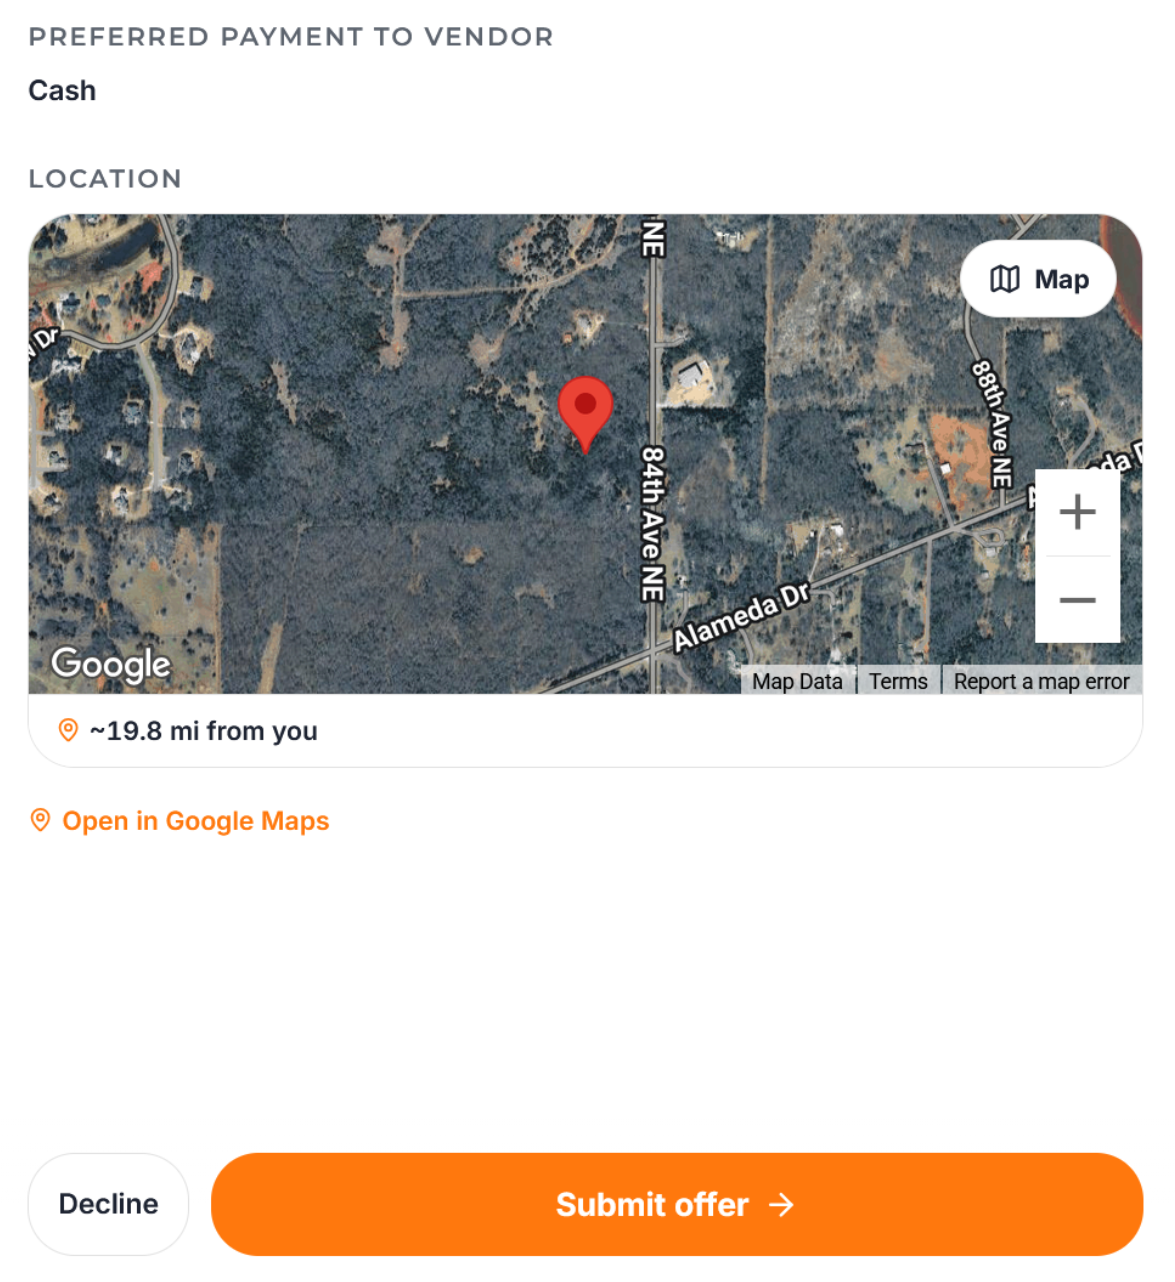
You can switch to Satellite View for a more detailed look at the location or open it in Google Maps. Reviewing all available information before submitting an offer helps you determine whether the job is a good fit for your business.
6. Submit Your Offer
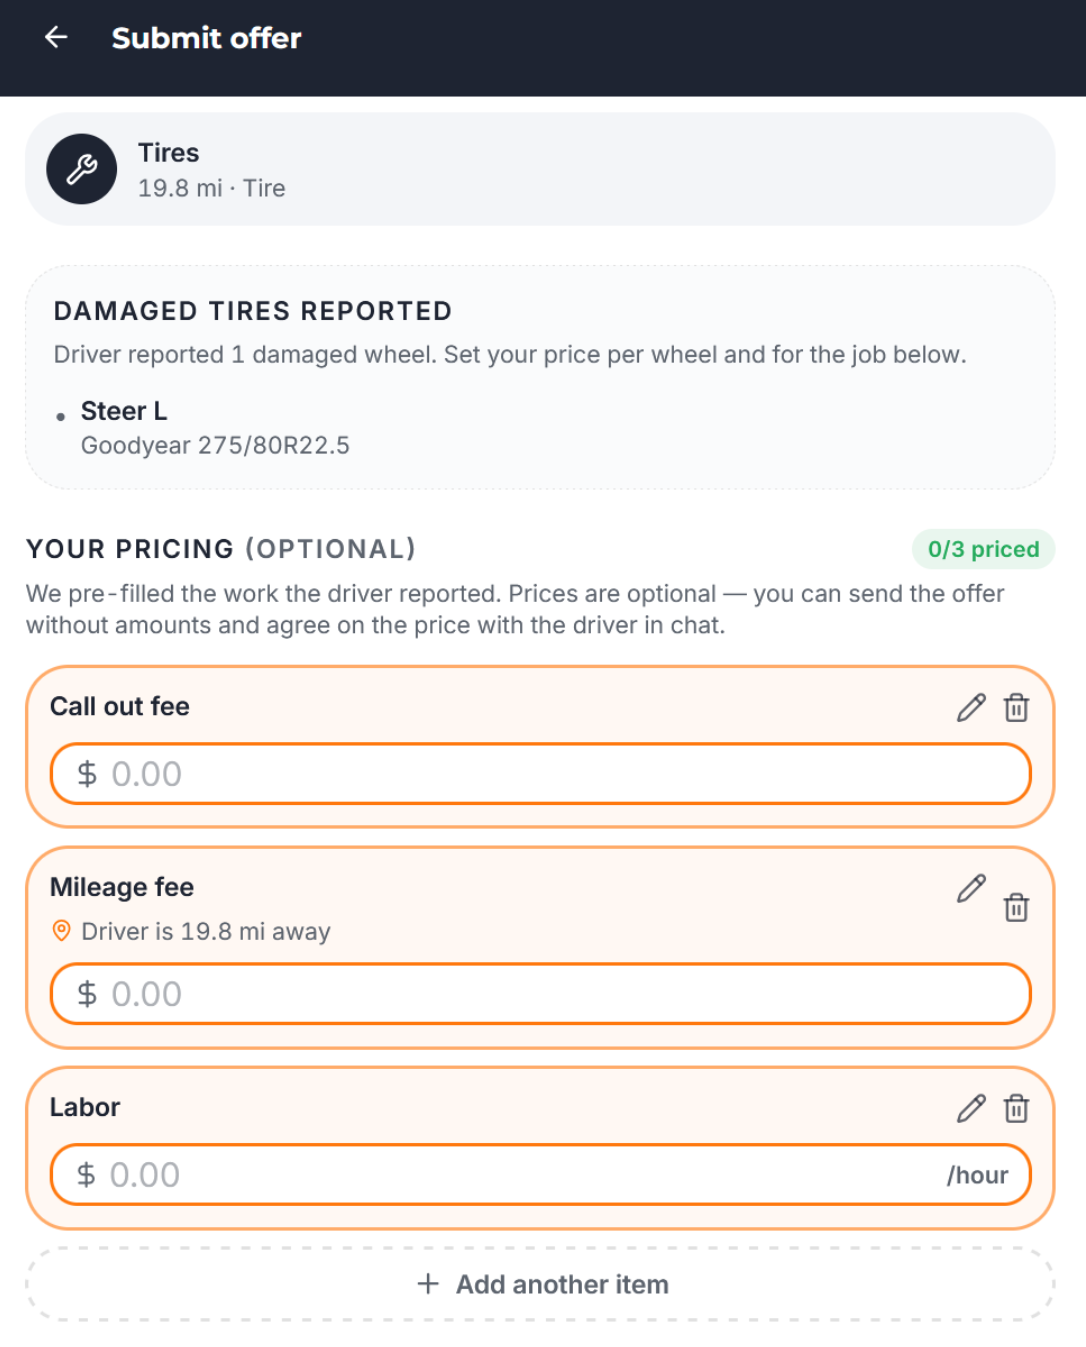
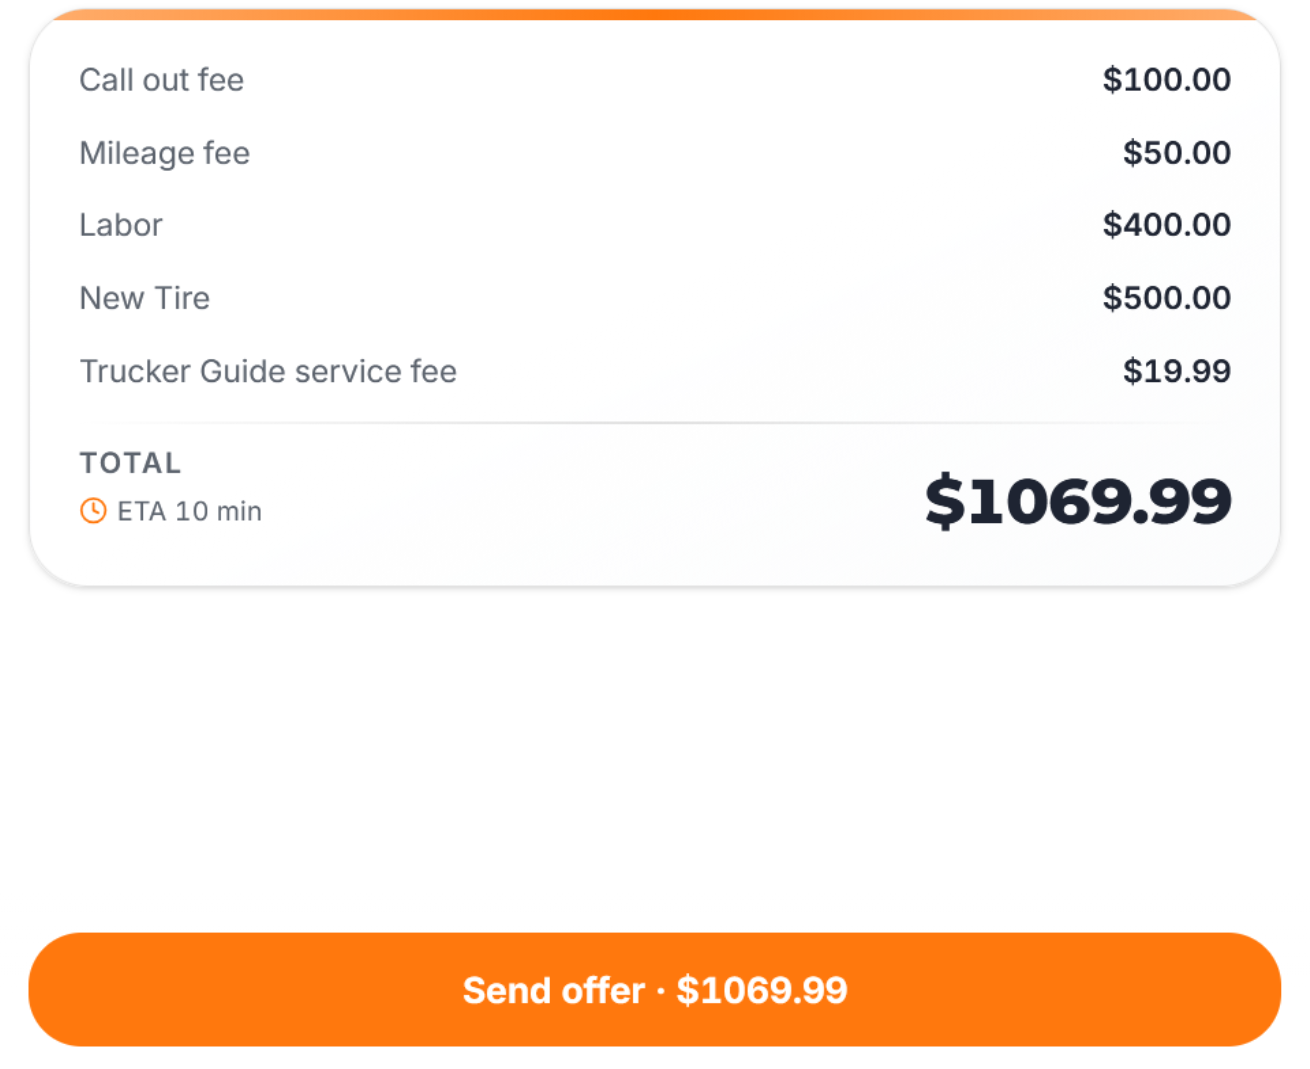
If you decide to take the job, you can send the driver a service offer with your pricing details. Enter your:
1. Call-out fee
2. Mileage fee
3. Labor charges
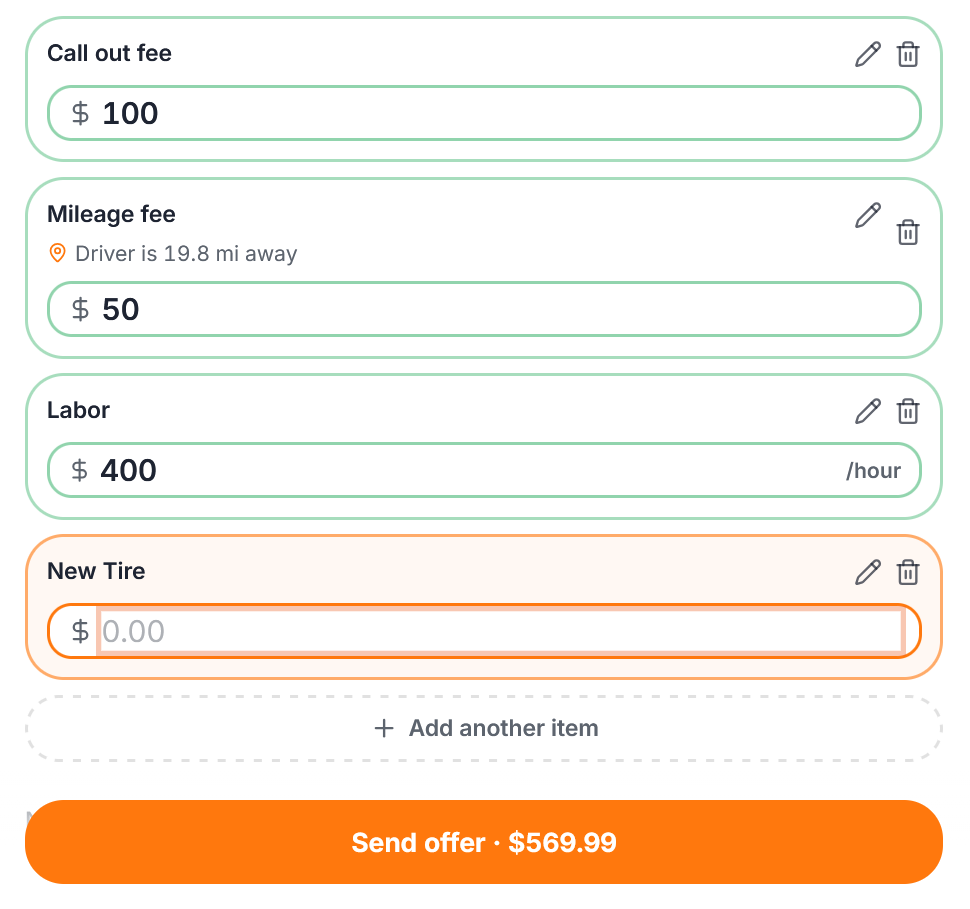
If additional charges apply, select “Add another item”, enter a description, and specify the price.
You can also leave notes for the driver, such as requesting additional information like tire size, confirming payment options, providing your estimated arrival time, or sharing any other important details related to the service.

Next, choose your estimated arrival time by adjusting the time selector.
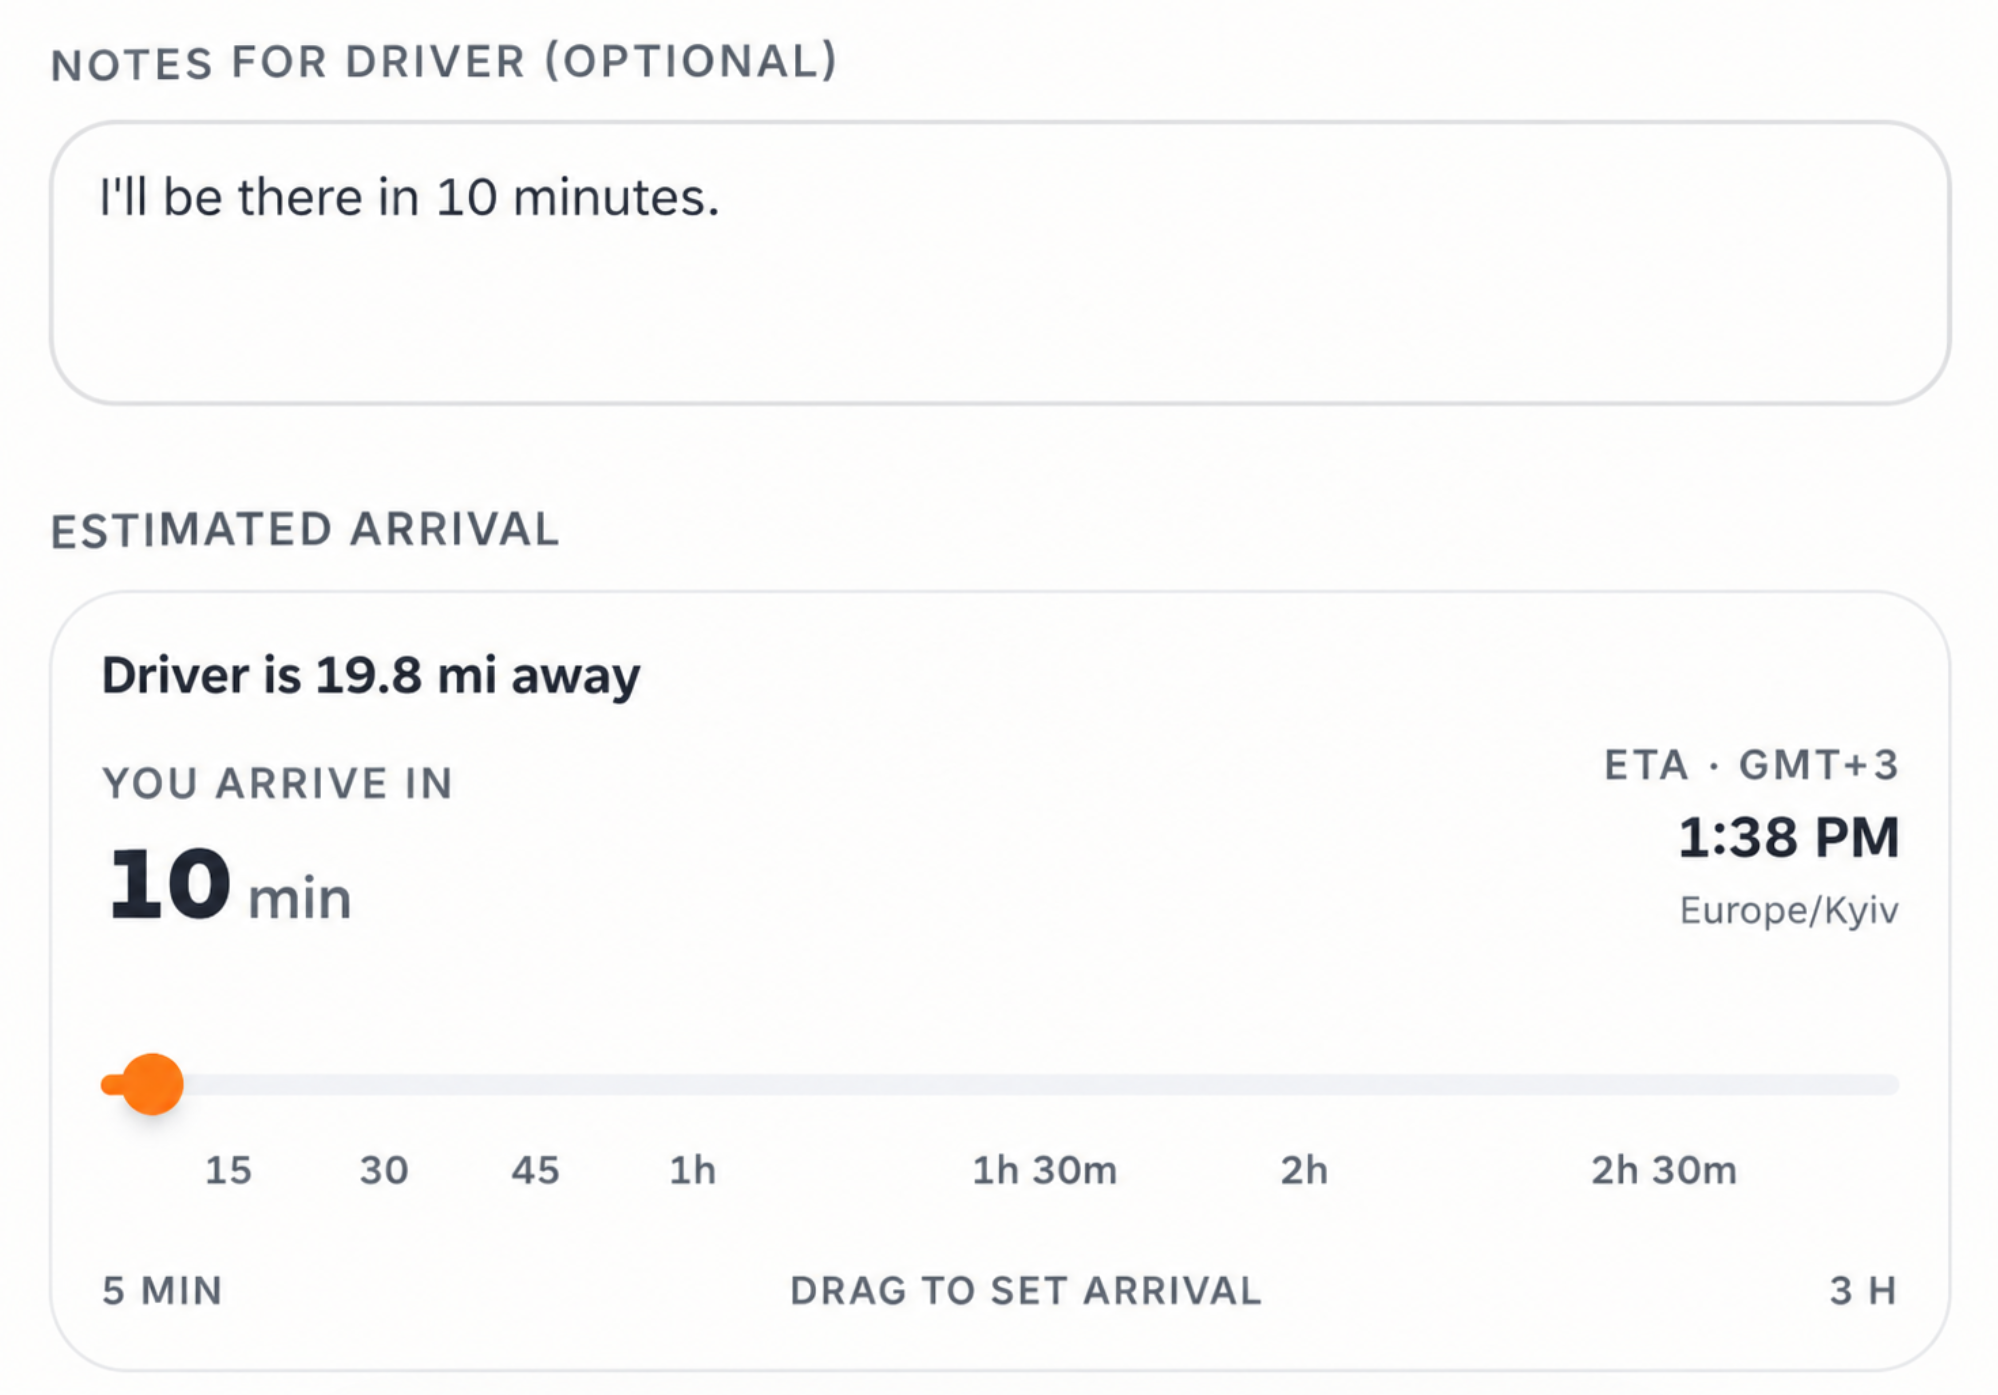
Before sending your offer, review the pricing information and all service details to make sure everything is accurate. Once everything looks correct, submit your offer to the driver.
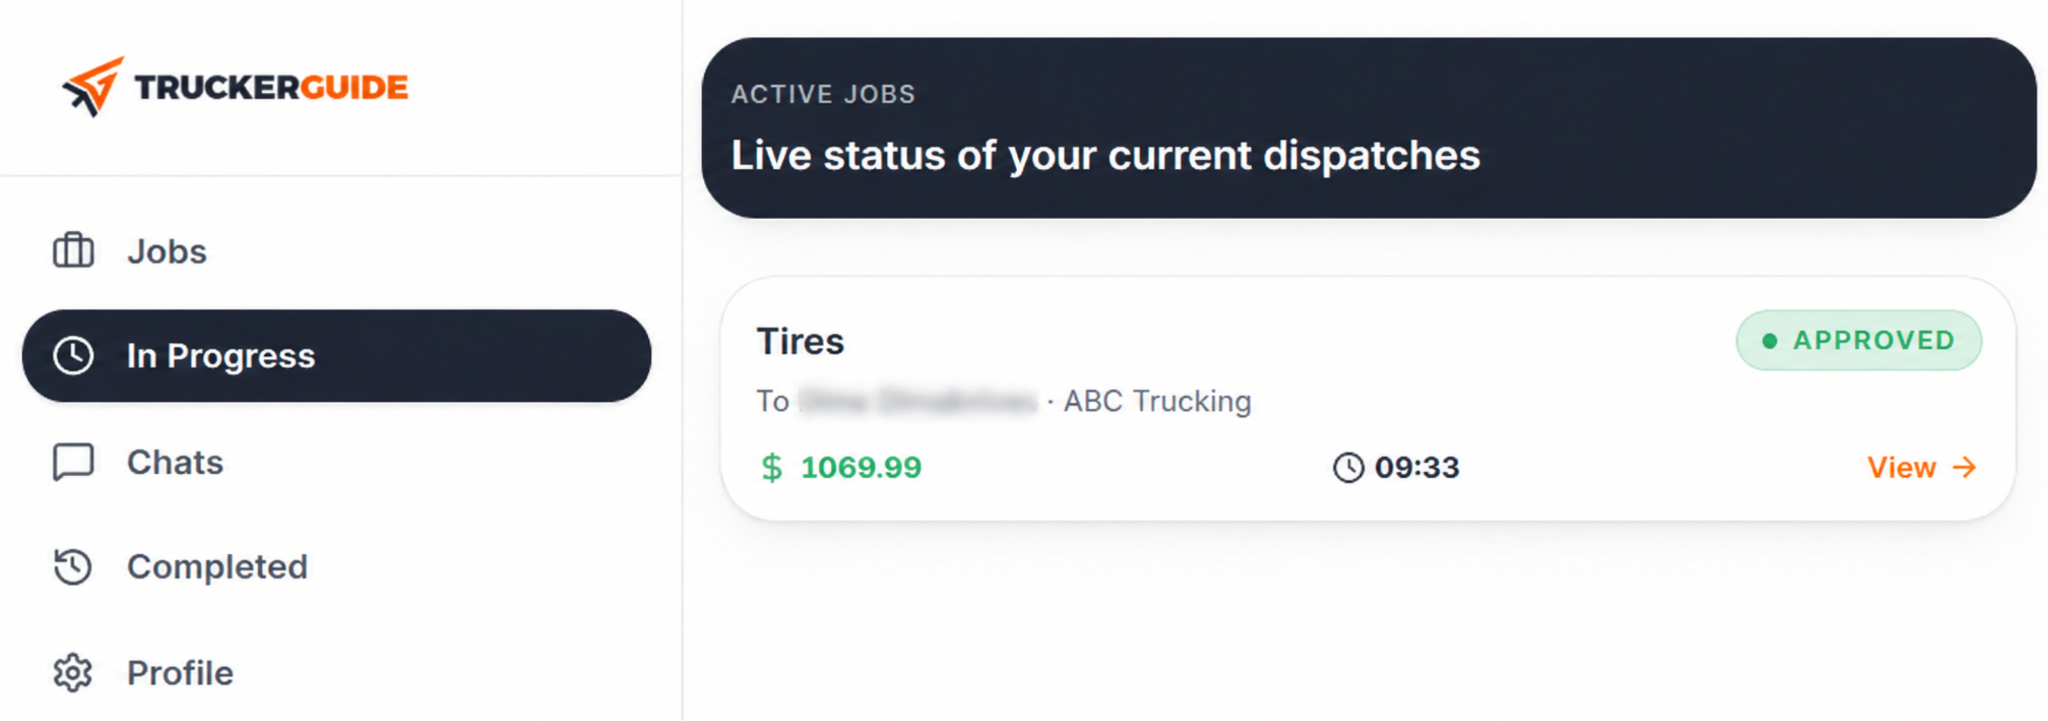
Once you submit your offer, it will remain visible on the Live Job Board until the driver reviews and accepts it.
7. Pay the Service Fee
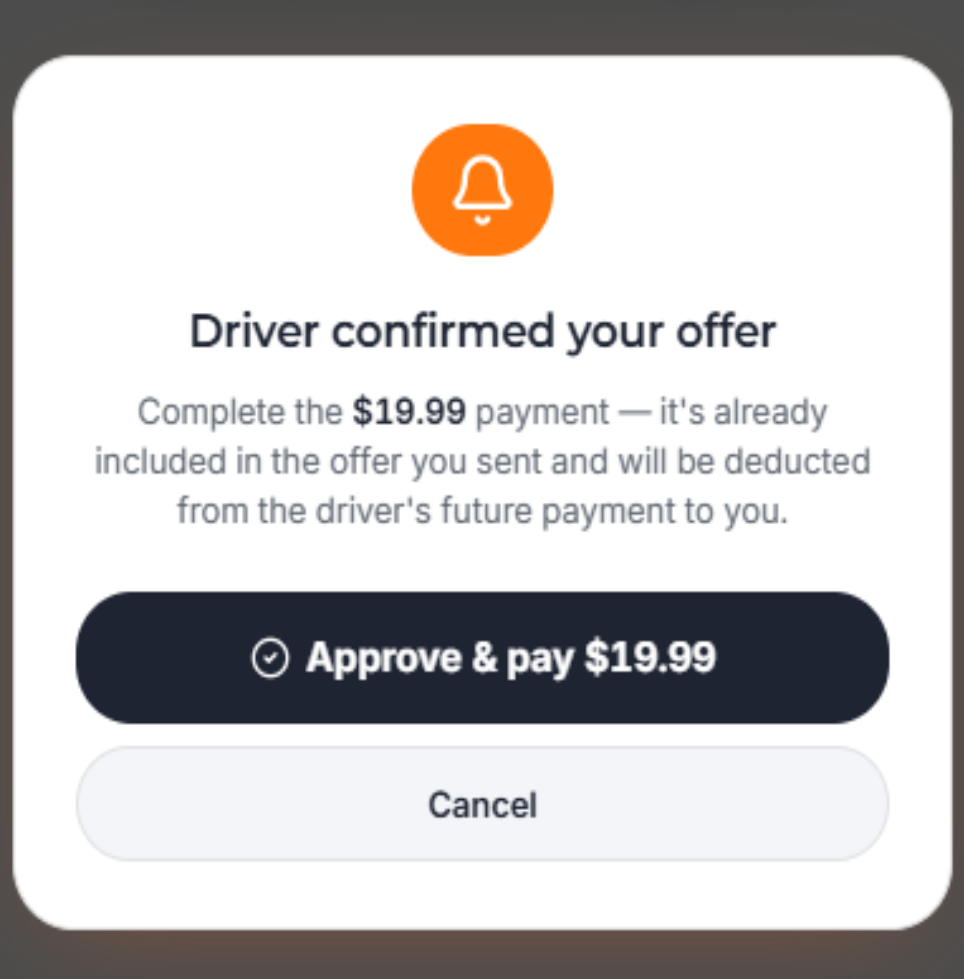
After the driver accepts your offer, you’ll be taken to the payment page. Pay the $19.99 service fee* to access more information about the driver and continue with the request.
*The service fee is included in the offer you sent and will be deducted from the trucker’s future payment.
8. Move to the Destination
After payment, a timer will appear on your screen showing the estimated time of arrival (ETA). This helps you keep track of how long it will take to reach the service location. Use the ETA to plan your route and arrival time, then head to the location the driver provides.
You May Also Like: Why Accurate ETAs Matter and How Truck-Specific Routing Makes the Difference
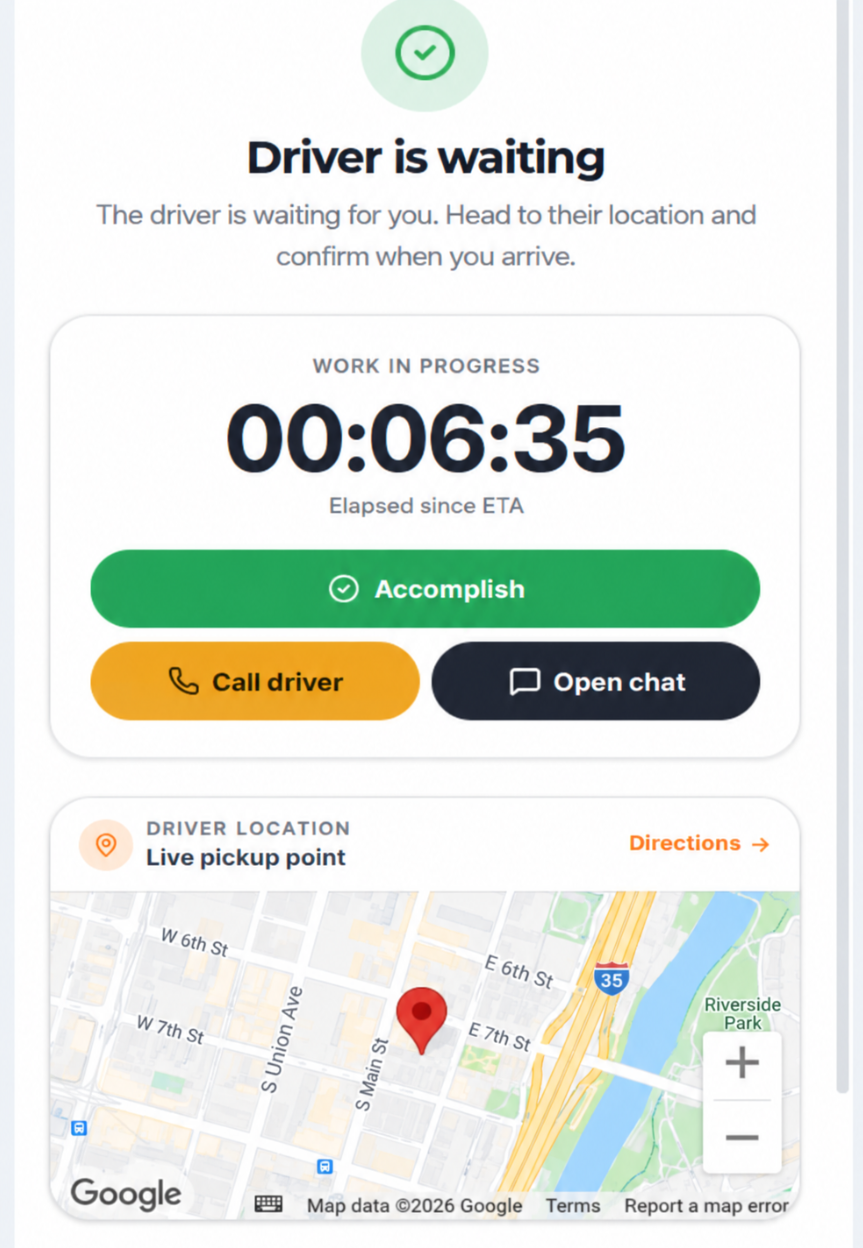
9. Rate Your Experience
After you complete the service, you can rate the driver from 1 to 5 stars. Your rating provides feedback about the request and helps support a better experience for both vendors and truck drivers.
Get Started Today!
Ready to connect with more truck drivers who need roadside assistance? Create your vendor profile, set your service area, and start receiving job requests through our Road Assistance service.
Frequently Asked Questions
How do I register my business for Trucker Guide Road Assistance?
Visit the Trucker Guide Vendor Portal and create a business account with your name, company name, email address, password, and phone number. After SMS verification, you can complete your vendor profile.
How do I set my service area?
Go to Profile → Business Profile, add your business location, and select a service radius that matches the area where your team can provide roadside assistance.
What vehicle types and roadside services can I offer?
You can select trucks, trailers, buses, and RVs. Available services may include tire services, mobile repairs, towing, fuel delivery, battery assistance, and other roadside services.
How do I receive and review roadside assistance requests?
Enable request notifications on the Jobs page and use the available filters. Requests that match your selected services will appear on the Live Job Board, where you can review driver details and locations.
What information can I include in a service offer?
You can provide a call-out fee, mileage fee, labor charges, additional charges, notes, and estimated arrival time (ETA) before submitting your offer to the driver.
When do I pay the Trucker Guide service fee?
After the driver accepts your offer, you’ll be taken to the payment page to pay the $19.99 service fee. The fee is included in your offer and is deducted from the trucker’s future payment.


