



Trucker Guide | A New Way for Truck Drivers to Get Roadside Help

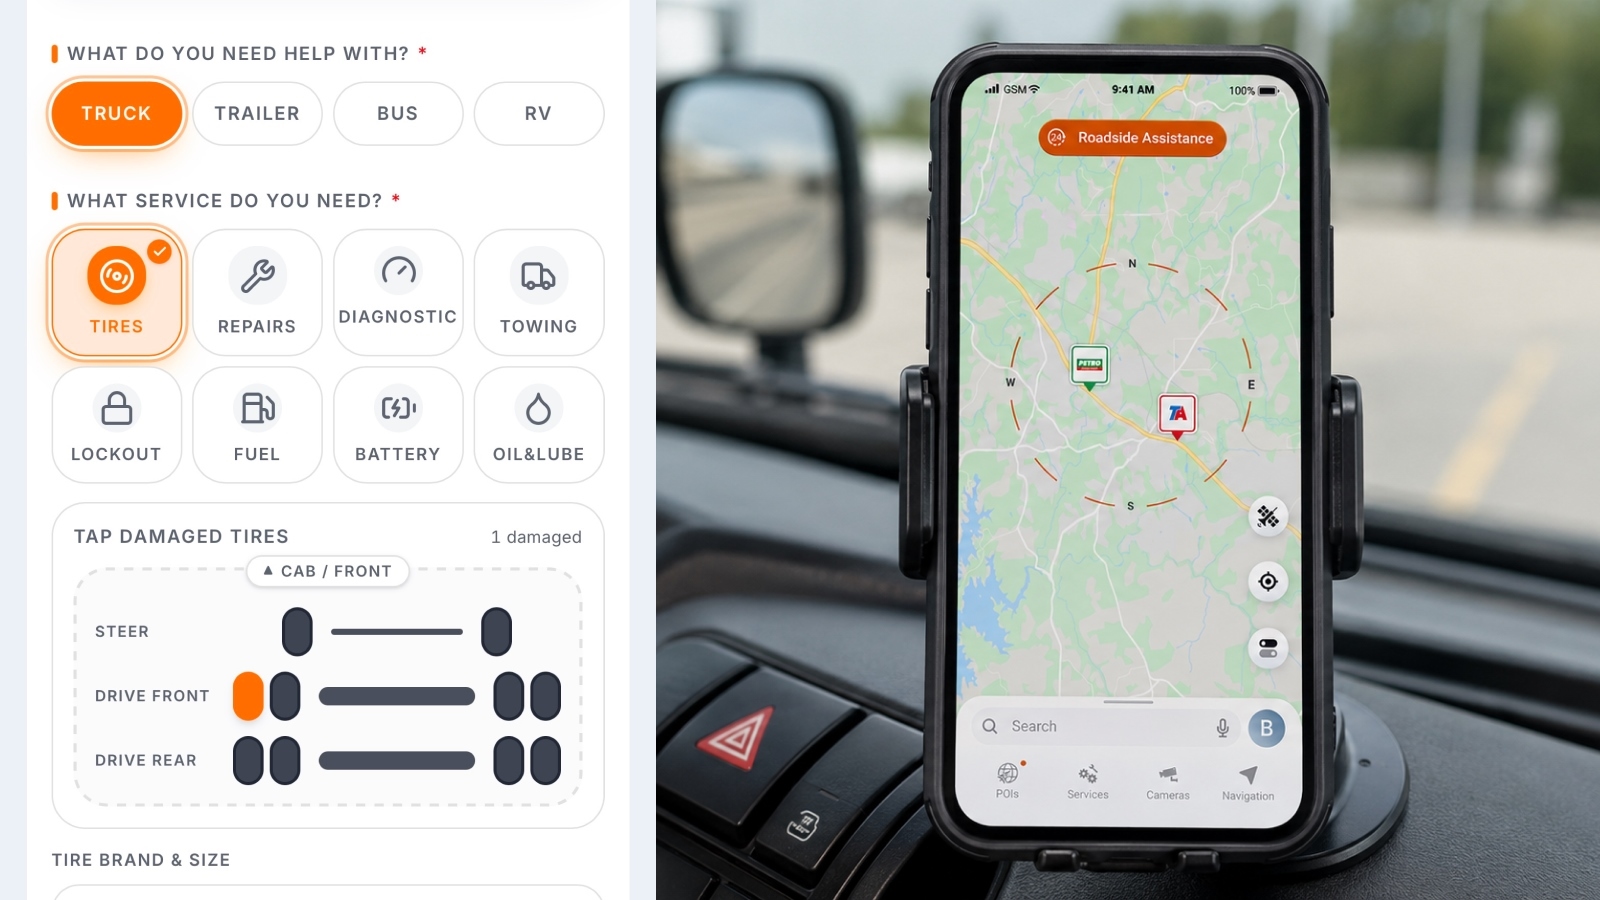
Need roadside assistance? Trucker Guide now lets you request roadside service, review offers from nearby providers, choose the option that works best for you, and track the estimated arrival time of your selected provider.
Describe what’s happening, share the details providers need, and let available service professionals respond to your request. Whether you’re dealing with a tire issue, truck breakdown, trailer repair, diagnostics, towing, or another roadside problem, the new Roadside Assistance Service helps connect you with providers who can respond to your situation.
Here’s how it works. 👇
Key Facts:
- Request roadside help directly in the Trucker Guide app for trucks, trailers, buses, and RVs.
- Describe the problem in detail by selecting the service type and adding relevant vehicle, tire, issue, and photo information.
- Choose a mile radius to find available service providers near you and potentially receive more offers.
- Compare provider offers using information such as price, estimated arrival time, ratings, and reviews.
- Choose the offer that works best for you and track the selected provider’s estimated arrival time after the request is confirmed.
1. Access the Roadside Assistance Service
To request help, tap the “Roadside Assistance” button at the top of the app.
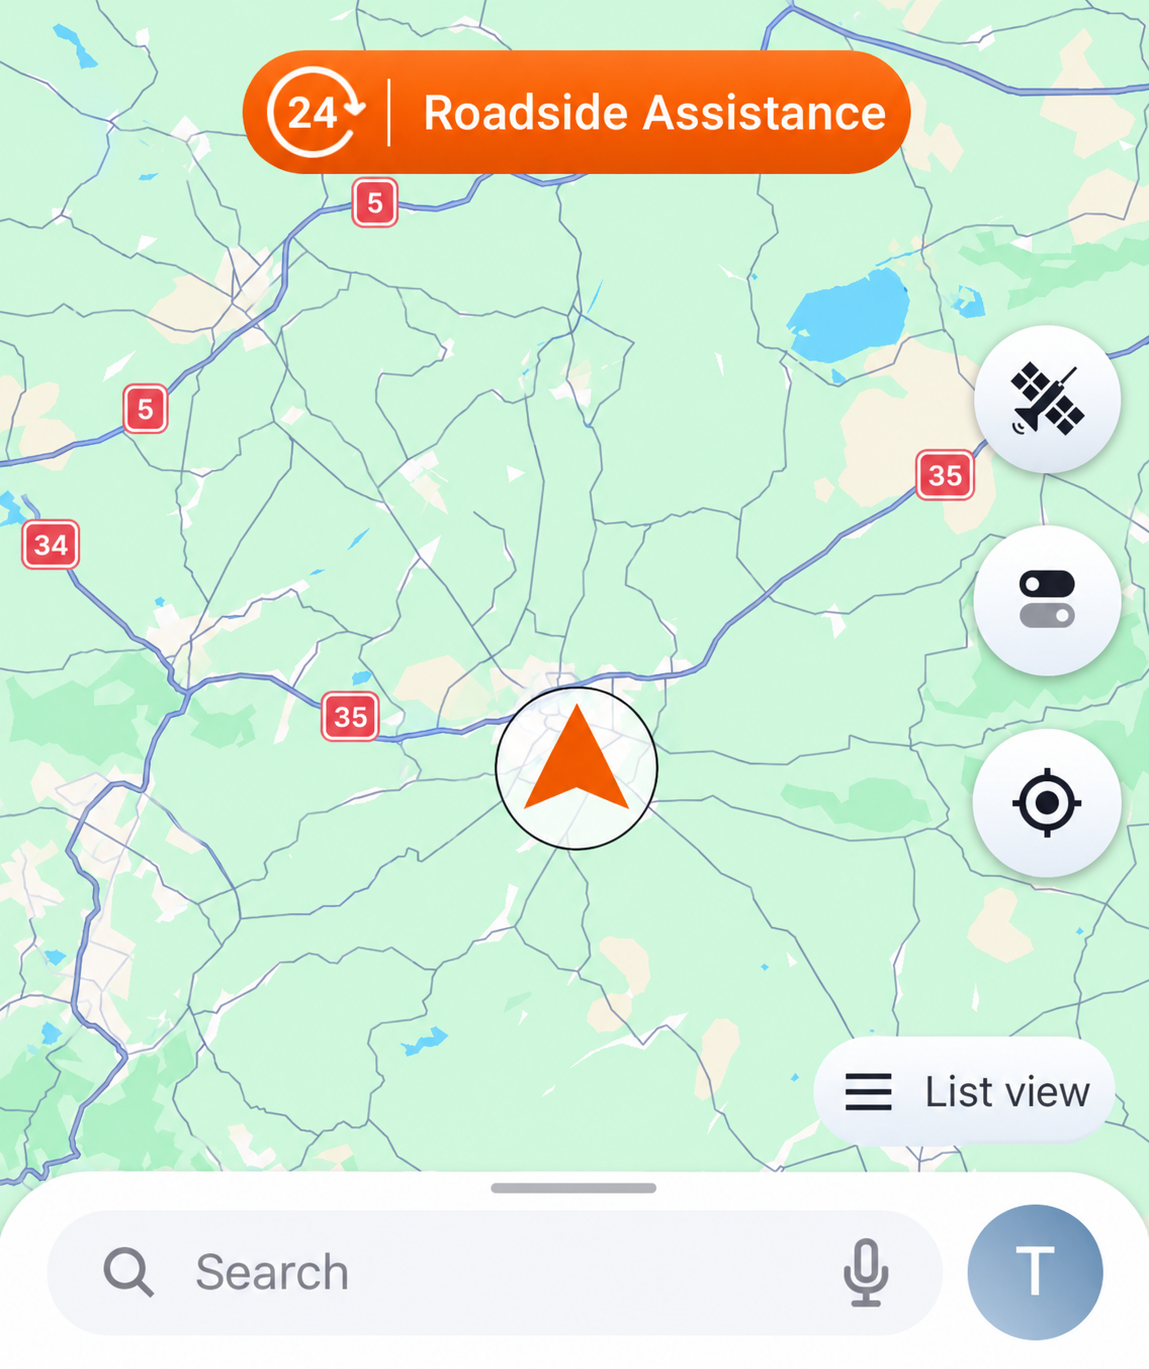
The system will then direct you to the Sign Up / Log In page, where you can create or complete your profile before submitting a service request.
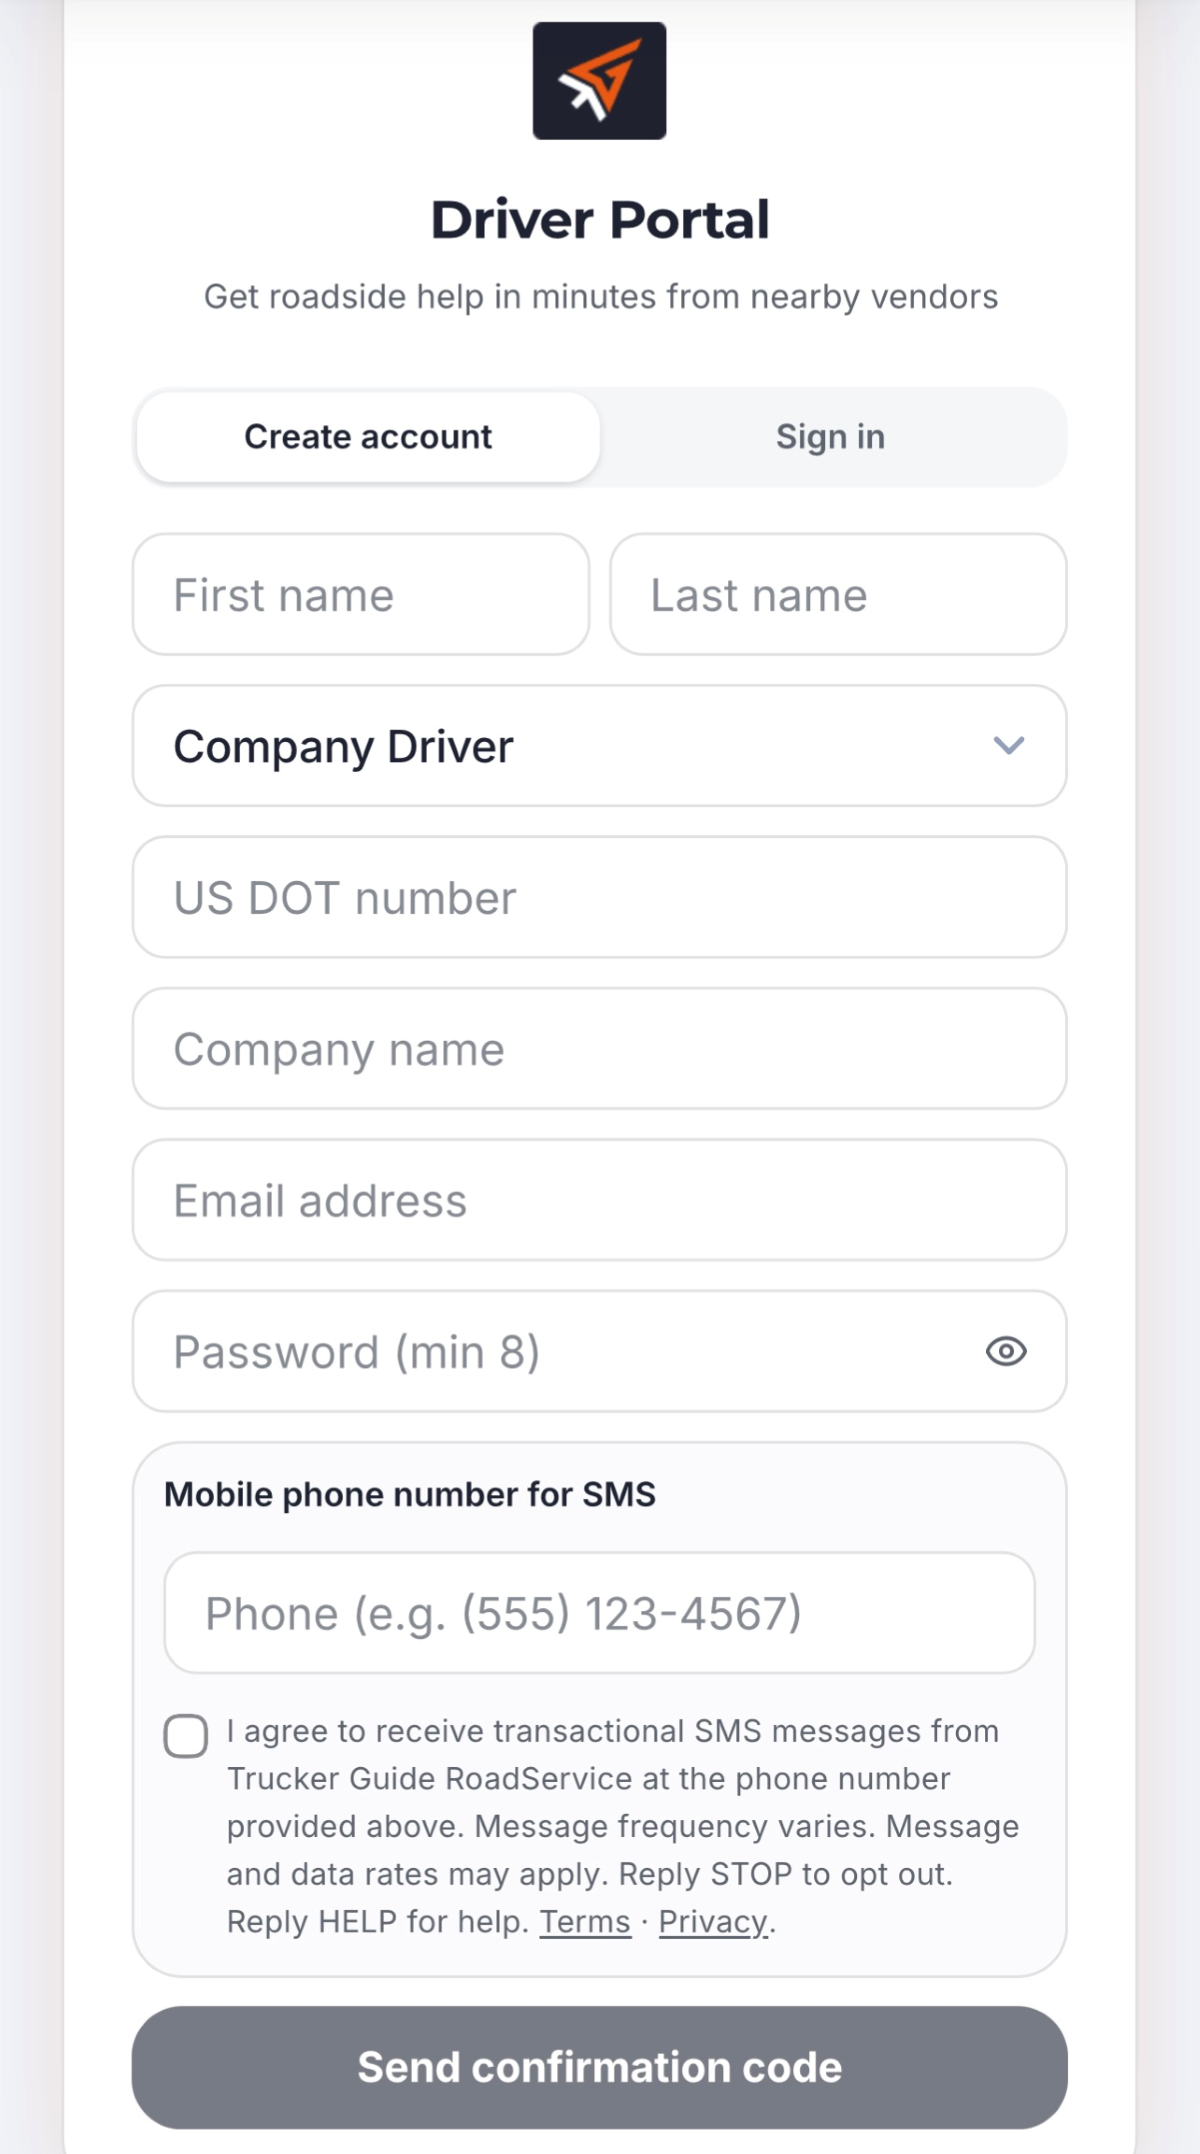
If you are not already registered, enter your name, company name, email address, password, and phone number for SMS confirmation. After completing and submitting your information, you will be directed to the main service request page, where you can begin providing details about the assistance you need.
2. Select Your Vehicle and Service Type
The first step in creating your request is selecting the type of vehicle you need assistance with. Choose truck, trailer, bus, or RV by tapping the option that matches your situation.
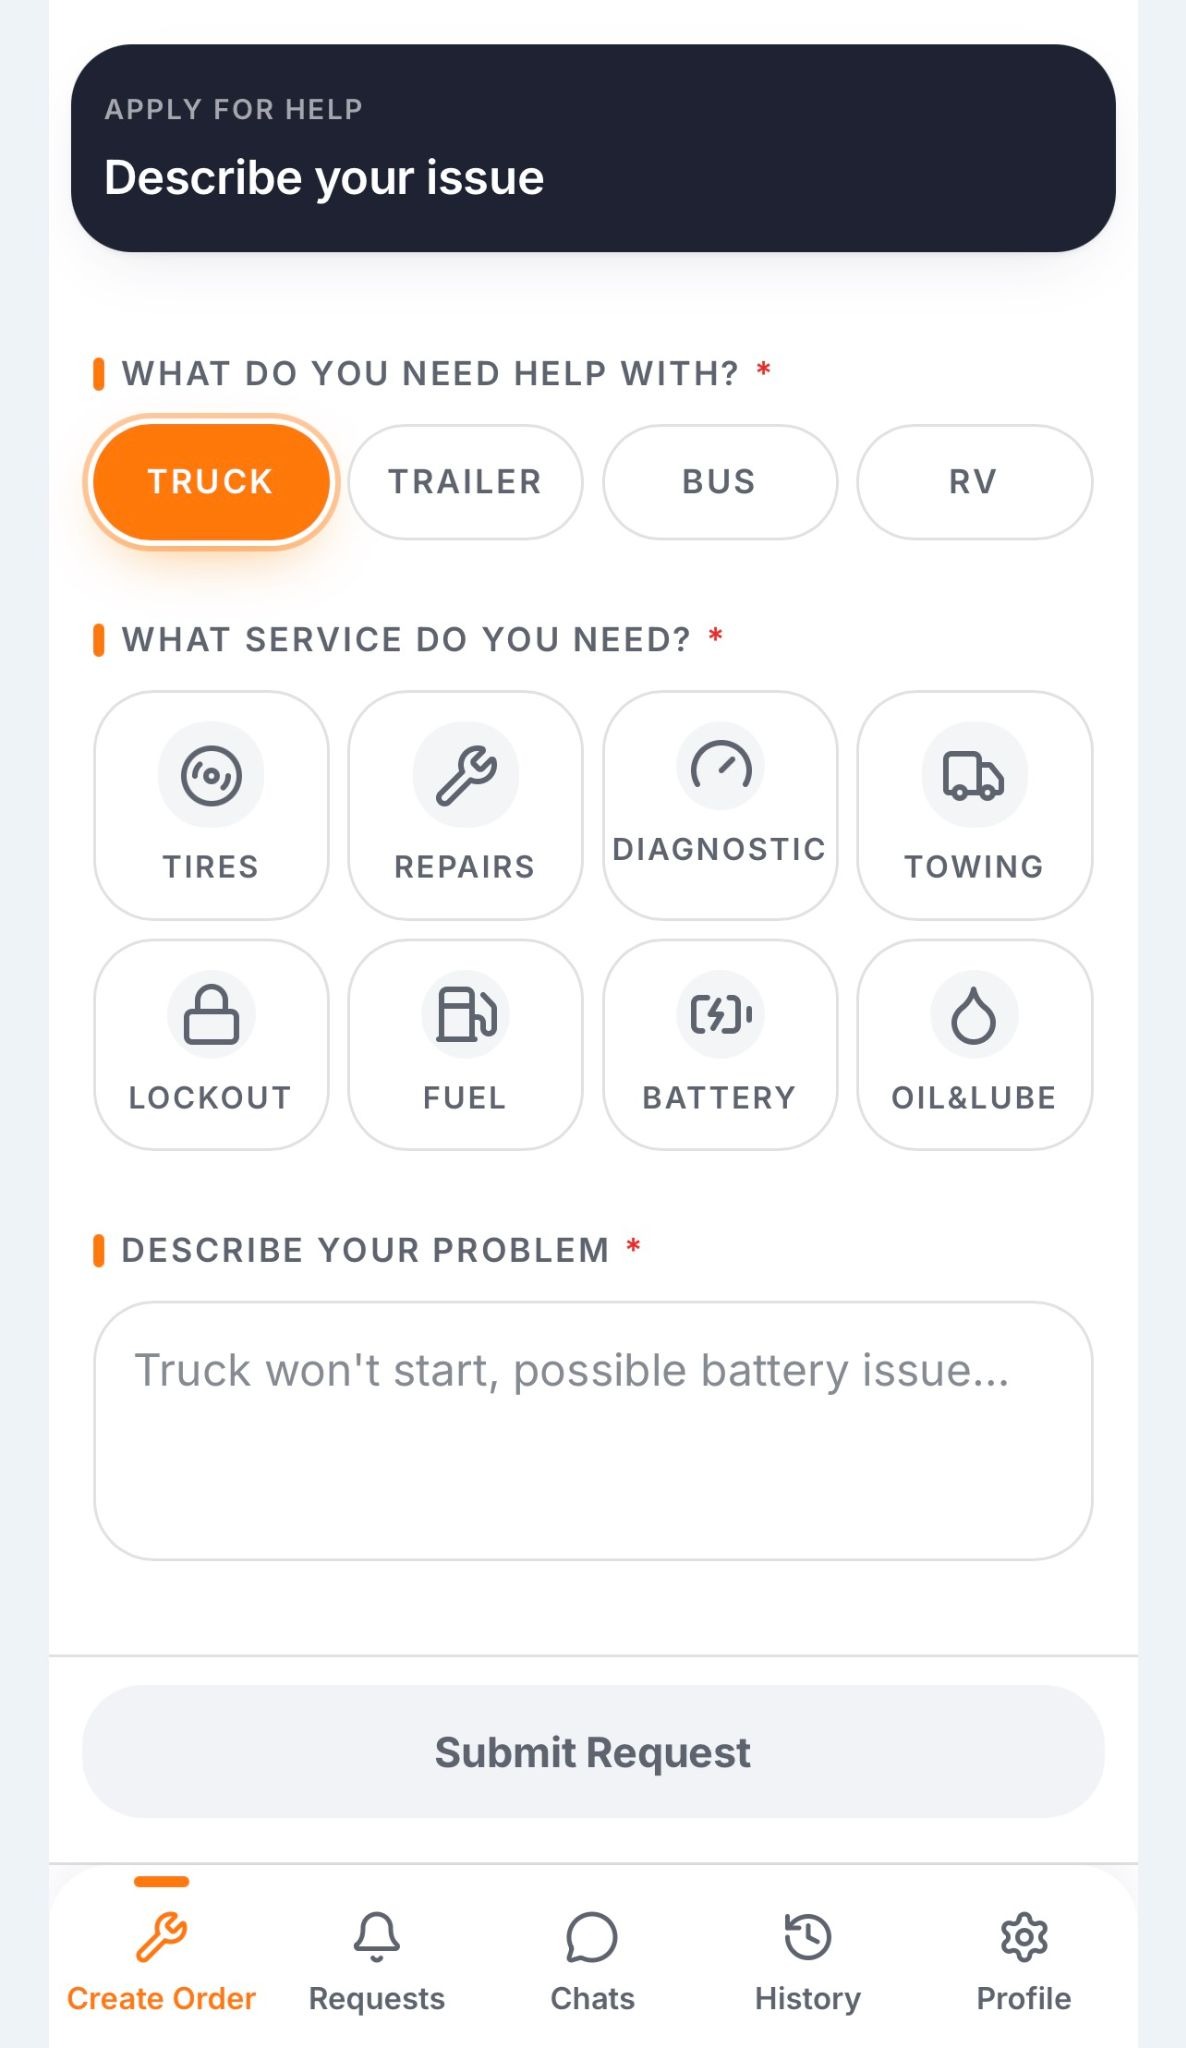
Next, select the type of service you need. The available options can include tire service, general repairs, diagnostics, towing, and other types of assistance.
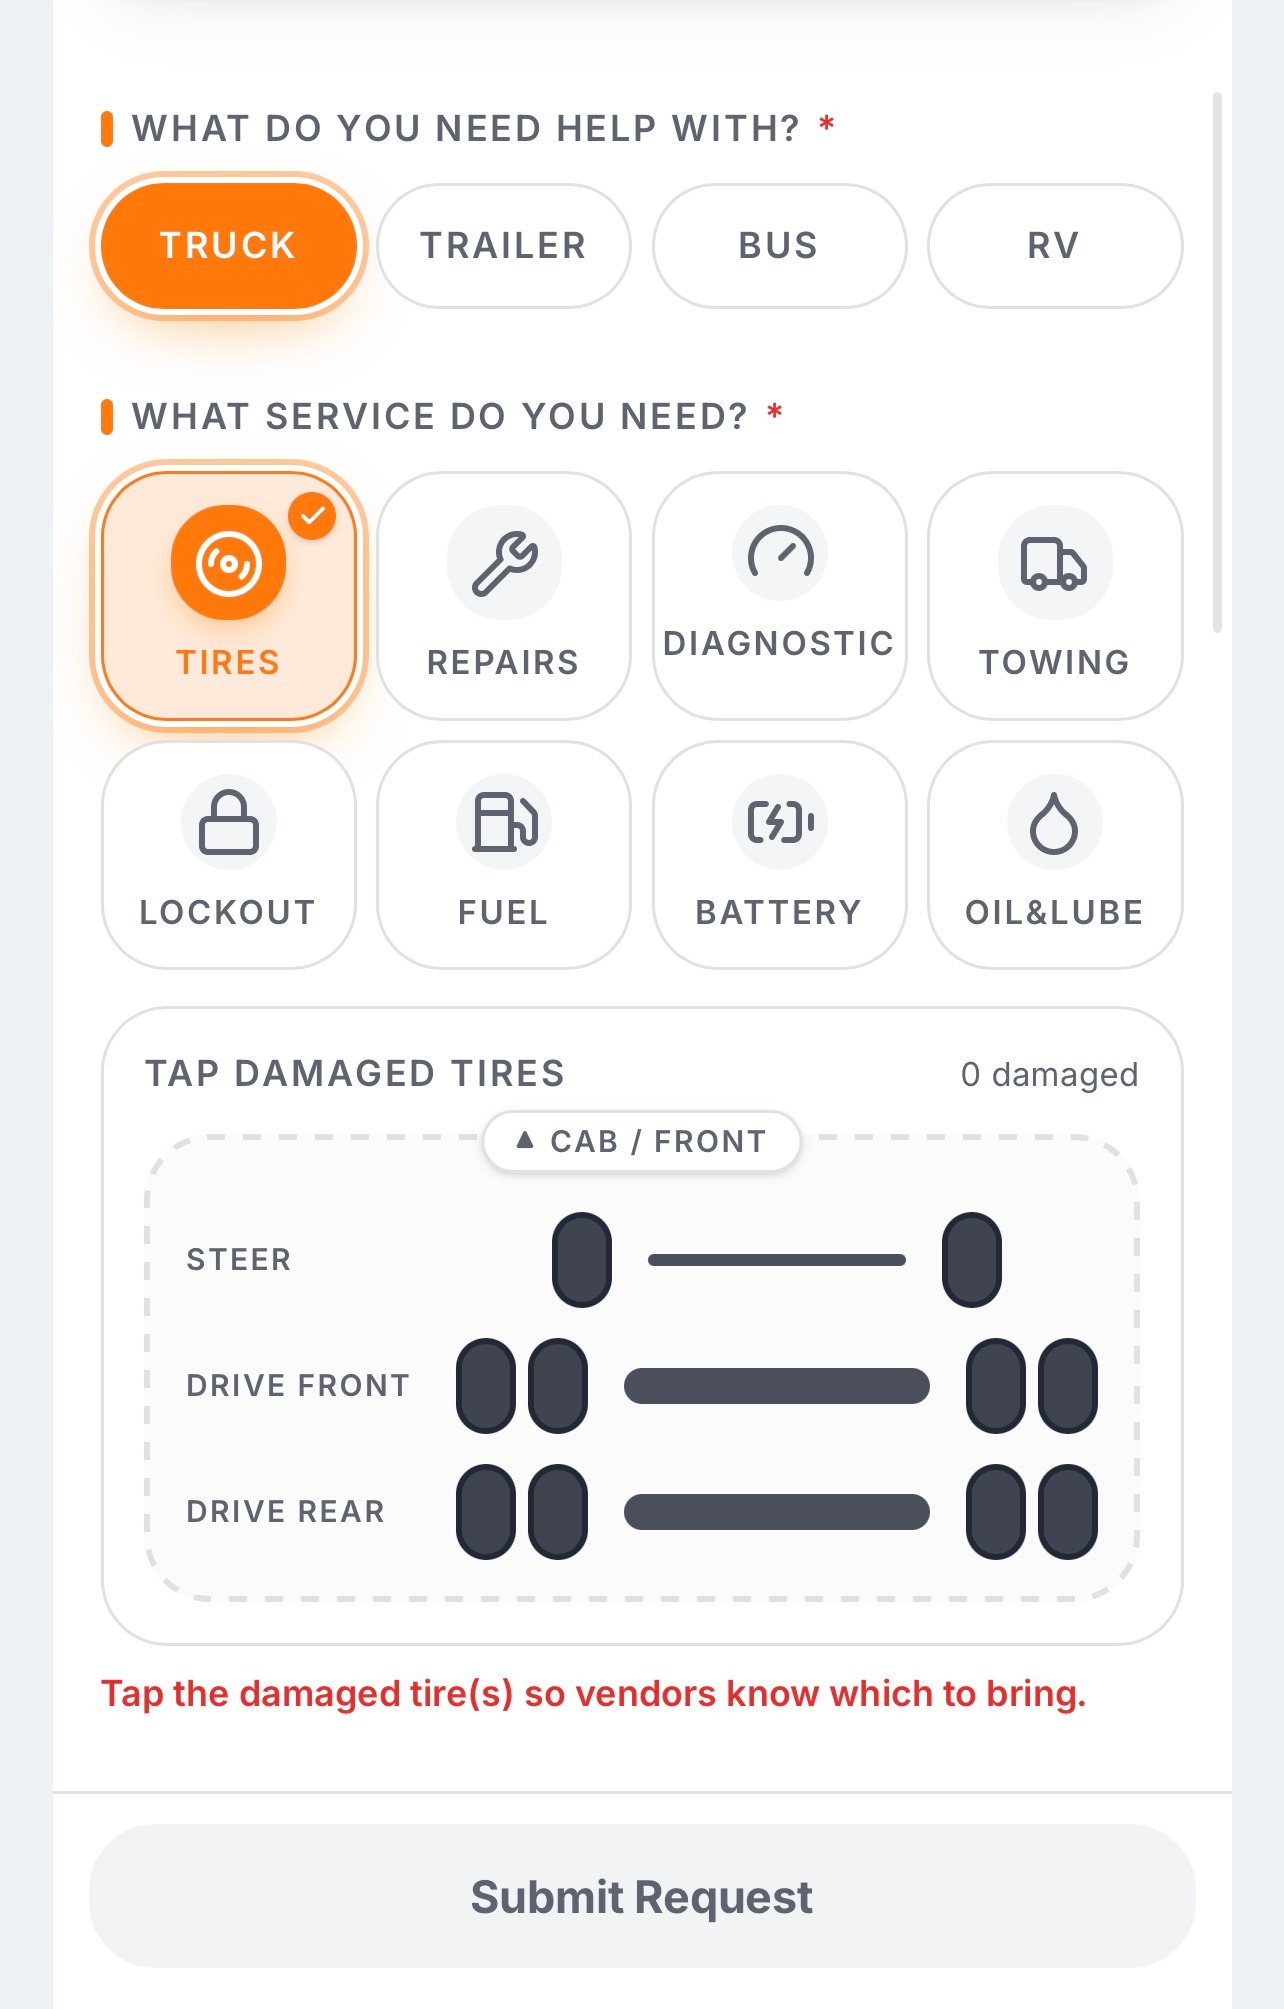
Once you select the service that best matches your problem, the system may ask you to provide additional information to help the service provider understand the issue more clearly.
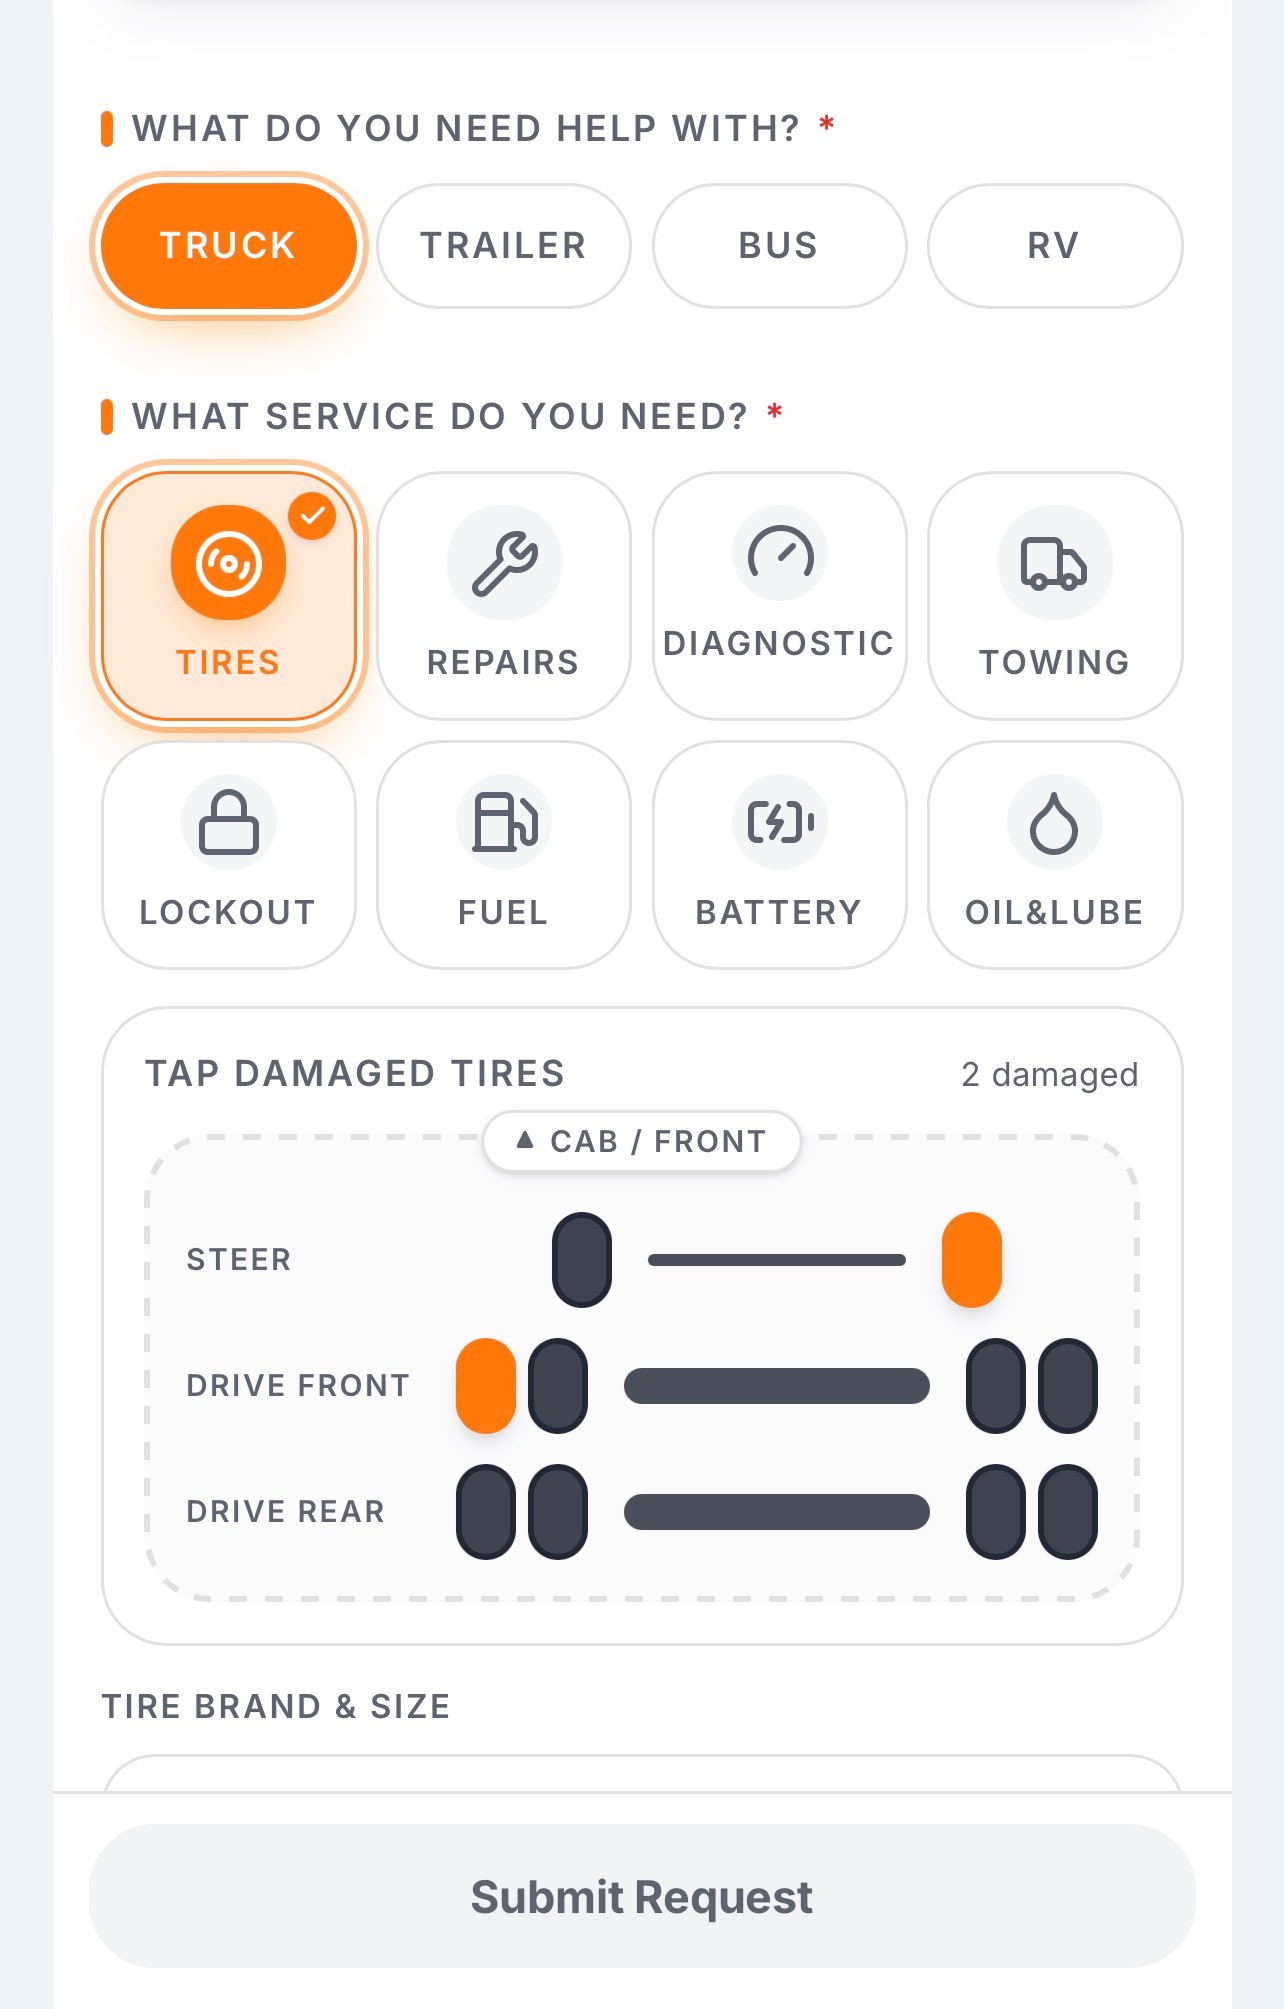
For example, if you choose tire service, you can specify exactly which tire is affected, such as the right-side steer tire or left-side drive-front tire. Providing this information at the beginning of the request helps ensure that the service provider receives a clearer picture of what assistance you need.
3. Add More Issue Details
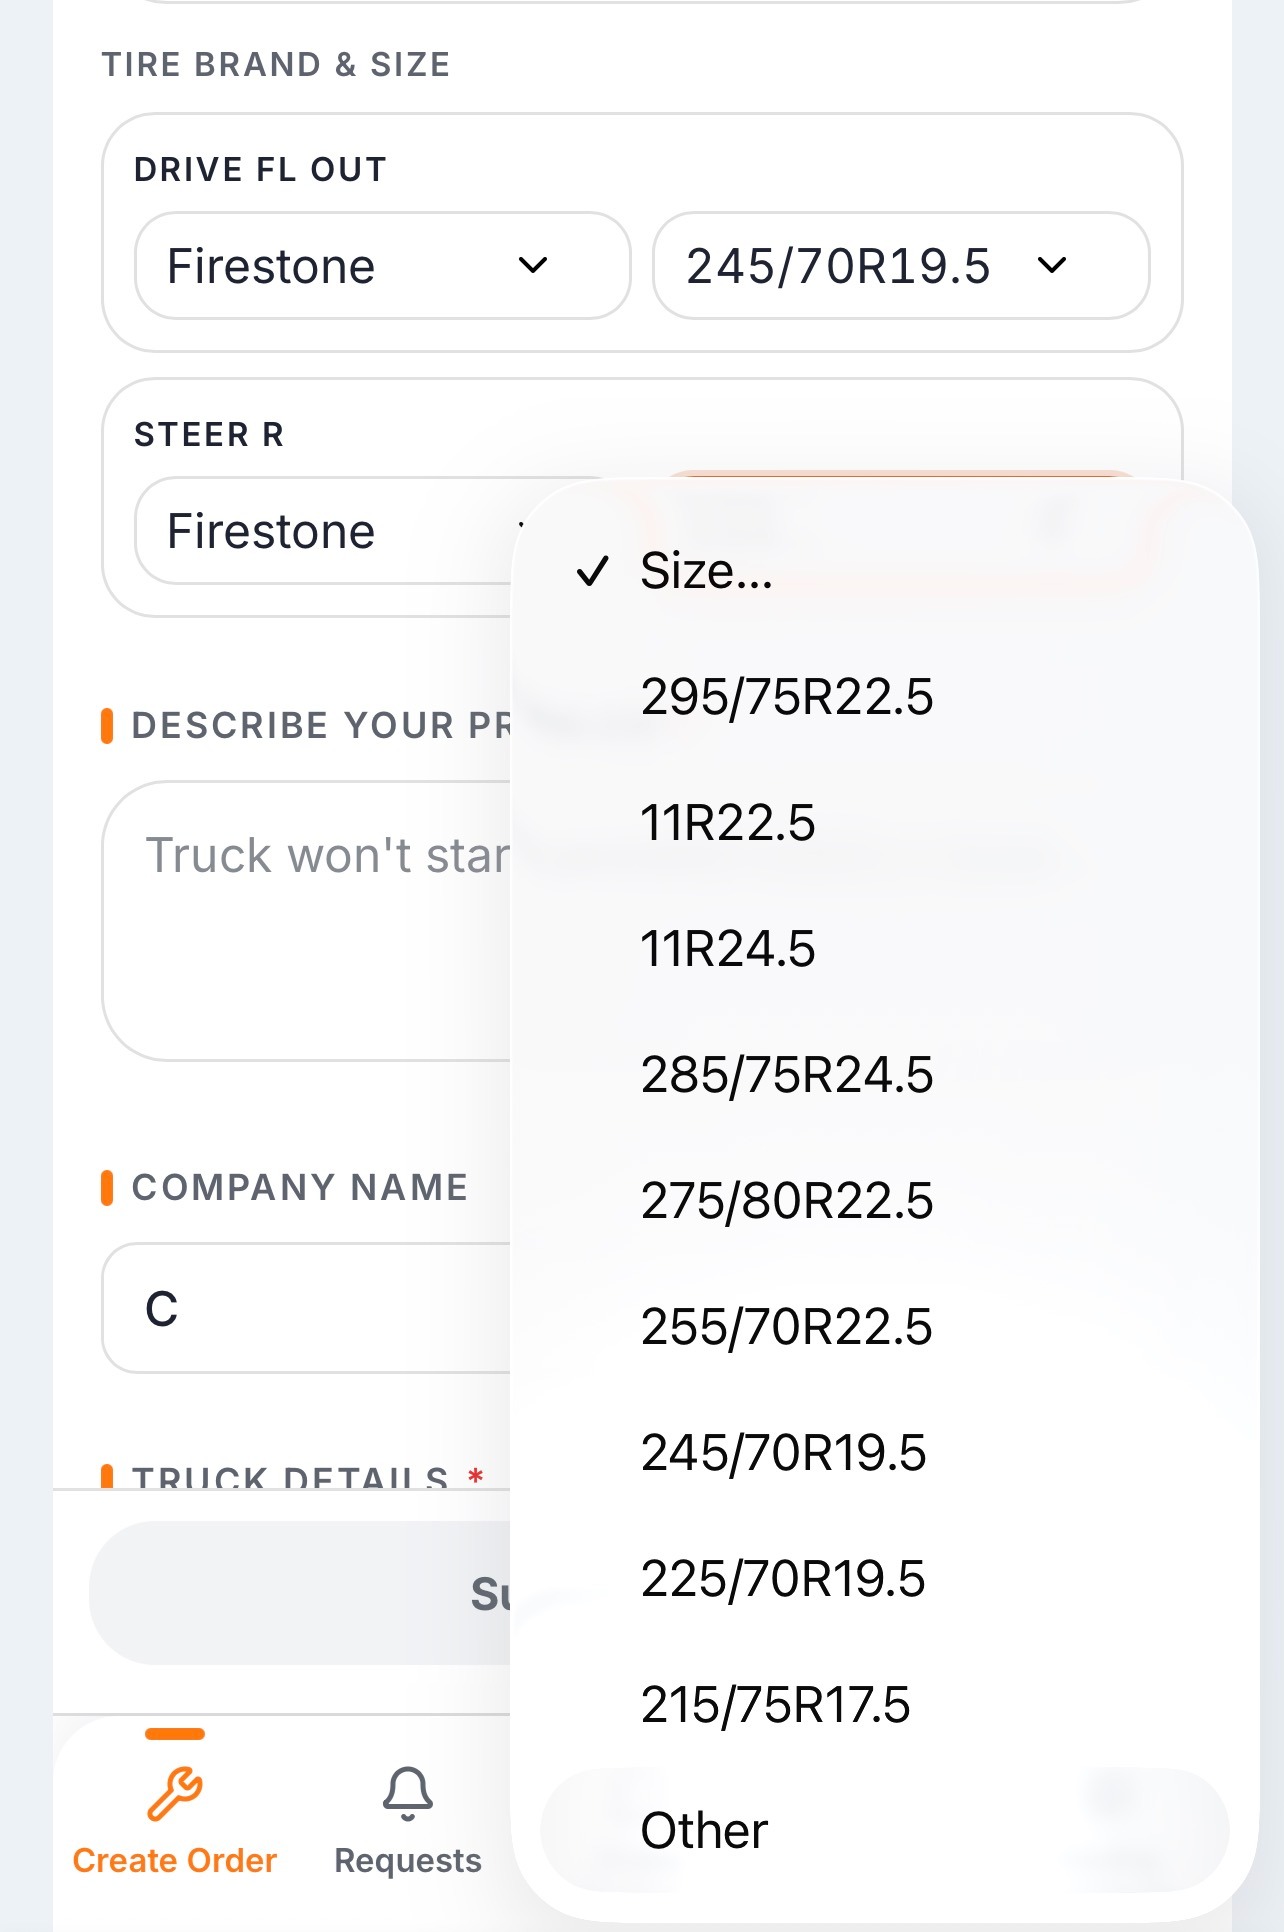
Depending on the type of service you select, you may be asked to provide additional details about the problem. If, for example, you need tire service, the system allows you to specify the tire brand and size so the service provider can better understand what may be needed for the repair or replacement.
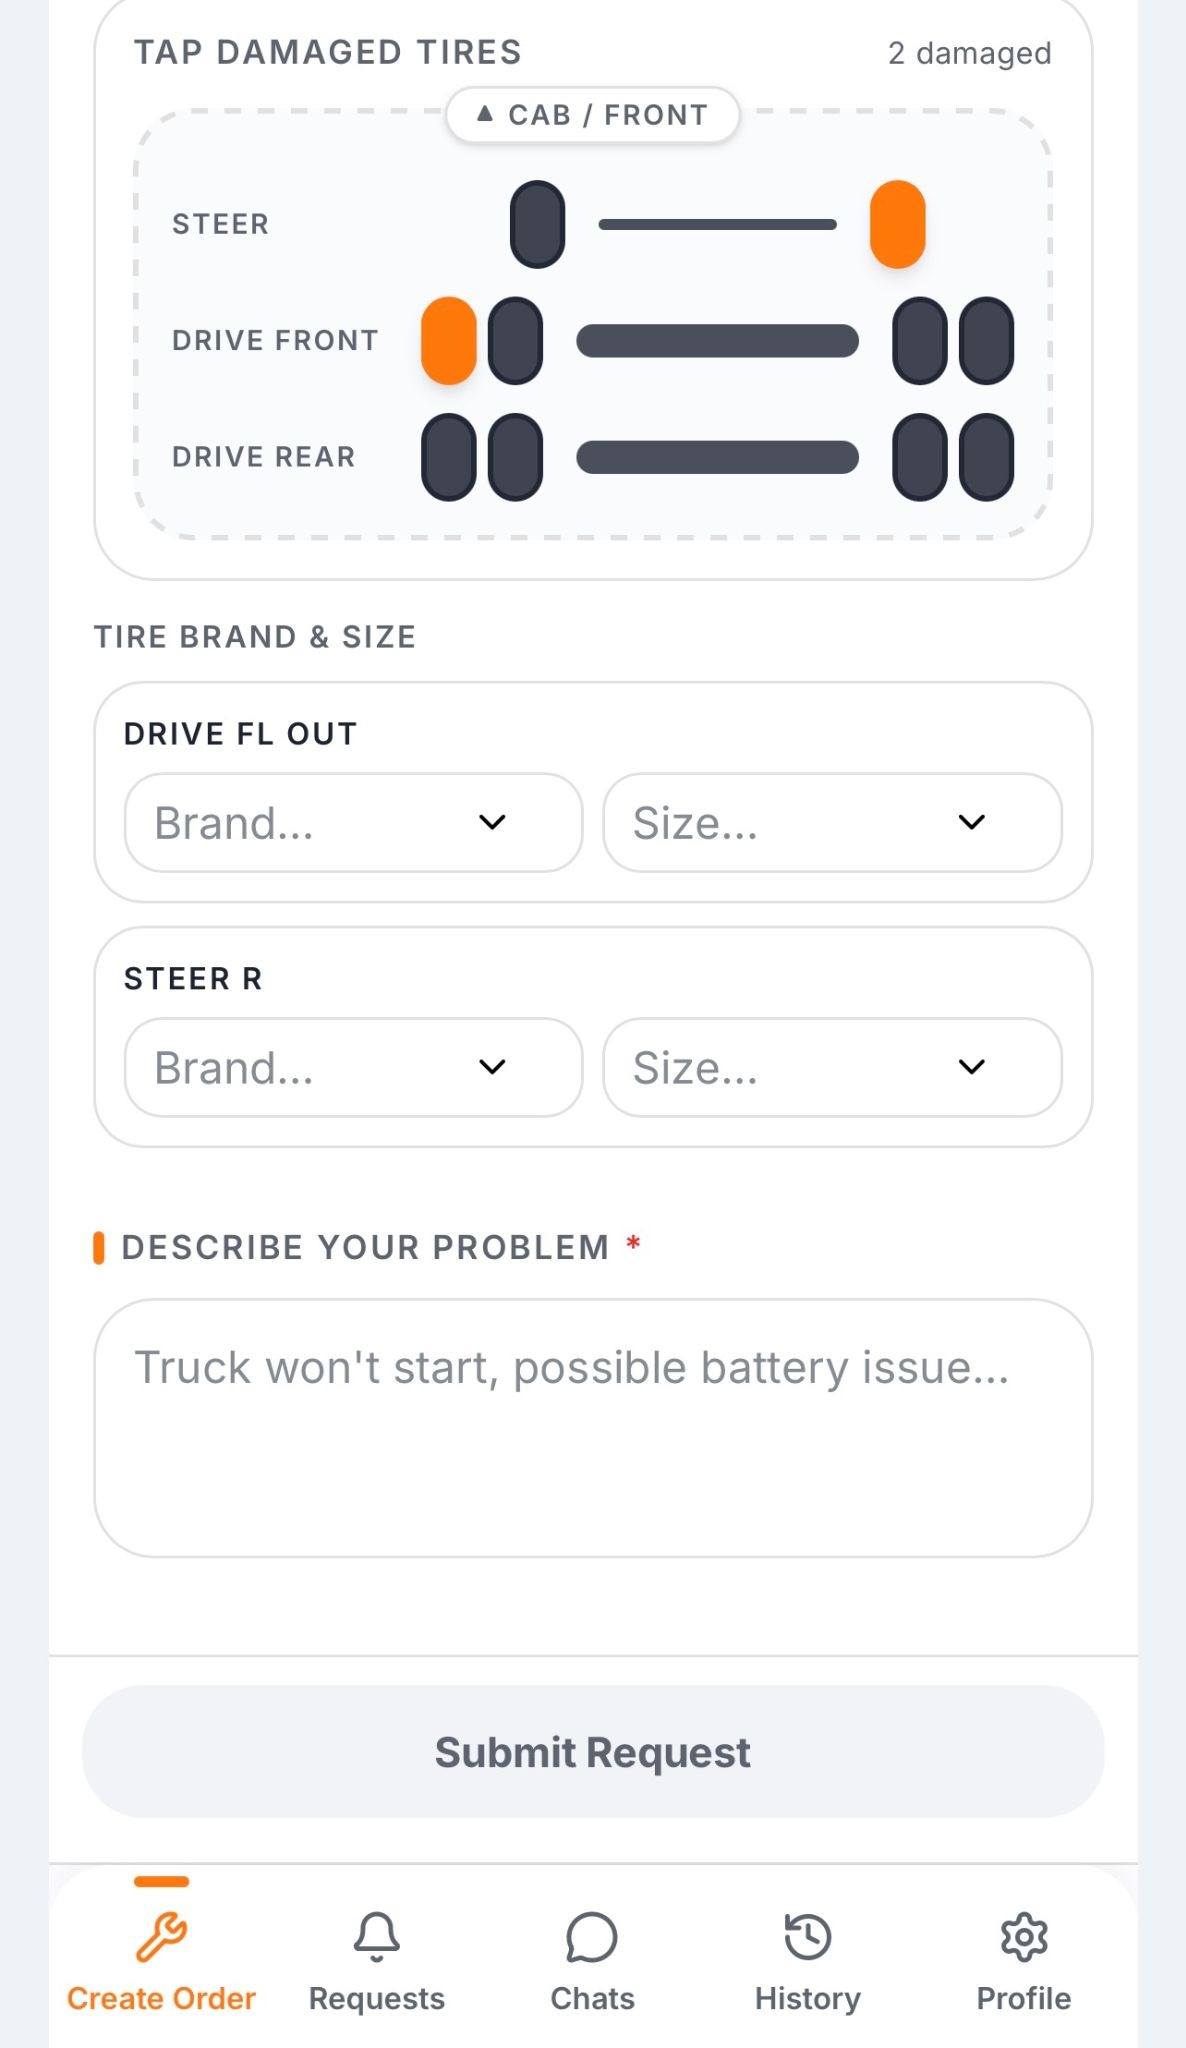
Since tires on the same truck can differ in both manufacturer and size, providing these details can help avoid confusion before the provider responds to your request. You can choose from brands such as Michelin, Bridgestone, Goodyear, Continental, Firestone, and others, and then select the appropriate tire size.
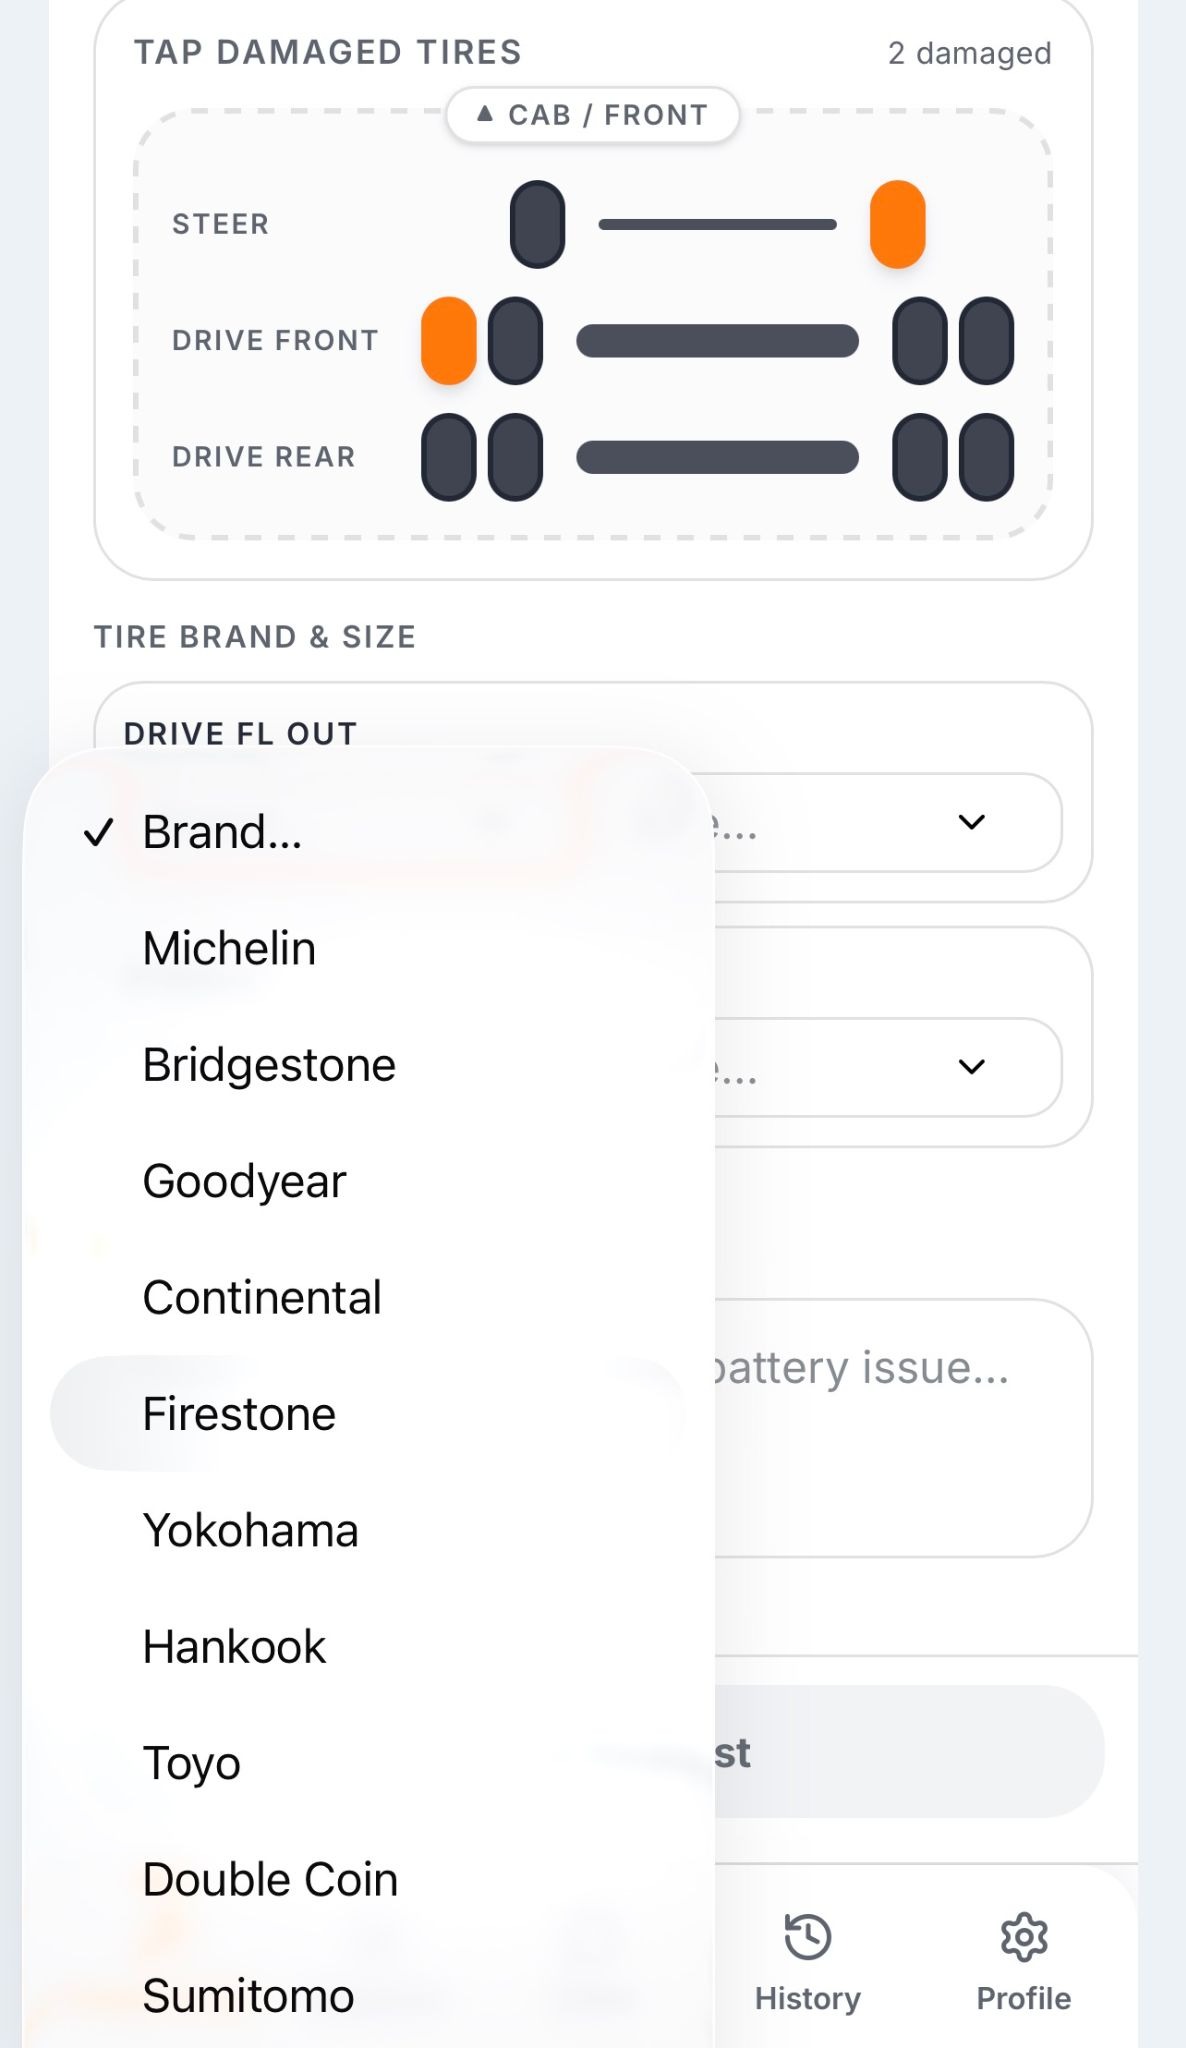
If the tire size you need is not available in the list, choose “Other” and enter the correct information in the comment section below.
The bottom section can also be used to describe the problem in more detail, whether you are dealing with a tire blowout, tire replacement, tire repair, or another issue.
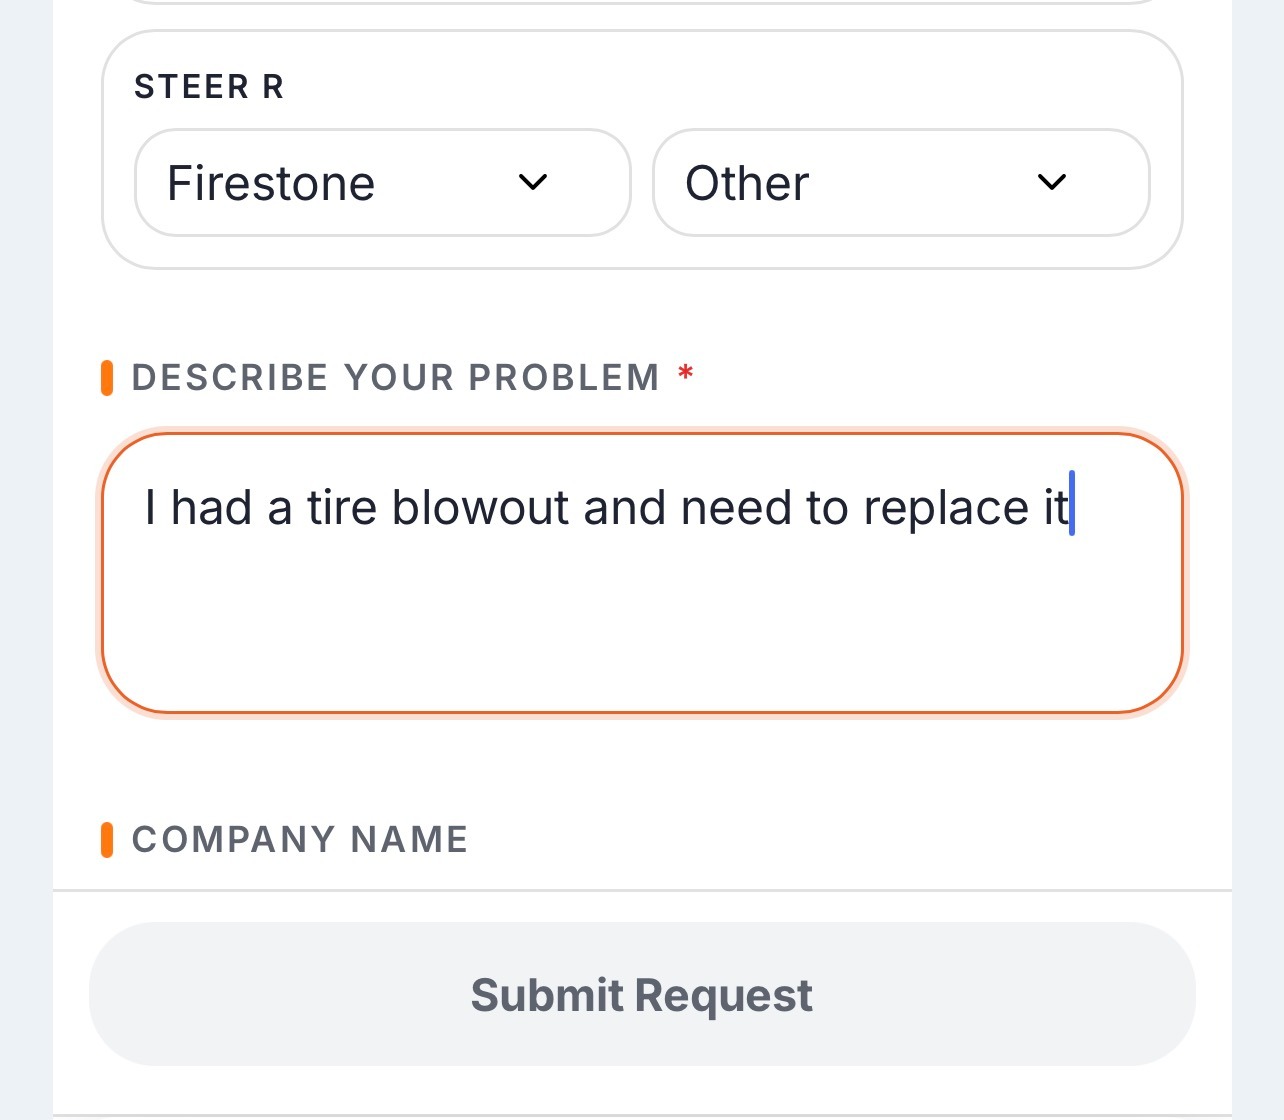
The more accurate the information in your request, the better prepared the service provider can be before arriving at your location.
4. Enter Your Vehicle Information
After describing the issue, enter your company name and vehicle details so the service provider has additional information about the equipment involved.
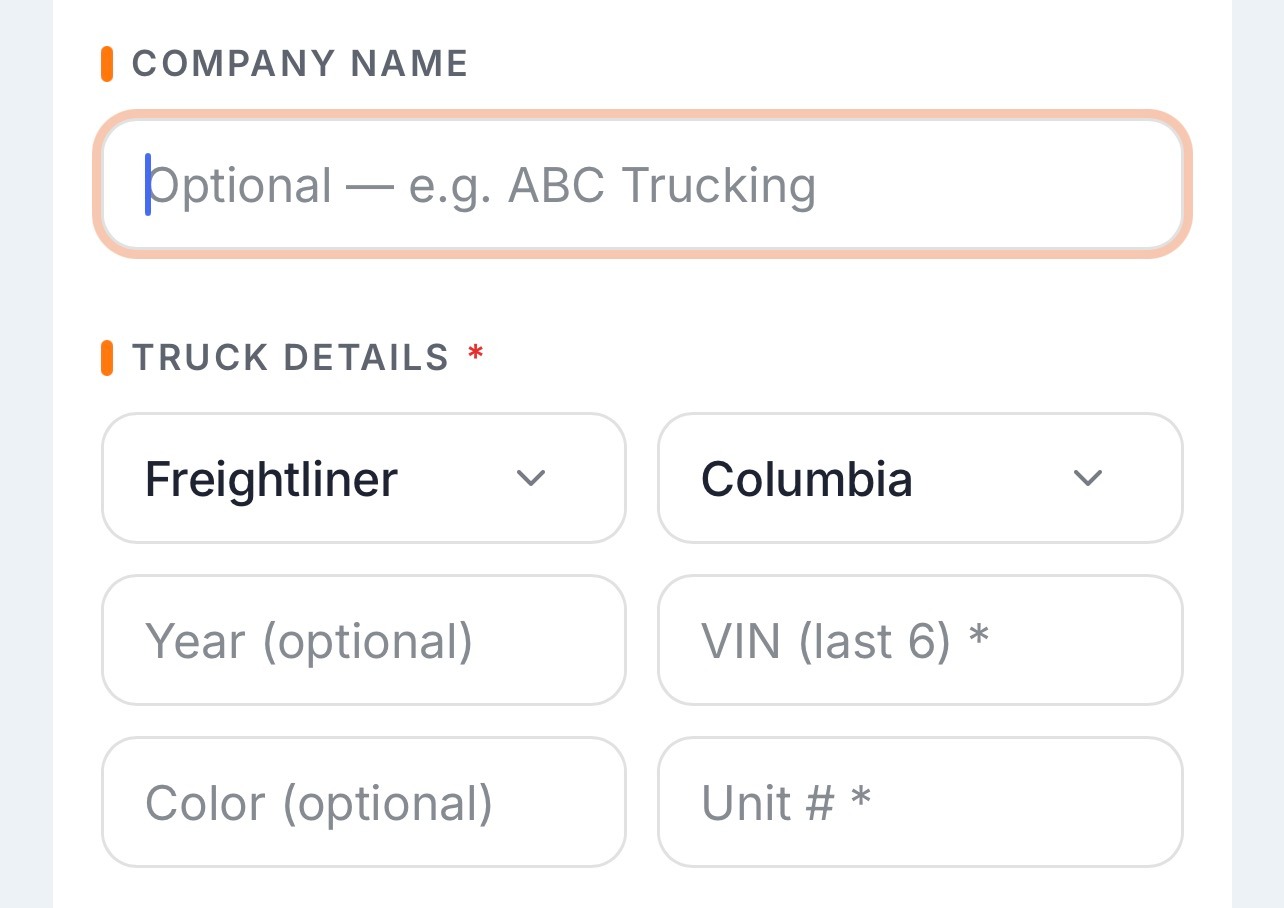
Continue by choosing the vehicle make and model, and then provide the year, VIN, color, and Unit #.
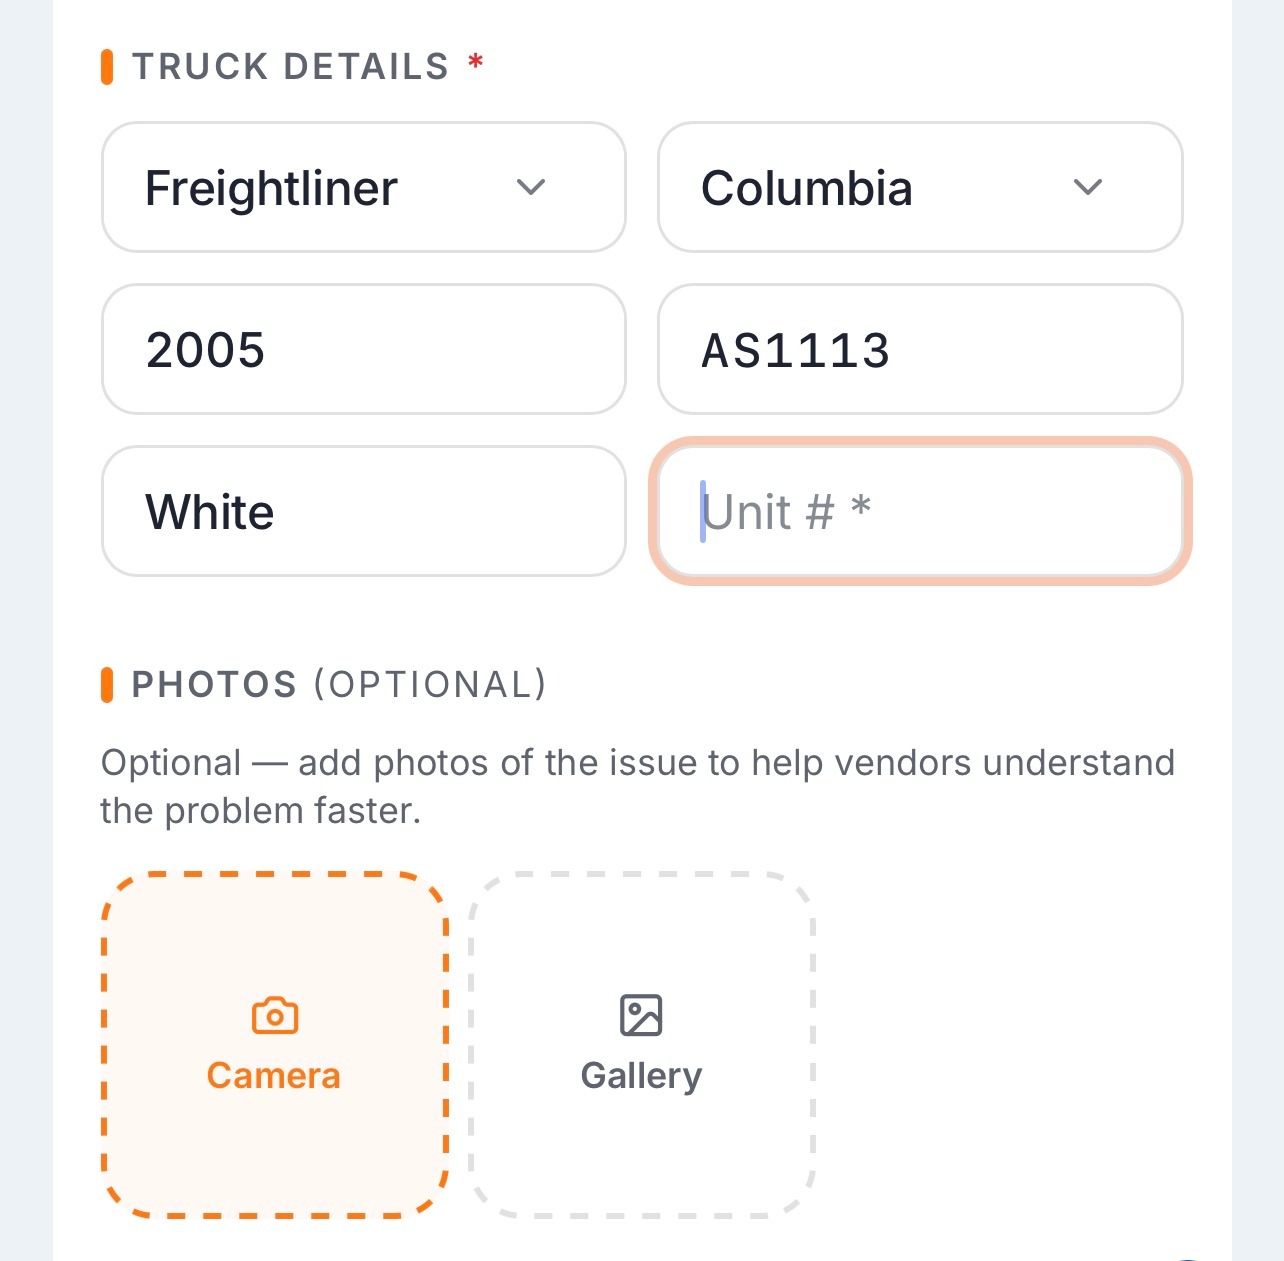
These details can help the service provider identify the vehicle and better understand the type of equipment they will be working with. Completing this section also helps ensure that the information attached to the request is as accurate and complete as possible before it is sent to nearby providers.
5. Add a Photo of the Issue
If possible, you can also add a photo of the problem by taking a new picture or choosing one from your phone’s gallery.
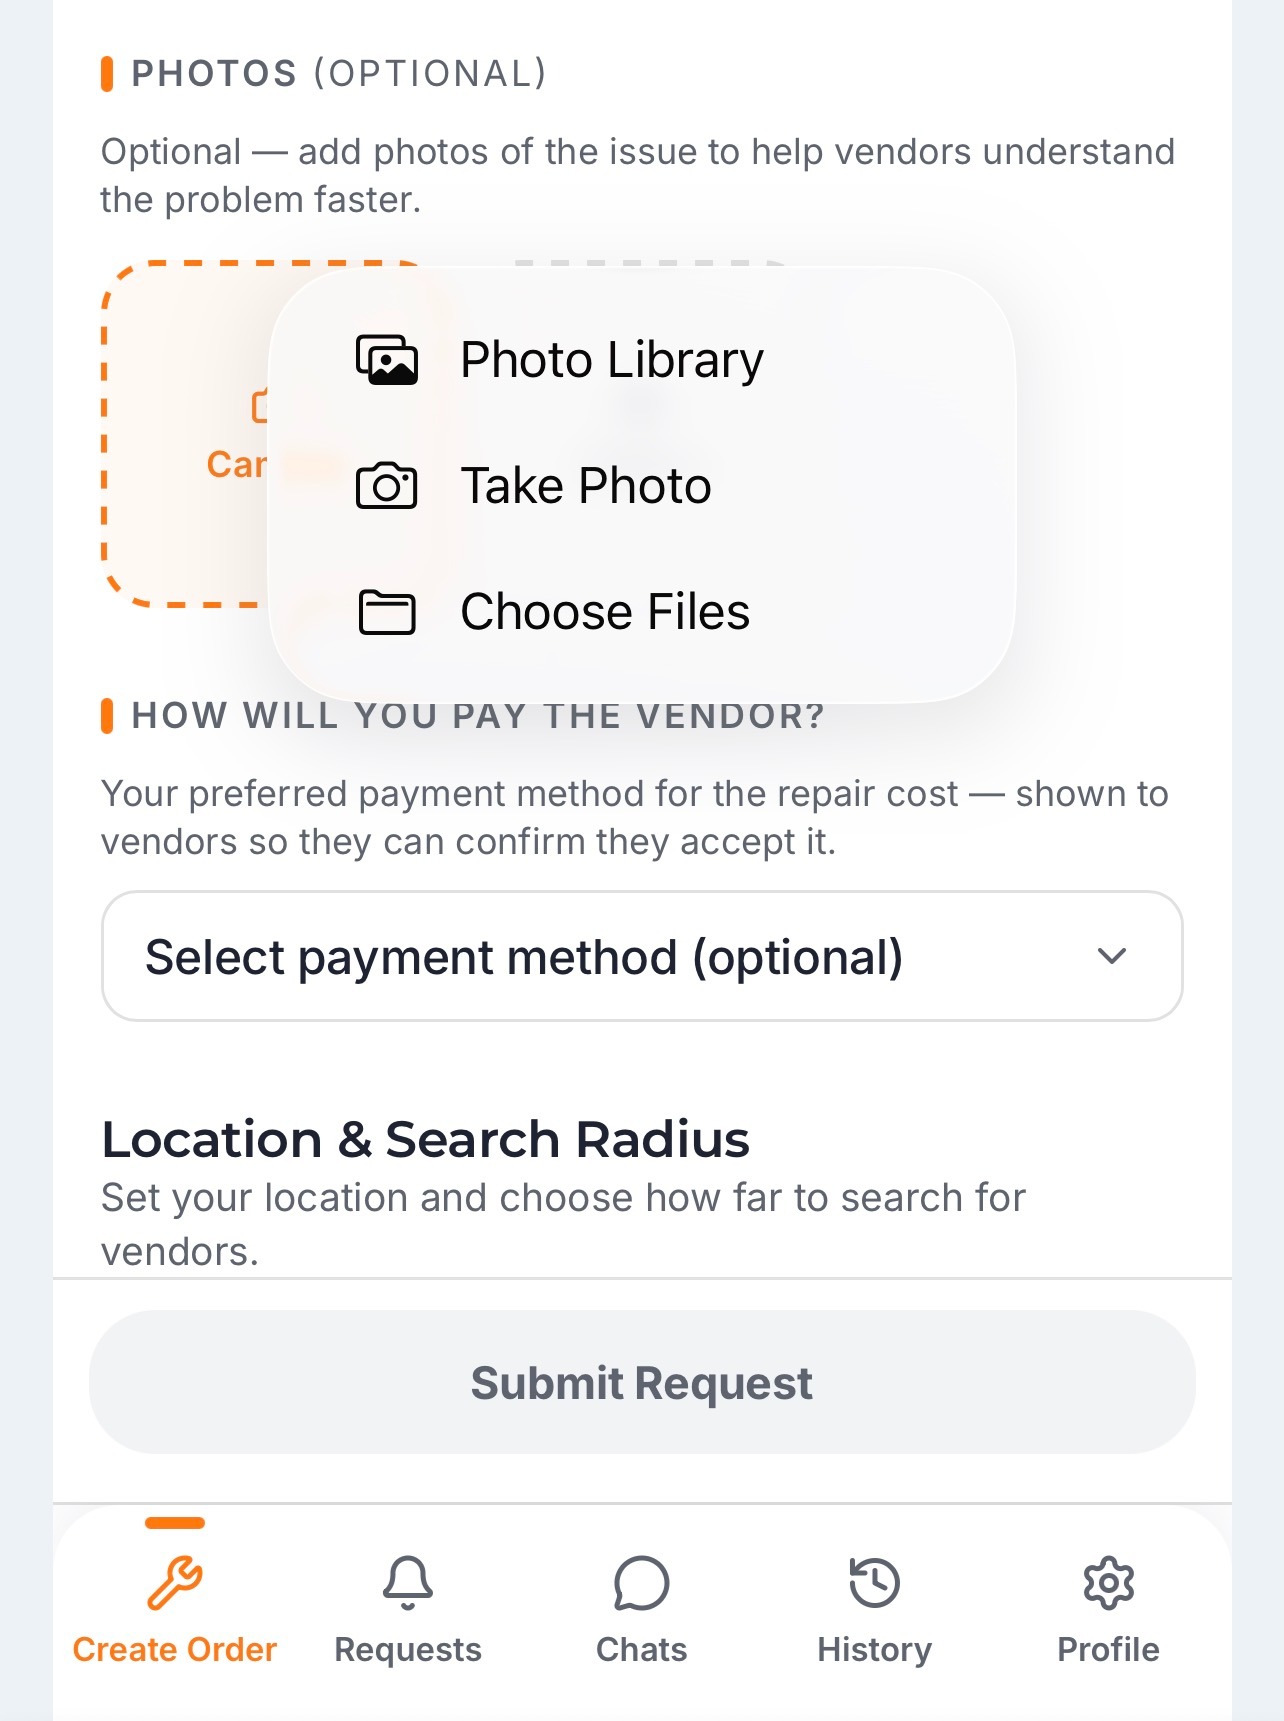
While a written description provides the basic information, a photo can give the service provider a clearer view of the current situation before deciding how to respond. This can be particularly useful when you are dealing with visible damage or a tire problem. Seeing the issue in advance may help the provider better understand what type of assistance, equipment, or preparation could be required before arriving at your location.
6. Choose Your Payment Option and Location
Once the information about the vehicle and the issue has been added, select the payment option you would like to use. This is another factor service providers can consider when reviewing your request and deciding whether they can provide the required assistance.
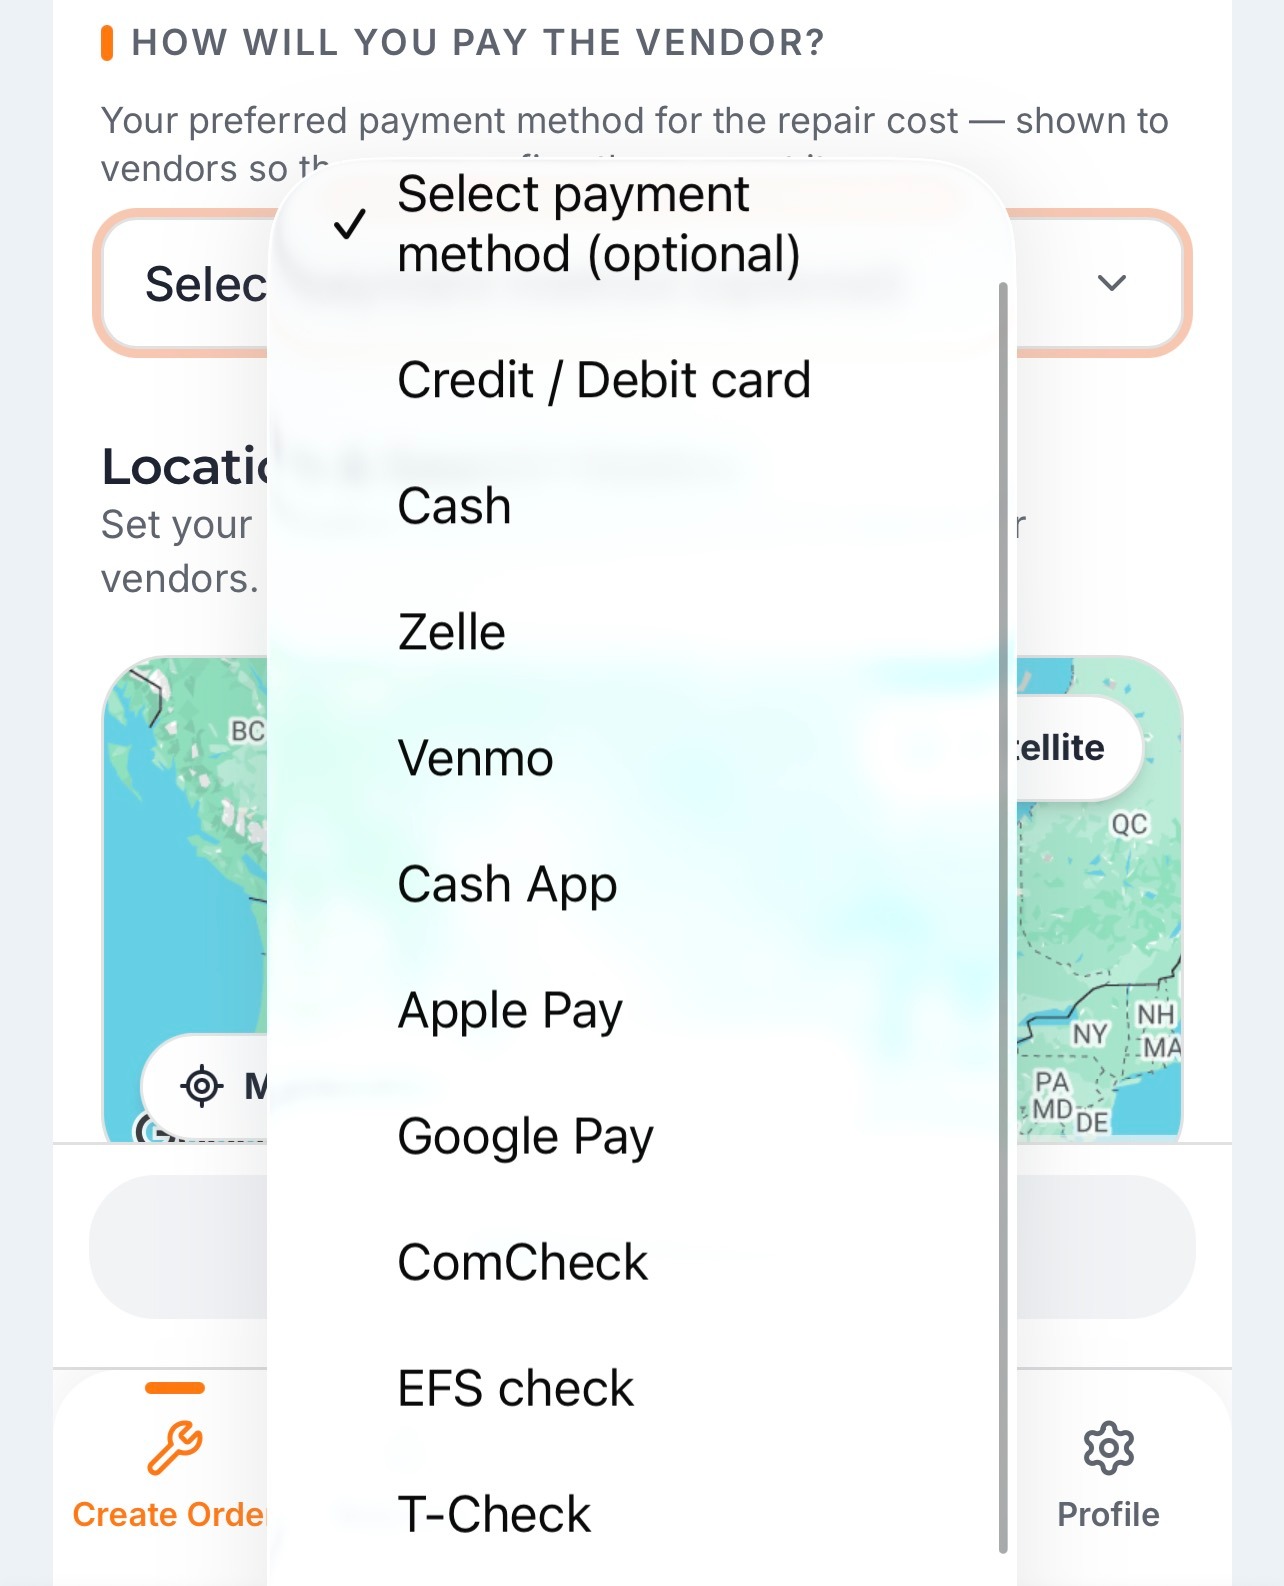
You will then need to choose your current location or drop a pin on the map. The location is used to identify service providers available near you, while the search radius allows you to control how far from your location the system will look for available providers.
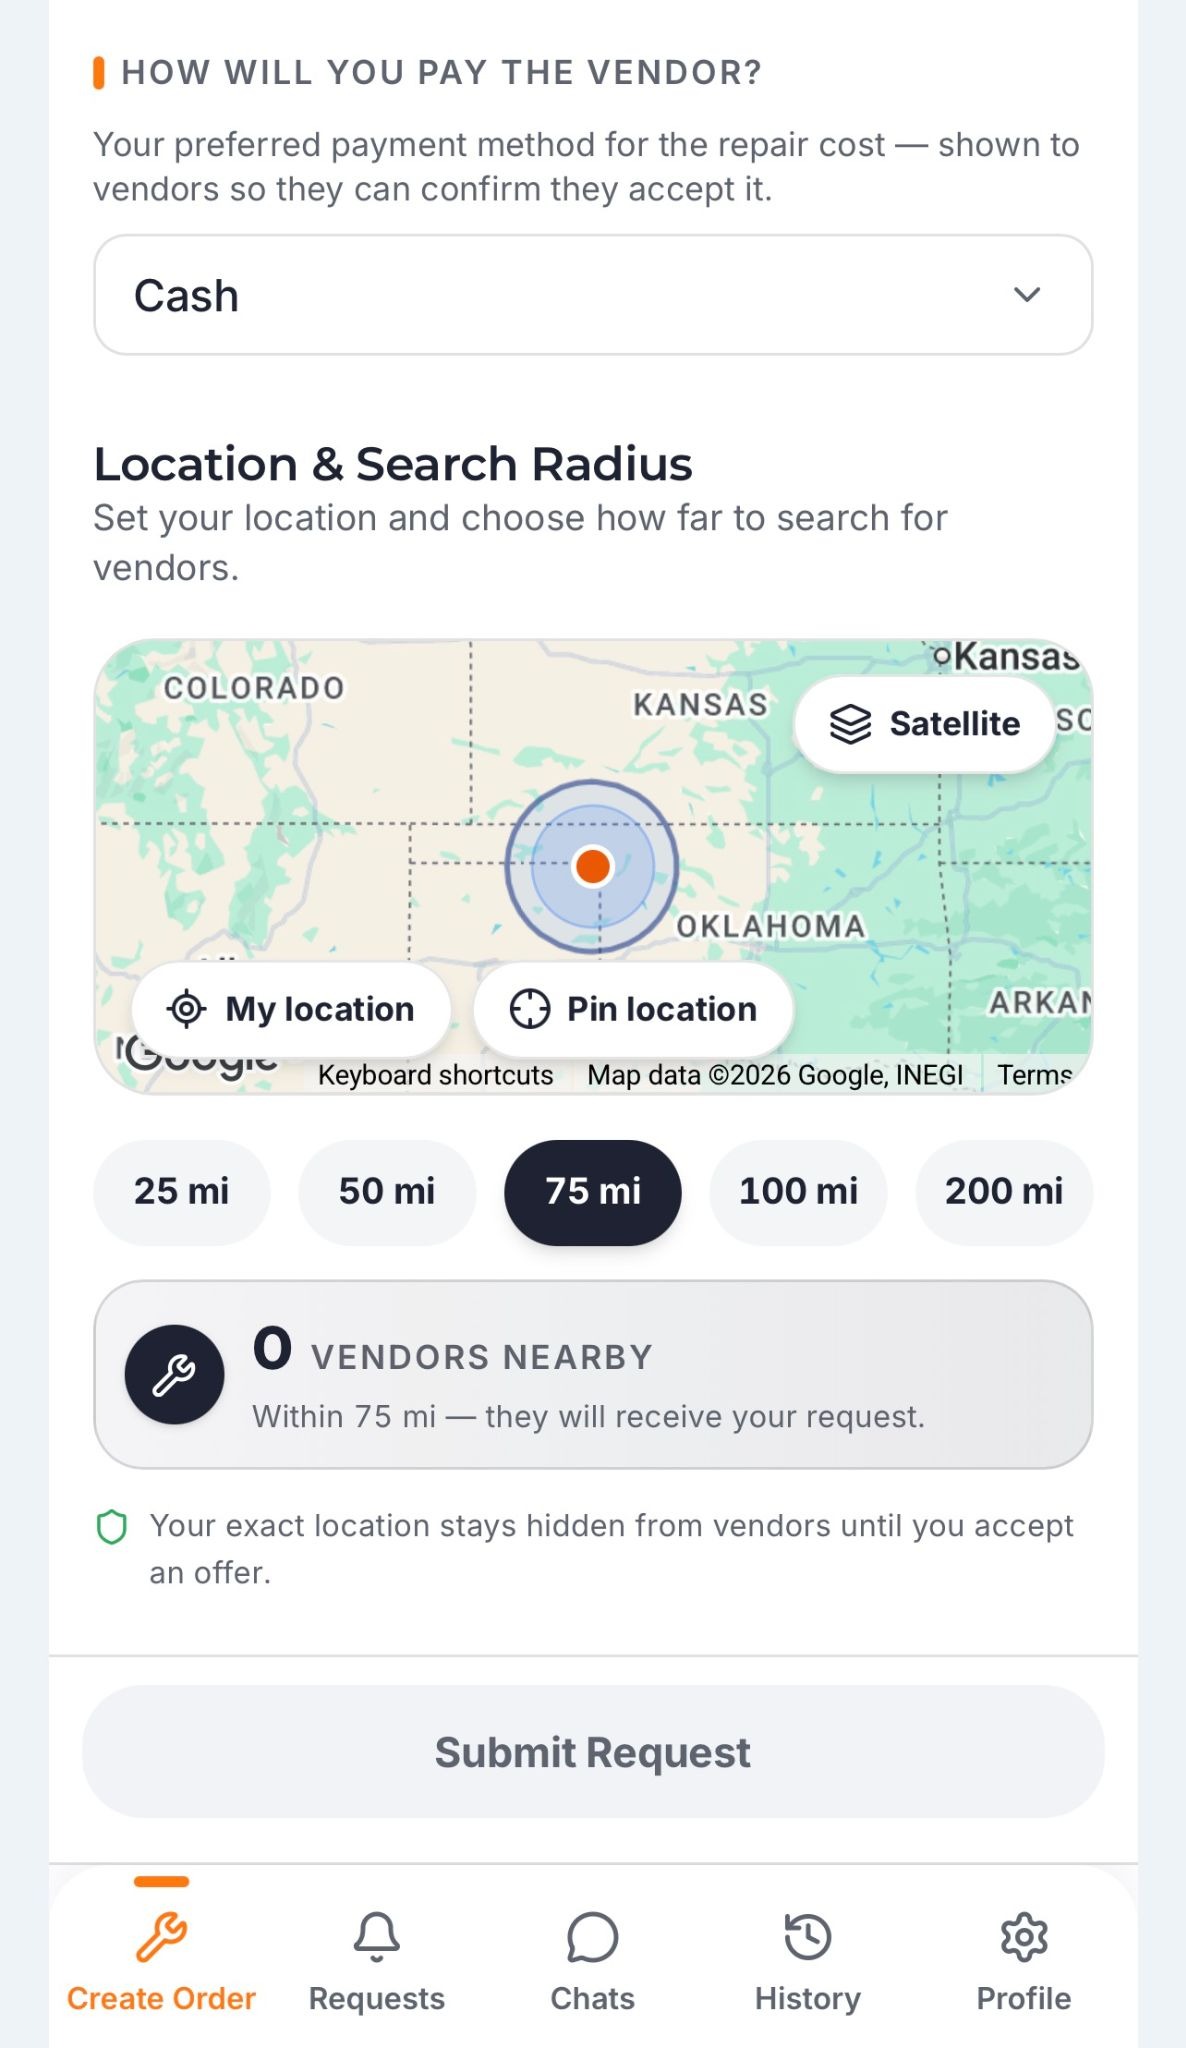
Below the map, you can see how many service providers are available within your selected search area. A larger search radius can give you access to more providers and potentially more offers, but providers farther away may take longer to reach you.
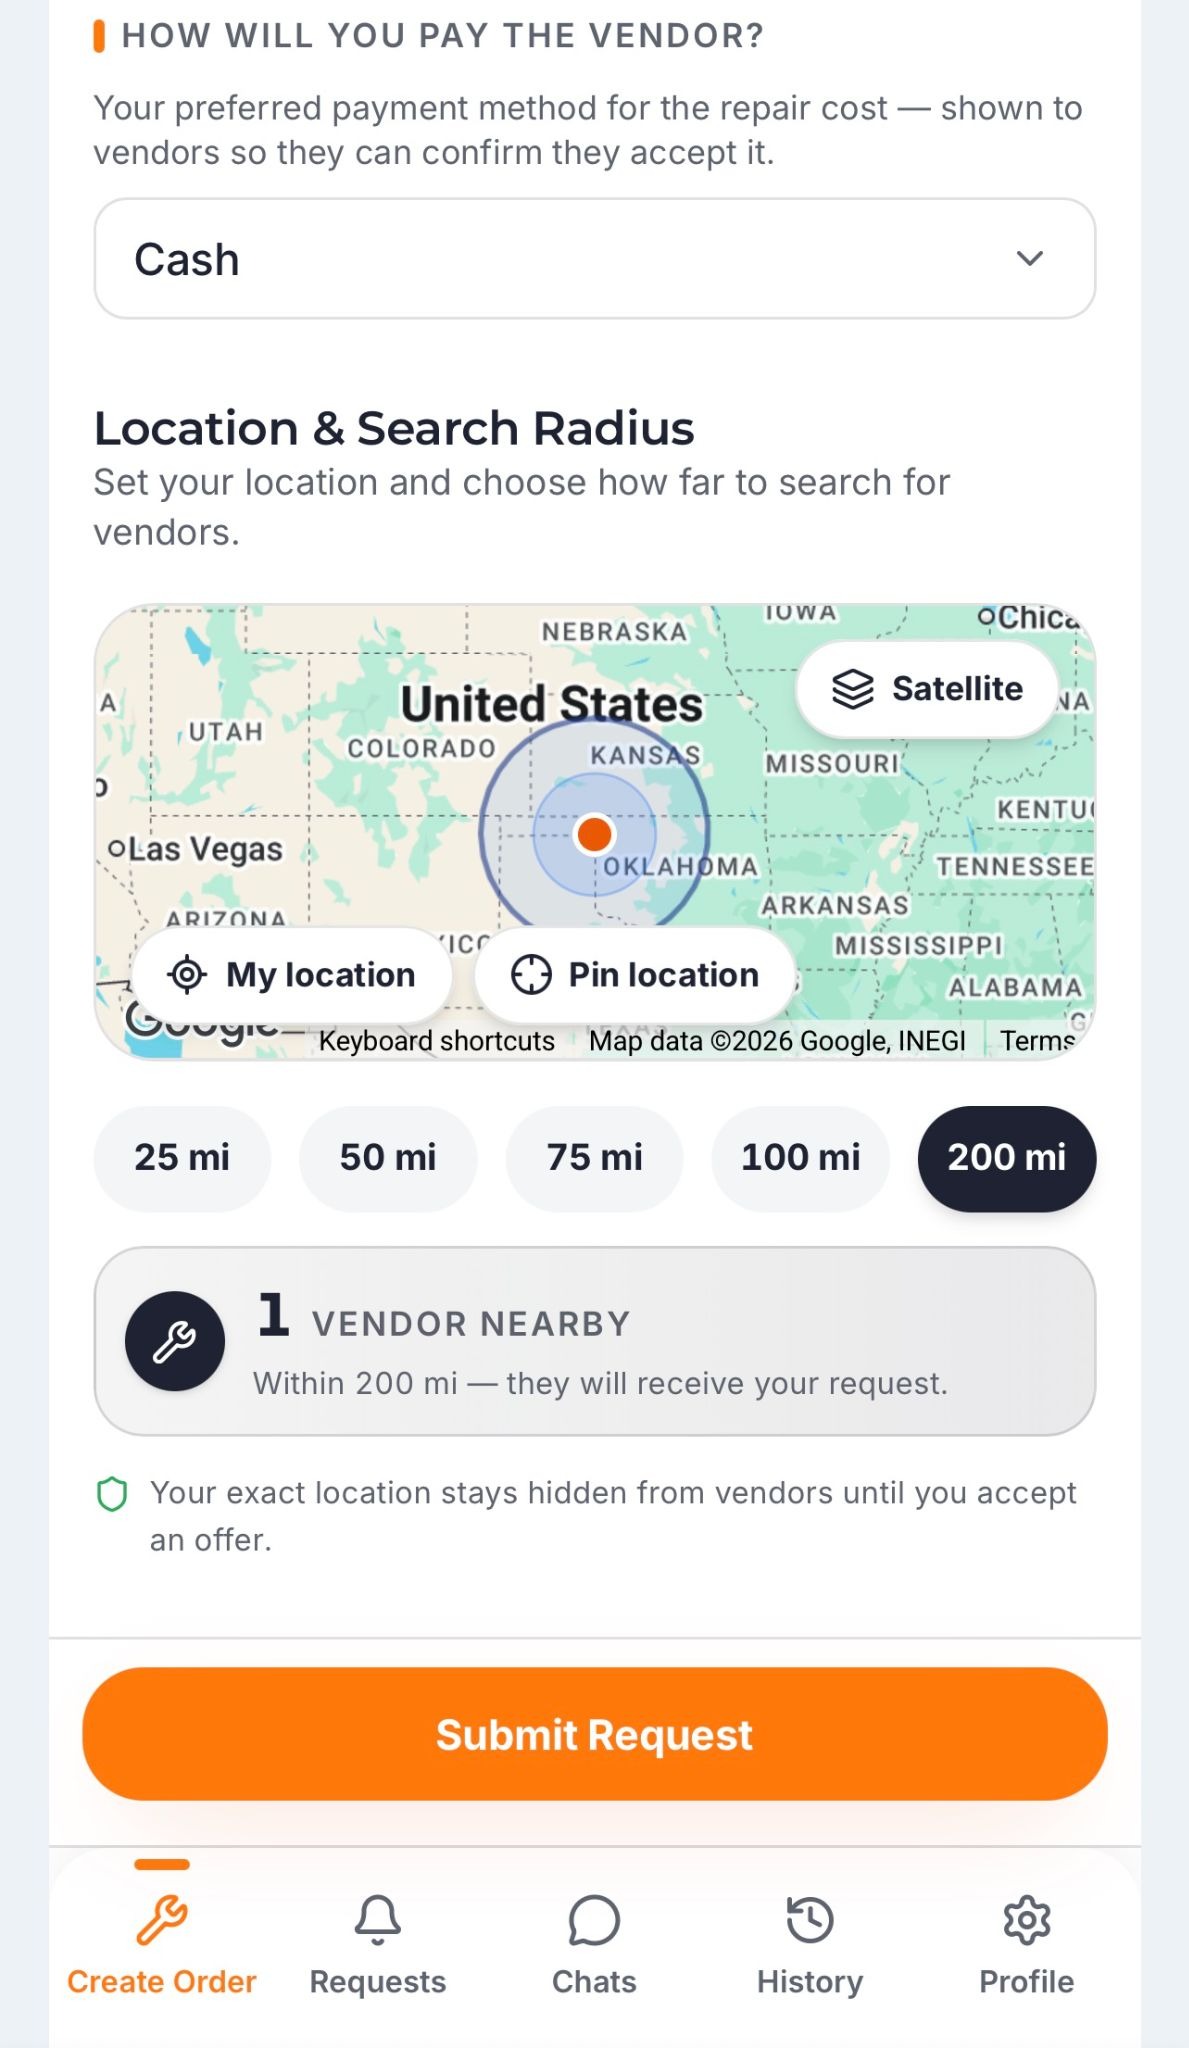
For that reason, the best search radius may depend on your situation. If you need assistance as quickly as possible, you can begin with a smaller radius and focus on providers located closer to you. If fewer providers are available, expanding the search area can give you more options.
7. Review Your Details and Submit the Request
Before sending the request, review the information you entered, including the vehicle details, description of the issue, payment option, location, and search radius. Once everything is correct, tap the service request button at the bottom of the page.
Note: If the button is grey, some required information is still missing. Once all required fields have been completed, the button will turn orange, indicating that your request is ready to submit.
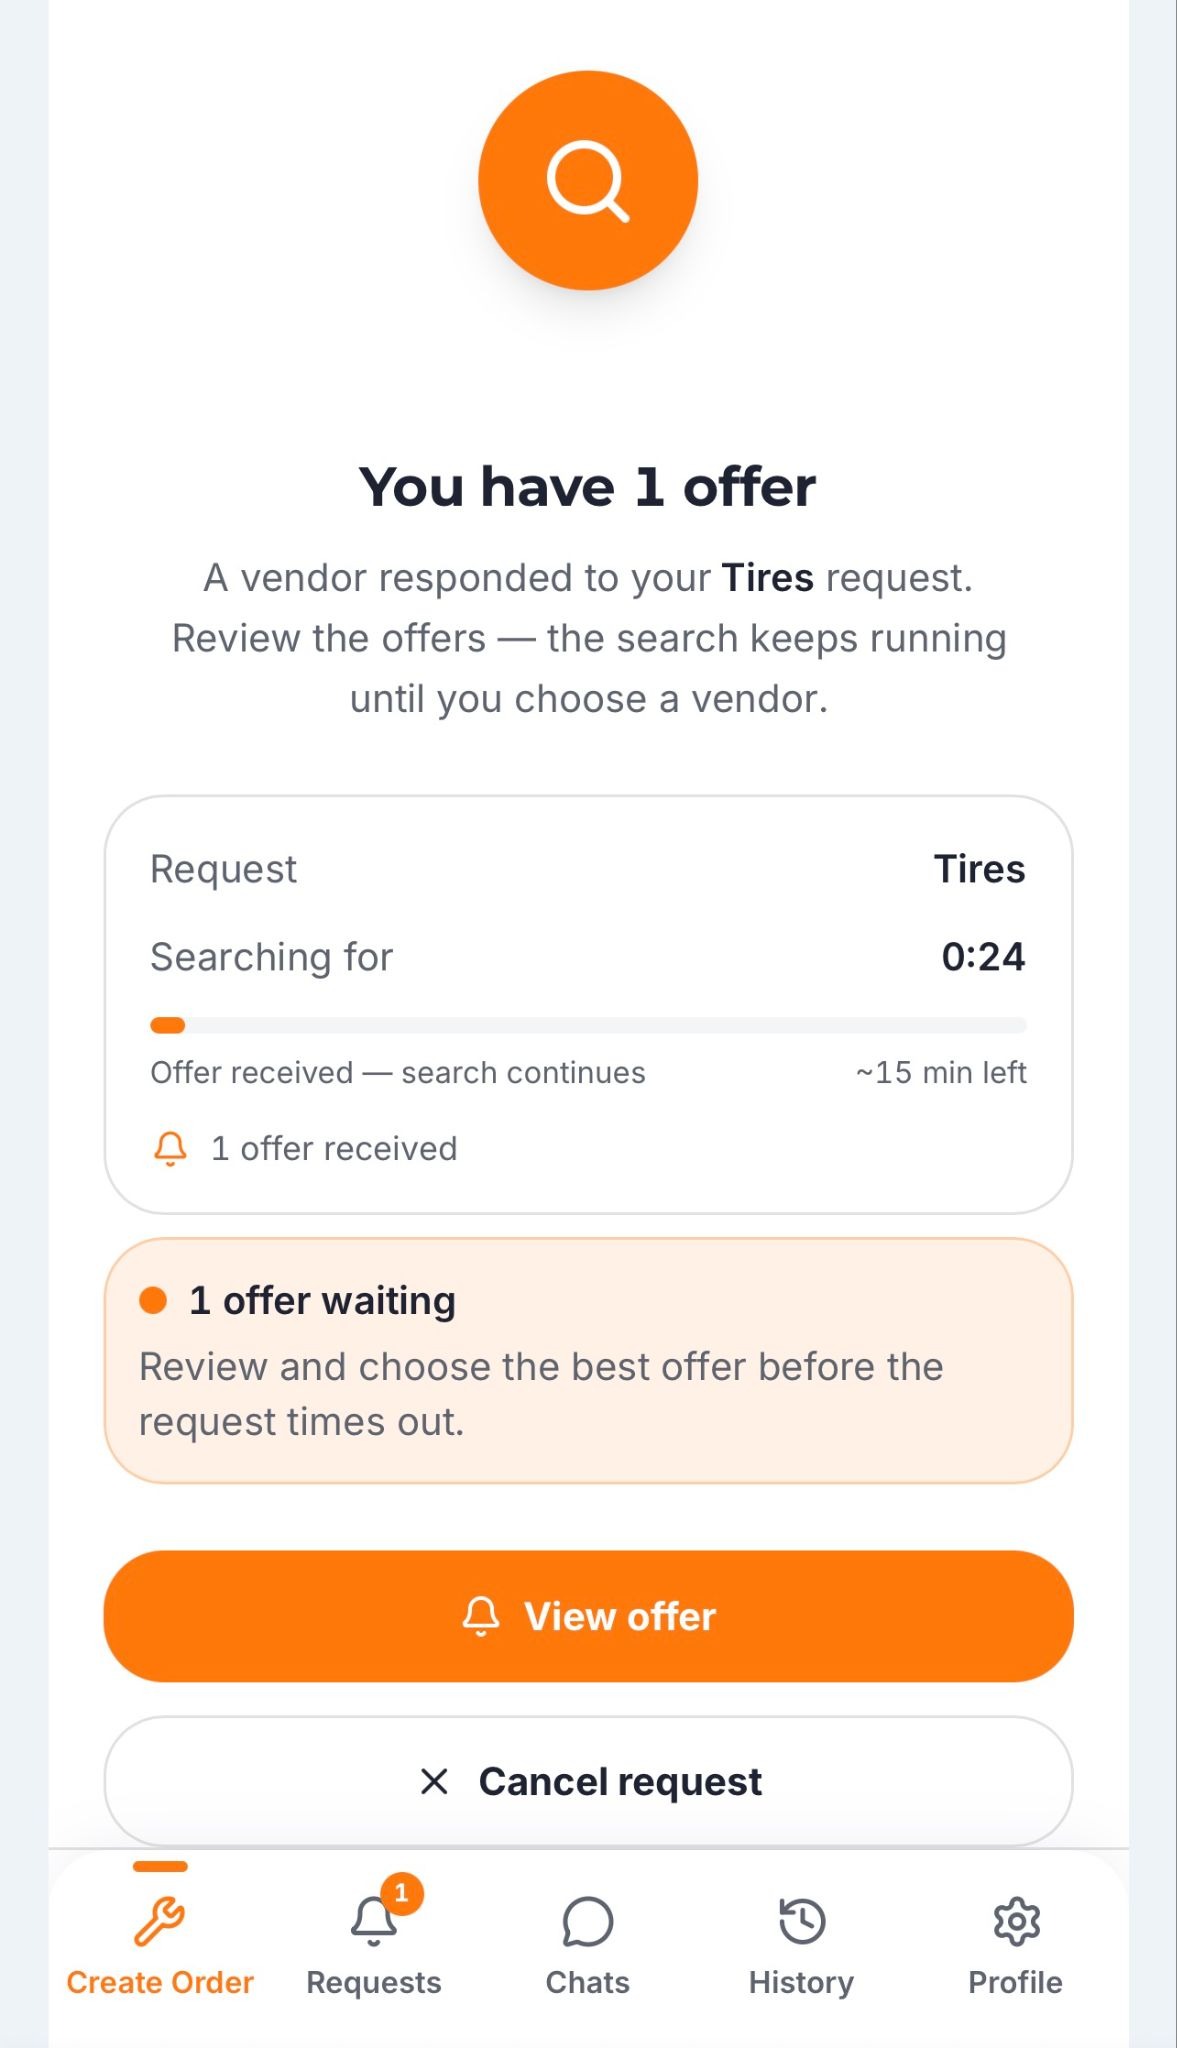
After you submit the request, the system will direct you to another page where you can see nearby service providers and receive offers from those interested in providing assistance.
8. Review Offers From Service Providers
Submitting your request does not automatically assign you to the first available provider. Instead, nearby service providers can review your request and send you offers, allowing you to compare the available options before making a decision.
When a vendor responds to your request, you will receive an offer notification. Tap “View Offer” to check the information provided by the service provider. The initial offer preview usually includes the company name, price, and estimated time of arrival (ETA), allowing you to quickly review the key details.
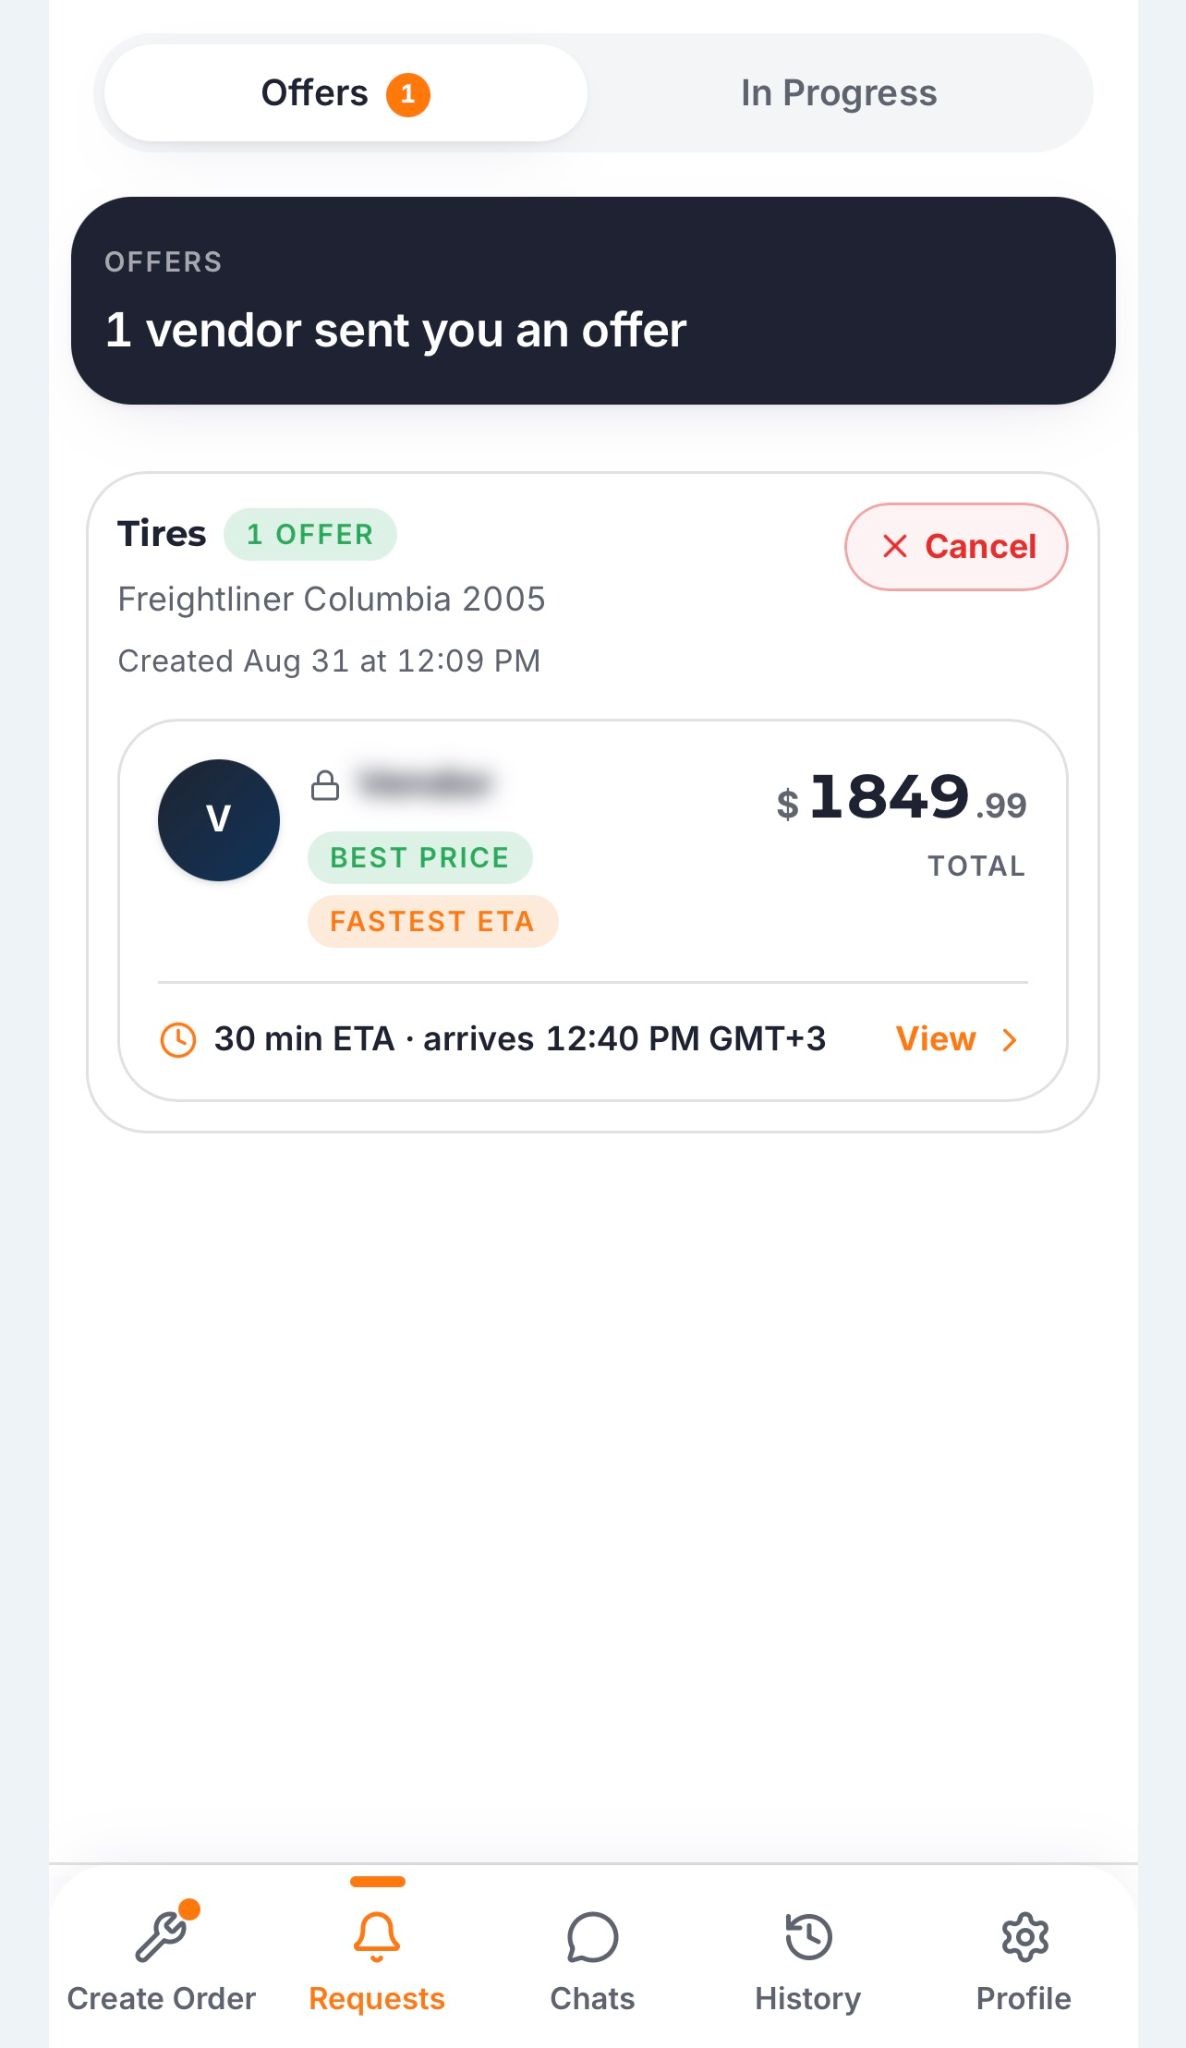
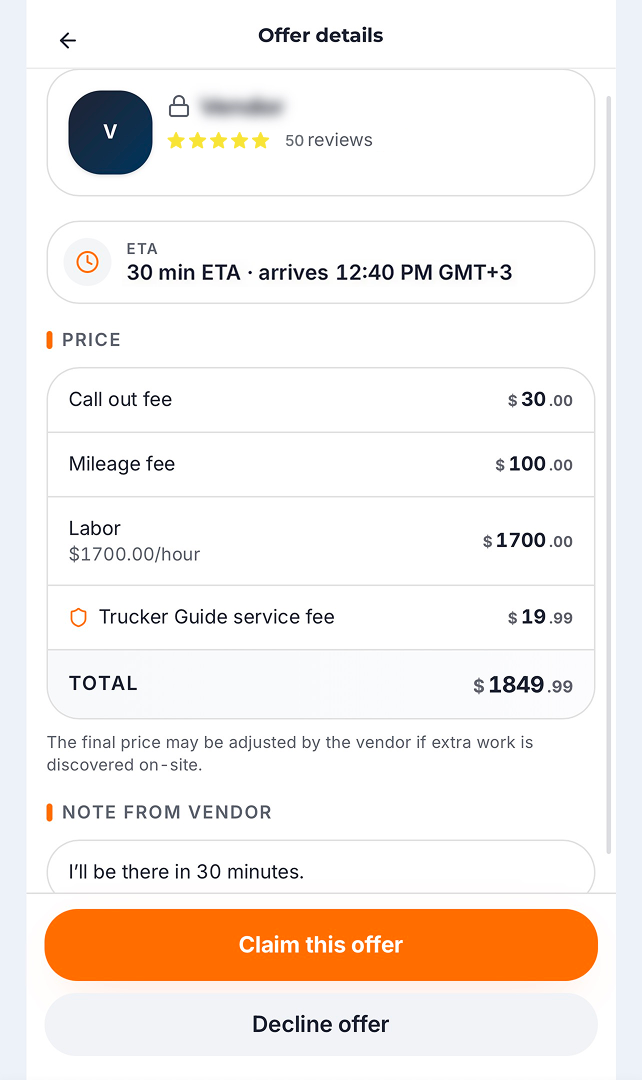
If you need more information before deciding, tap the provider’s offer to view the full details. There, you can see the star rating, customer reviews, pricing details, and any additional notes, if available, to help you compare options more thoroughly.
9. Claim or Decline an Offer
Once you have reviewed the available offers, you can choose the option that works best for your situation. If you want to accept an offer, tap “Claim this offer,” while “Decline” allows you to reject an option and continue considering other available offers. After you claim an offer, the service provider will receive a notification about your decision.
10. Wait for the Assistance
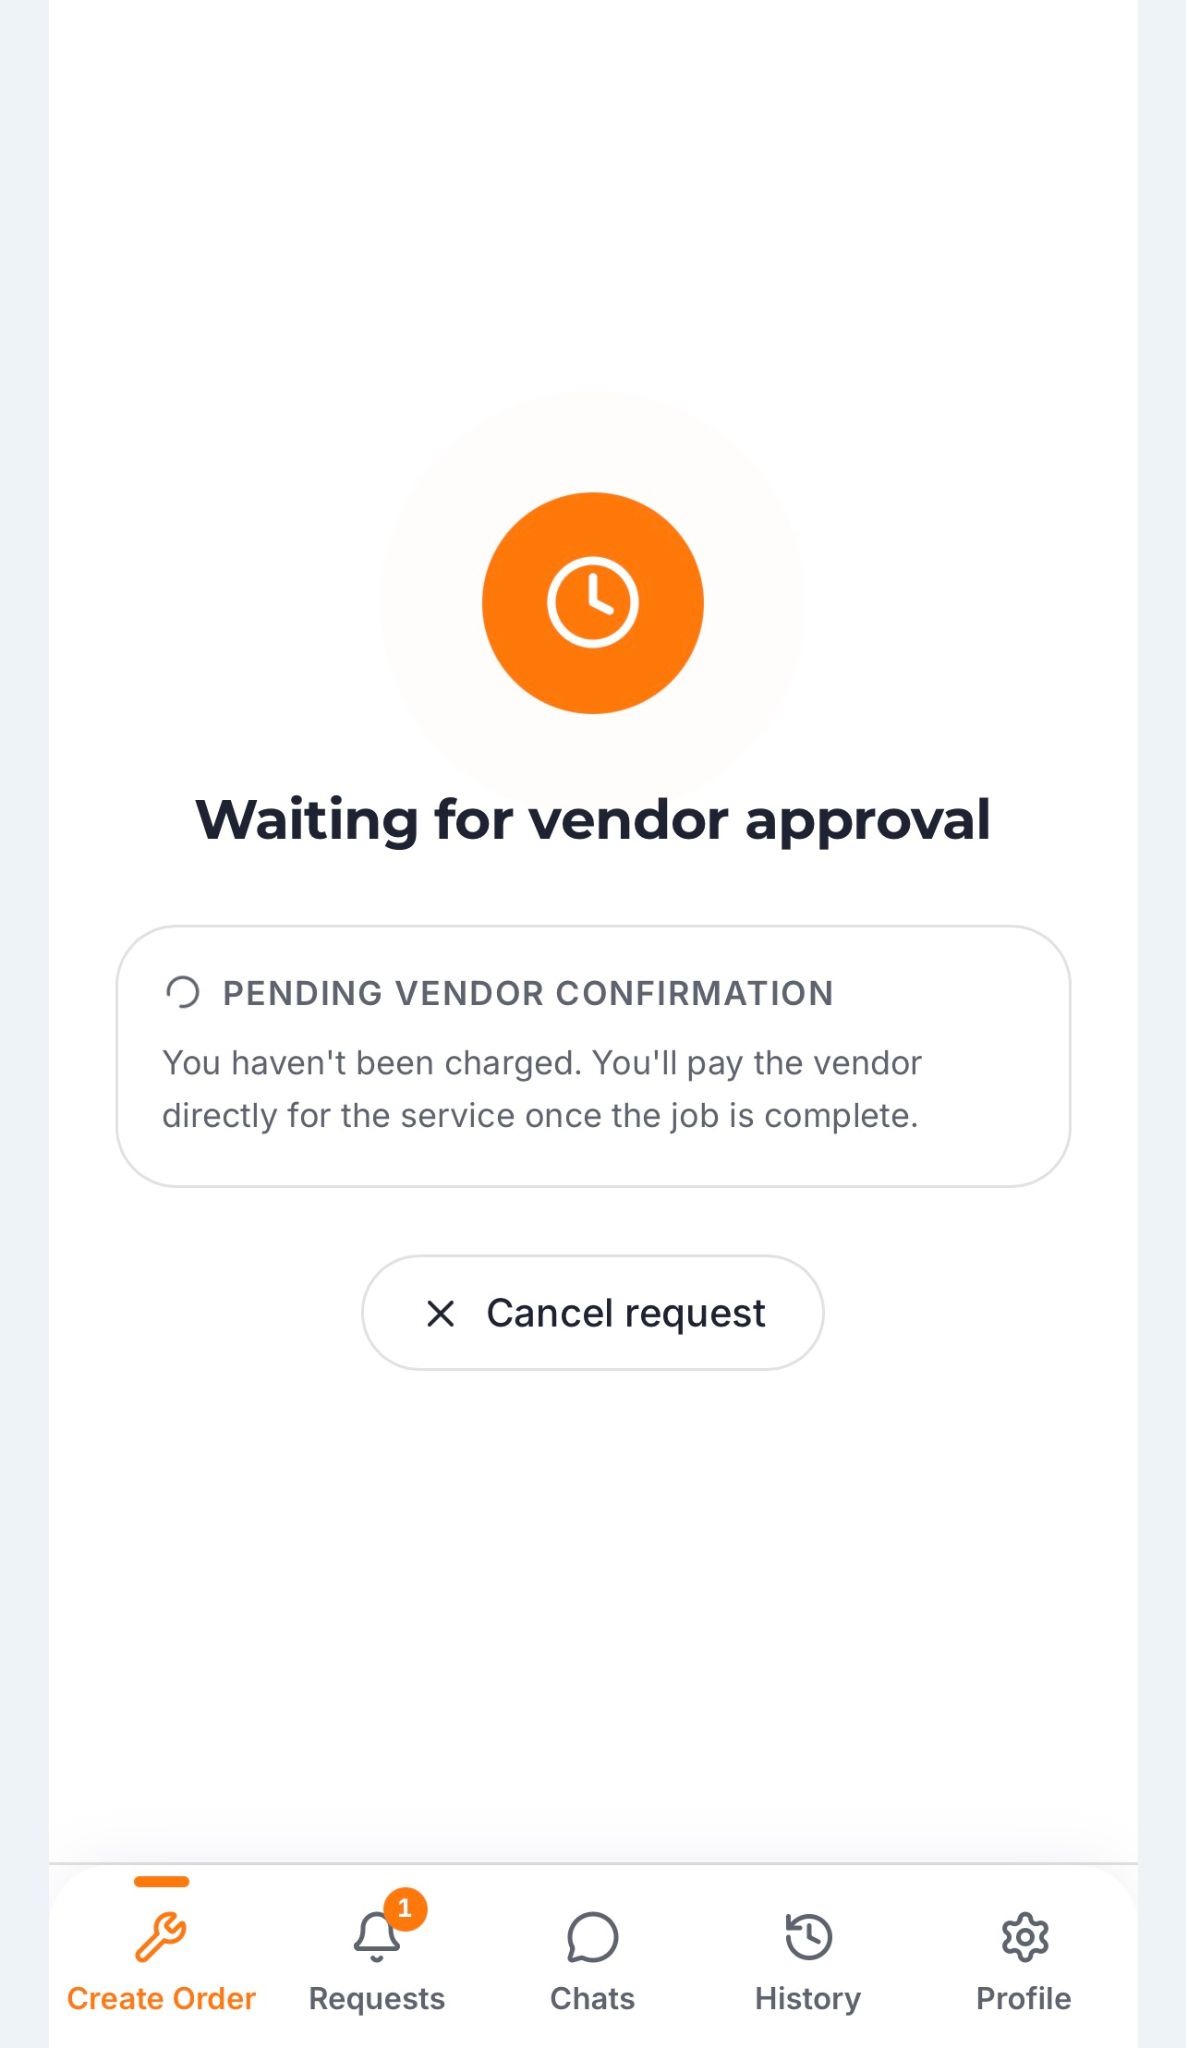
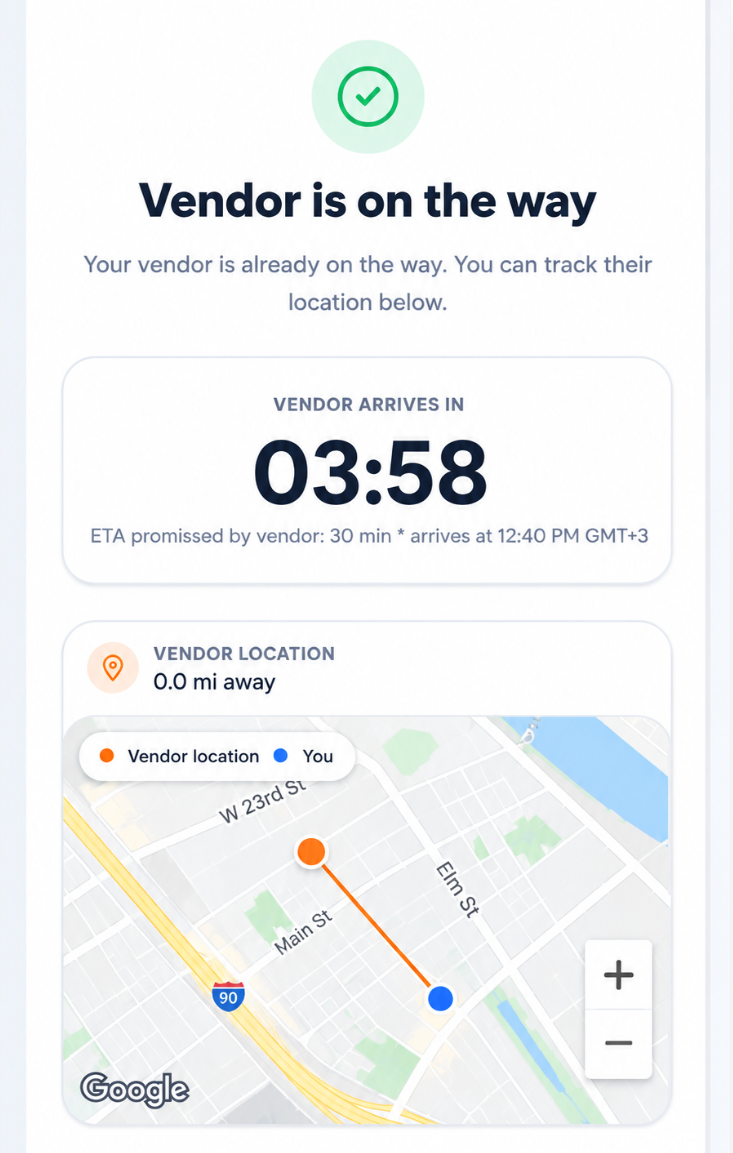
After the provider confirms your request, you’ll see a timer on your screen showing the provider’s estimated arrival time. Use the timer to keep track of your request while assistance is on the way.
11. Pay and Rate the Job
Once the requested assistance has been completed, you or the vendor can tap “Accomplish” to close the request.
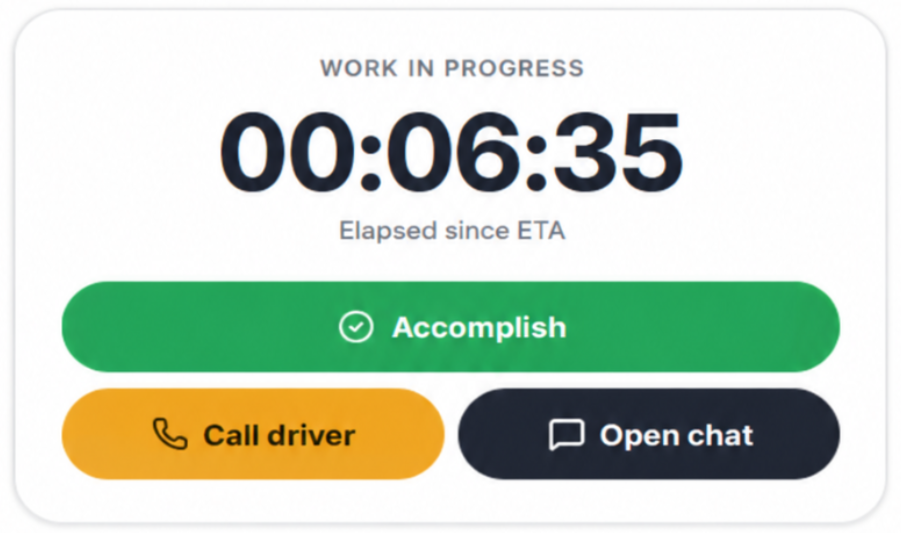
You’ll then pay the vendor according to the offer you accepted, plus the $19.99 Trucker Guide service fee. Once the payment is complete, you can rate the vendor and leave a review based on your experience. Share feedback about the quality of the work, professionalism, response time, and overall service to help other drivers know what to expect.
Ready to try? Open Trucker Guide and request roadside assistance when you need it.
Frequently Asked Questions
Is Roadside Assistance free for drivers?
The Roadside Assistance service is free to access. However, drivers are responsible for the cost of the roadside service, which depends on the offer and service provider they choose. Trucker Guide also charges a $19.99 service fee.
Do I need a Trucker Guide navigation subscription to use Roadside Assistance?
No. You don't need a navigation subscription to use Roadside Assistance. Drivers can request roadside help without having a navigation subscription.
What types of vehicles can I use in Roadside Assistance?
The service can be used to request assistance for trucks, trailers, buses, and RVs.
What types of roadside services can I request?
Depending on the available options, you can request tire service, general repairs, diagnostics, towing, and other types of roadside assistance.
Can I choose which service provider helps me?
Yes. After submitting your request, available service providers can review the details and send offers. You can review and compare the available offers before choosing the provider you want to use.
What if I cannot find enough providers near me?
You can increase the search radius to look for available providers farther from your current location. A larger radius may give you more options, although providers farther away may also take longer to reach.


